


10
10
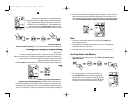
Replace the batteries if:
1. The weak battery mark appears in the display.
2. Nothing appears in the display when the power is switched on.
As the supplied batteries are for test only, they may discharge earlier than batteries
you buy in stores. Replace the batteries in pairs.
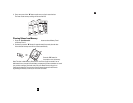
Remove batteries when unit is not in use for extended periods of time.
Note: Discard used batteries as directed by your local, environmental codes.
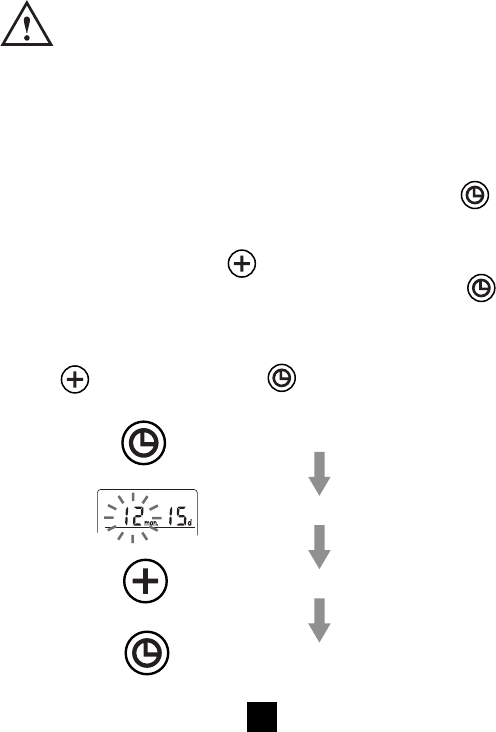
Setting the Time
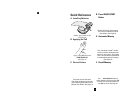
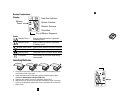
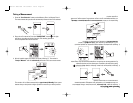
1. To set/adjust the date and time in the monitor, press the “Set” Button located
on the top surface of the monitor. The display will show a blinking number showing
the month.
2. Change the month by pressing the button. Each press of this button will
increase the number by one in a cycling manner. Press the Set Button again
to confirm the entry, and the screen will show a blinking number representing the
number of the day in the month.
3. Change the date, the hour and the minutes as described in Step 2 above,
using the button to change and the button to confirm the entries.
4. A “0” will reappear as the Blood Pressure Monitor is ready for measurement again.
Press the Set Button
Month Position Will Blink
Press To Select Month
Press To Confirm Selection
Reemplace las baterías si:
1. La marca de batería descargada apareciera en la pantalla.
2. Nada apareciera en la pantalla al encender el aparato.
Como las baterías que se proporcionan son solamente para fines de prueba,
estas pueden descargarse más pronto que las baterías que usted compra
en cualquier tienda. Reemplace las baterías por parejas.
Saque las baterías cuando la unidad no esté en uso por largos períodos
de tiempo.
Nota: Descarte las baterías Alcalinas usadas como lo indican las normas
ambientales locales.
Ajuste de la Hora
1.
Para poner / modificar la fecha y la hora en el monitor, presione el botón
“Set” ubicado en la superficie superior del monitor. La pantalla
mostrará un número parpadeante indicando el mes.
2.
Cambie el mes presionando el botón
.
Cada toque del botón
incrementará en uno el número de una manera cíclica. Presione el botón
nuevamente para confirmar la entrada, y la pantalla mostrará un
número parpadeante que representa la fecha.
3.
Cambie la fecha, la hora y los minutos como se describe en el Paso 2 más
arriba, utilizando el botón para cambiar y el botón para confirmar
las entradas.
4.
Luego reaparecerá un “0” para indicar que el Monitor de Presión Arterial
está listo para tomar mediciones nuevamente.
Presione el Botón de Ajuste
La Posición del Mes Parpadeará
Presione para Seleccionar el Mes
Presione para Confirmar la Selección
7632 01 Text New 24-06-2002 11:18 Page 18