


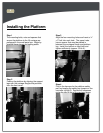
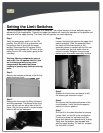


Setting the Limit Switches
Your lift is equipped with upper and lower limit switches. The vertical location of these switches may be
adjusted to fit your application. Typically the upper limit switch will need to be adjusted so the platform will
stop level with the upper landing. The lower limit will typically not need adjusting.
Step 1
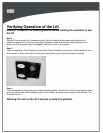
Verify the emergency switch is in the ON
position. Run the lift in the up direction until
the platform floor is level with the upper
landing. Disconnect the lift’s power (at the
building’s circuit breaker for AC units, at the
battery box for DC units) before going to the
next step.
Warning: Moving components can cut
and crush. Do not operate the lift if you
are in close proximity to any drive
components. Be aware that loose
clothing or jewelry may catch on moving
parts.
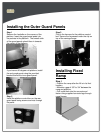
Step 2
Remove the screws at the top of the lift that
attach the front cover.
Step 3
Remove the front cover by tilting it forward
and lifting upwards. The bottom of the front
cover sits on a pin on either side of the lift
frame. Set the cover aside in a safe location
where it will not get damaged.
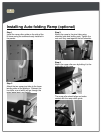
Step 4
Loosen the bolts that attaches the upper limit
switch assembly. Slide the assembly down
the track until the lower switch in the
assembly comes in contact with the lift’s car.
You should hear the limit switch click as
contact is made. Retighten the set screw
fastening the limit switch assembly in place.
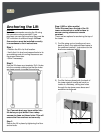
Step 5
Replace the front cover and secure it with
the screws you removed in step 1.
Step 6
Re-connect the lifts electricial power at the
circuit breaker. Verify that the emergency
switch is in the on position.
Step 7
Run the lift in the down direction for several
inches. Next, run the lift in the up direction.
Continue to press the up button until the
upper limit switch has caused the lift to stop.
Verify that the platform has stopped level
with the upper landing. If it has not, readjust
the limit until it is level.
10