4
Installing the Vehicle Wiring Harness
Important Note: IMPROPER WIRING IS THE #1 CAUSE OF PROBLEMS IN THE OPERATION OF
A VEHICLE LIFT. FOLLOW THE WIRING INSTRUCTIONS CAREFULLY
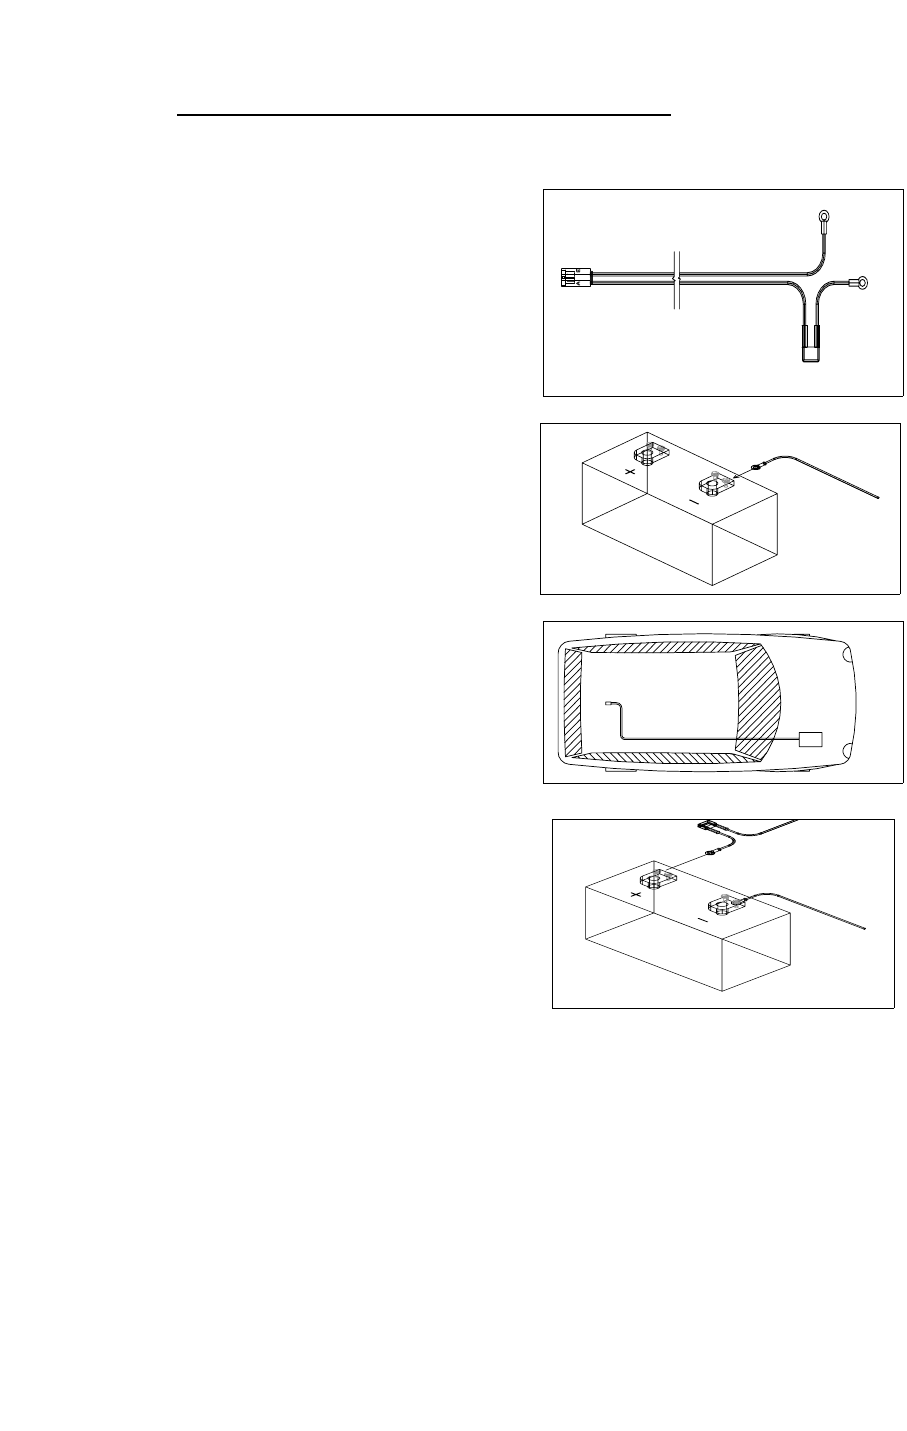
Located in the hardware package is the vehicle wiring harness. The harness is manufactured to, and
complies with the SAE J1128 requirements. The wire har-
ness is approximately 23 ft. long and will accommodate
most vehicles.
1. Unwind the harness and lay it flat. One end of the
harness has a black plug . This is the lift end of the
harness and goes to the back of the vehicle.
2. Begin routing the wiring harness at the vehicle
battery. Attach the black wire to the negative
terminal on the battery. Do not attach the red wire
yet.
3. Run the wiring harness under or when possible
through the vehicle, back to the lift. If you need to
pass the wiring through a fire wall or hole in the
vehicle you may cut the double wire and reassem-
ble it with butt connectors. Always locate the wiring
harness where it can not be snagged by road de-
bris and away from the vehicles gas tank.
4. If the harness is too long for the vehicle, coil the
excess wire and secure it to the vehicle frame with
the supplied tie wraps.
5. Attach the red wire to the positive terminal on the
battery.
Important Reminder: Never attempt to attach the wire harness to a secondary power source,
The lift requires direct connection to the battery.
Caution: When the installation requires the wiring harness be run on the underside of a
vehicle, route the harness away from the exhaust system, brake lines, fuel lines, gas tank,
pinch points, and sharp edges. Locate the wiring harness where it can not be snagged by
road debris.
Manufactures Recommendation: Schedule a routine maintenance visit with the end user. Har-
mar recommends the lift be greased in the applicable areas, and the wire harness connec-
tions be checked for corrosion, and/or decay, as such conditions are normal due to environ-


