


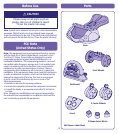


For best performance, we
recommend replacing the
batteries that came with
this toy with three, new
alkaline “AA” (LR6) batteries.
•
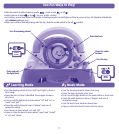
Locate the battery compart-
ment on the dashboard.
• Loosen the screws in the
battery compartment
door with a Phillips screw-
driver. Remove the battery
compartment door.
• Insert three "AA" (LR6)
alkaline batteries, as indicated inside
the battery compartment.
Hint: We recommend using alkaline batteries for longer life.
• Replace the battery compartment door and tighten the
screws with a Phillips screwdriver. Do not over-tighten.
• When lights or sounds from this toy become faint or stop,
it’s time for an adult to change the batteries!
In exceptional circumstances, batteries may leak fluids that
can cause a chemical burn injury or ruin your product. To avoid
battery leakage:
• Do not mix old and new batteries or batteries of different
types: alkaline, standard (carbon-zinc) or rechargeable
(nickel-cadmium).
•
Insert batteries as indicated inside the battery compartment.
• Remove batteries during long periods of non-use. Always
remove exhausted batteries from the product. Dispose of
batteries safely. Do not dispose of product in a fire.
The batteries inside may explode or leak.
• Never short-circuit the battery terminals.
• Use only batteries of the same or equivalent type
as recommended.
• Do not charge non-rechargeable batteries.
• Remove rechargeable batteries from the product
before charging.
• If removable, rechargeable batteries are used,
they are only to be charged under adult supervision.
Battery Compartment Door
4
1.5V x 3
“AA” (LR6)
SHOWN ACTUAL SIZE
Battery Replacement
Battery Safety Information
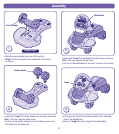
Assembly
4
5
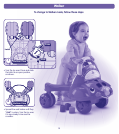
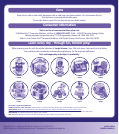
Proper label application will help to keep the labels looking
their best!
• Wash your hands before applying the labels.
• Make sure the areas where the labels will be applied are
clean and dry. Wipe your vehicle with a clean, soft, dry cloth
to remove any dust or oils.
• For best results, avoid applying a label more than once.
• Apply the labels as shown in the illustration above.
3
1
2
3