


Installing WES7 Firmware 11
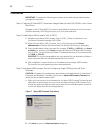
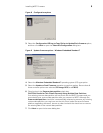
11. Select the USB key onto which you want the configurations (you can use Refresh as
needed to recognize an inserted USB key), and then click Next. The progress bars
show the overall (formatting and configuration) progress and task progress.
CAUTION: DO NOT interrupt the formatting and configuration process. All process
requirements are done automatically.
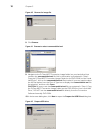
12.After configuration, click Finish to close the wizard and then remove the configured
USB key for use (you will use the configured USB key on your target devices).
TIP: At this time you can also replicate/duplicate the configured USB key (containing
the firmware you want to push) for simultaneous usage on target devices (by users in
several locations at the same time). For full Wyse USB Firmware Tool details, see Users
Guide: Dell
®
Wyse USB Firmware Tool 1.20.0.1.
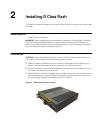
Step 4: Use the Configured USB Key to Install Firmware on Each Thin Client
In this step, you will boot each target device you want to convert from the configured
USB key so that the USB key will push the contents from the USB key onto the target
device.
NOTE: BIOS selection, movement, and exit instructions are displayed in the BIOS
window.
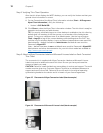
1. Be sure the client is shut down and disconnected from any network.
2. Attach the configured USB key to a thin client USB 2.0 port.
3. Power on the thin client and during boot, tap and continue tapping the Delete key
to boot to the BIOS screen.
4. Enter the password Fireport (this is case sensitive) and press Enter.
5. Select the Advanced tab.
6. Using the down arrow key, select the Boot from USB option and press Enter.
7. Select the Enabled option and press Enter.
8. Press the F10 key to save, exit, and reboot the client from the configured USB key.
When booting a target device from the configured USB key (containing the contents
to be pushed to a target device), you will be prompted to continue with the push
process (to continue, type y and press Enter). Once the push process is complete,
the client automatically reboots several times.
CAUTION: DO NOT interrupt the installation/conversion process. All process
requirements are done automatically. The client automatically reboots several times.
Some screens may display for several seconds during the process.
9. After a target device completes the installation/conversion process and displays the
WES7 desktop, remove the USB key and continue with "Step 5: Verifying Thin Client
Operation."
TIP: You can use the configured USB key to push the firmware onto as many target
devices as you want (repeat "Step 4: Use the Configured USB Key to Install Firmware on
Each Thin Client").