© Copyright 2012 TRENDnet. All Rights Reserved.
TRENDnet User’s Guide
TEW-731BR
36
• Add – Saves a new virtual server entry.
• Delete – Removes an existing virtual server.
• Update – Modifies an existing virtual server.
• Cancel – Discard changes to an existing virtual server.
Example: To forward TCP port 80 to your IP camera
1. Setup DynDNS service (See DynDNS section).
2. Access TRENDnet IP Camera management page and forward Port 80 (see
product documentation)
3. Make sure to configure your network/IP camera to use a static IP address or you can
use the DHCP reservation feature (see “Set up DHCP reservation” on
page 31).
Note: You may need to reference your camera documentation on configuring a static IP
address.
4. Log into your router management page (see “Access your router management page”
on
page 27).
5. Click on Access, and click on Virtual Server.
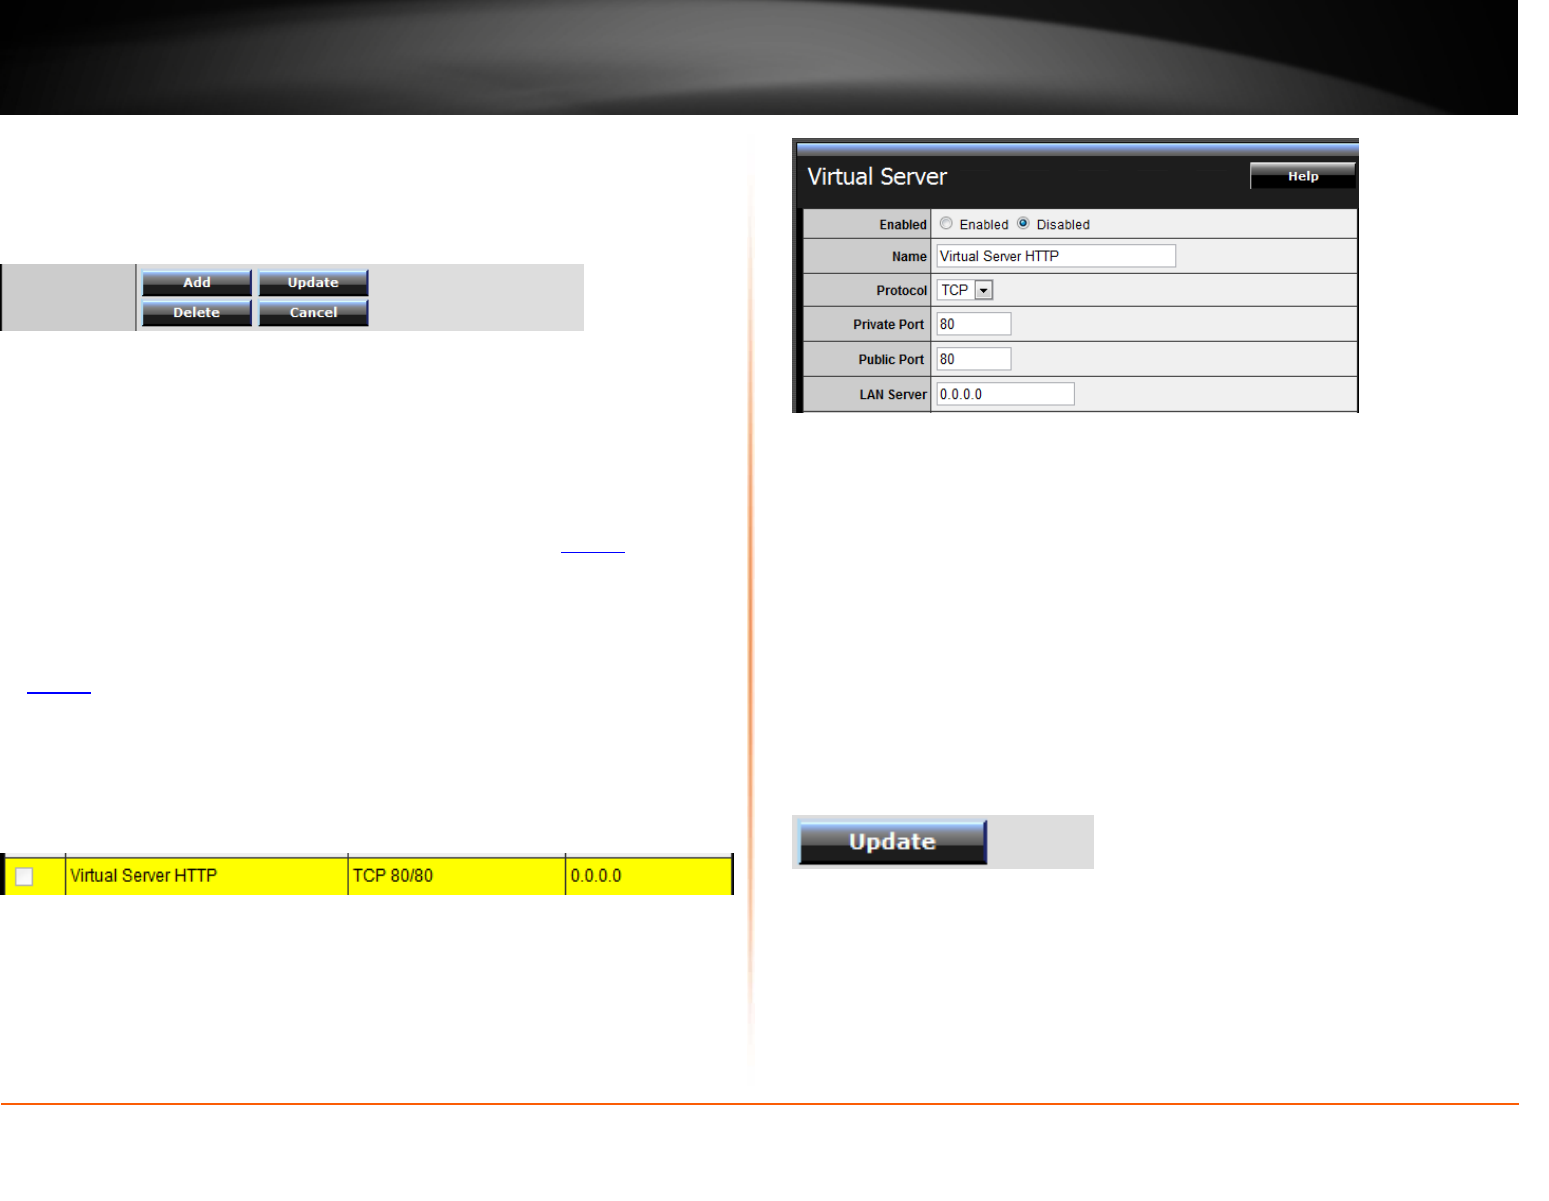
6. In the list below, click the pre-defined virtual server entry named Virtual Server HTTP.
Note: The selected item will be highlighted in yellow when selected.
7. The fields will be populated with the selected pre-defined virtual server entry.
8. Click Enabled to turn on this virtual server.
9. Next to Name, you can enter another name for the virtual server, otherwise, leave
the default name.
10. Next to Protocol, make sure TCP is selected in the drop-down list.
11. The Private Port and Public Port, make sure port number 80 is configured for both
settings.
12. Next to LAN Server, enter the IP address assigned to the camera. (e.g.
192.168.10.101)
13. To save the changes, click Update.


