106
106
Setting the CAM: Using USB Mode
ENGLISH
DEUTSCH
Connecting the CAM to a Printer
By connecting the CAM to printers with PictBridge support (sold
separately), you can send images from the internal memory or
external memory (Memory Stick or Memory Stick Pro)
directly to the printer with a few simple operations.
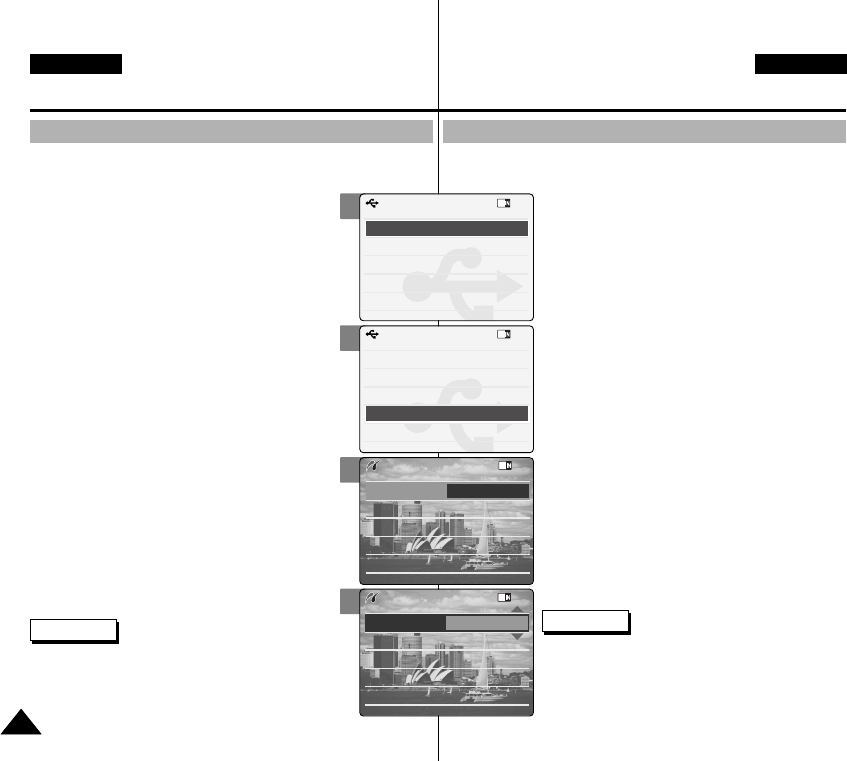
1. Connect the CAM to the printer with
PictBridge support with the USB cable.
2. Move [Mode Selector] down to turn on the CAM.
◆ USB mode screen appears automatically.
3. Move the [▲ /▼ ] switch to select
<PictBridge> and press the [OK] button.
4. Move the [▲ /▼ ] switch to select <Date> and
press the [OK] button.
5. Move the [▲ /▼ ] switch to select <On> or
<Off> and press the [OK] button.
6. Move the [▲ /▼ ] switch to select <Copies>
and press the [OK] button.
7. Move the [▲ /▼ ] switch to select desired
number and press the [OK] button.
◆ You can select the number of copy from
1 to 99.
8. Move the [▲ /▼ ] switch to select <Print> and
press the [OK] button.
Notes
✤ If you select <Back> in the menu, the previous
menu appears.
✤ If you want to select the next or previous photo,
select <Next> or <Previous> using [▲ /▼ ] switch.
2
3
4
5
Back
USB Mode
PC-Cam
PictBridge
USB 2.0 MassStorage
USB 1.1 MassStorage
Back
USB Mode
PC-Cam
PictBridge
USB 2.0 MassStorage
USB 1.1 MassStorage
Print
Next Photo
Previous Photo
Date Off
Copies
1
PictBridge 100-0056
Print
Next Photo
Previous Photo
Date On
Copies
1
PictBridge 100-0056
Camcorder einstellen:
USB-Modus verwenden
Camcorder an einen Drucker anschließen
1. Verbinden Sie den Camcorder über das USB-
Kabel mit einem PictBridge-fähigen Drucker.
2. Drücken Sie zum Einschalten des Camcorders
den [Moduswahlschalter] nach unten.
◆ Automatisch wird der Bildschirm USB-Modus
(USB Mode) eingeblendet.
3. Wählen Sie mit der Taste [ ▲/▼]
<PictBridge>, und drücken Sie die Taste [OK].
4. Wählen Sie mit der Taste [ ▲/▼] <Date>
(Datum), und drücken Sie die Taste [OK].
5. Wählen Sie mit der Taste [ ▲/▼] <On> (Ein)
oder <Off> (Aus), und drücken Sie die Taste
[OK].
6. Wählen Sie mit der Taste [ ▲/▼] <Copies>
(Abzüge), und drücken Sie die Taste [OK].
7. Wählen Sie mit der Taste [ ▲/▼] die
gewünschte Anzahl, und drücken Sie die
Taste [OK].
◆ Sie können eine Anzahl zwischen 1 und 99
wählen.
8. Wählen Sie mit der Taste [ ▲/▼] <Print>
(Drucken), und drücken Sie die Taste [OK].
Hinweise
✤ Wenn Sie die Menüoption <Back> (Zurück)
auswählen, wird das vorherige Menü angezeigt.
✤ Um das nächste oder das vorherige Bild
auszuwählen, wählen Sie mit der Taste [ ▲/▼]
<Next Photo> (Nächstes Foto) bzw. <Previous
Photo> (Vorheriges Foto).
Wenn Sie den Camcorder an einen Drucker mit PictBridge-
Unterstützung anschließen, können Sie Bilder vom internen oder
externen Speicher (Memory Stick oder Memory Stick
Pro) mit einigen einfachen Tastenoperationen direkt
an den Drucker senden.
00876P X105 UK+GER~111 6/10/05 1:39 PM Page 106


