15
Getting Ready to Play
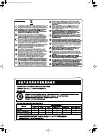
If you place the C-200 on a stand, you must use the CKS-C200 or the KS-12 (sold separately).
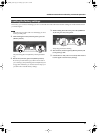
•When placing the C-200 on the stand, be careful not to pinch your fingers between the instrument and the stand.
•When lifting the C-200 onto the stand, make sure to enlist the help of at least one other person.
• Using the C-200 with any other stand may produce an unstable situation, possibly causing the instrument to fall or overturn,
and resulting in injury or damage.
• For details on how to assemble the stand, refer to the owner’s manual that accompanied the stand.
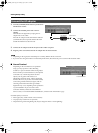
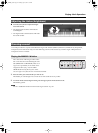
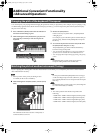
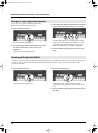
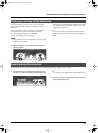
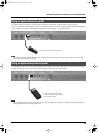
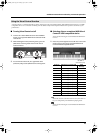
1.
Align the screws on the bottom of the C-200 (one each at left and right) with the metal brackets on the side boards of
CKS-C200 stand, and while keeping the front of the instrument slightly raised, pull it toward yourself to engage the
screws in the metal brackets.
2.
Fasten the C-200 to the stand with the two knob bolts (one each at left and right) supplied with the CKS-C200 stand.
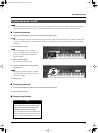
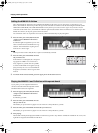
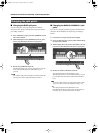
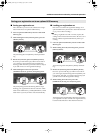
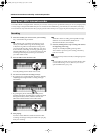
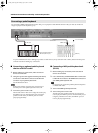
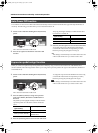
1.
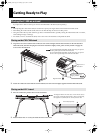
Place the C-200 in the position shown in the illustration.
2.
Position rubber feet “A” so they fit inside the holes on the stand.
Placing the C-200 on a stand
Placing on the CKS-C200 stand
Placing on the KS-12 stand
Please don’t get your
fingers pinched.
Right knob bolt
Right screw at
the bottom
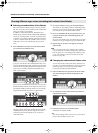
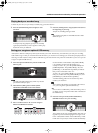
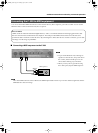
We recommended the Bench BNC-23-BK when using an optional
PK-25A pedal keyboard with CKS-C200 stand.
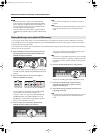
We recommended the Bench BNC-15-BK when using an optional
PK-5A or PK-7A pedal keyboard with CKS-C200 stand.
AA
Front side (keyboard)
Rear panel side
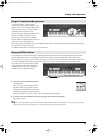
The height of the KS-12 can be set to 3 levels. Please set it to
the lowest or medium height for the C-200. Avoid selecting
the highest level (760mm, 29-15/16 inch) for the C-200.
C-200_e.book Page 15 Monday, April 4, 2011 5:22 PM