10
Local console connections: Keyboard and mouse
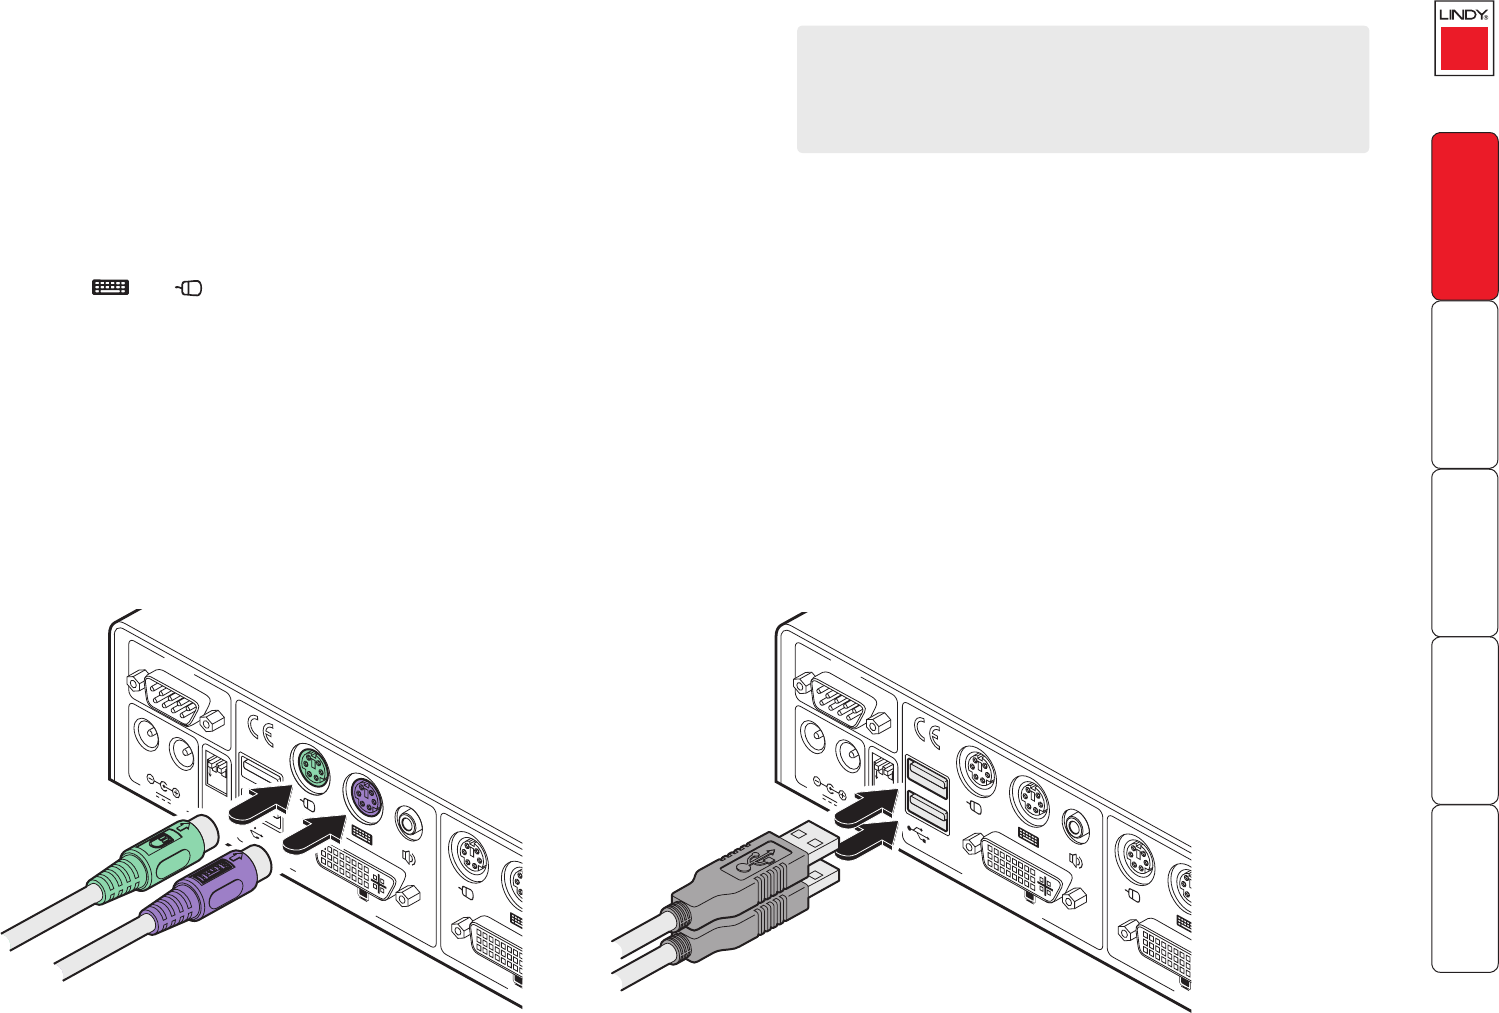
The LINDY KVM IP supports both PS/2-style and USB-style keyboard and mouse
connections.
To connect a local keyboard and mouse
1 Wherever possible, ensure that power is disconnected from the LINDY KVM
IP. Position a suitable keyboard and mouse in the vicinity of the LINDY KVM
IP such that their cables will easily reach.
2 Connect the PS/2 or USB style keyboard and mouse to the KVMA CONSOLE
section of the LINDY KVM IP rear panel:
• PS/2 style Connect PS/2 style keyboard and mouse cables to the ports
marked and within the KVMA CONSOLE section of the rear
panel.
• USB link Connect USB style keyboard and mouse cables to the ports
marked K / M within the KVMA CONSOLE section of the rear panel.
IMPORTANT: There is no internal conversion between PS/2 keyboard and
mouse connections and USB. Hence, if you use a PS/2 style keyboard and
mouse at the local console, you must also use PS/2 style links from the
LINDY KVM IP to the computer / KVMA switch. Similarly, if you use a USB
style keyboard and mouse at the local console, you must also use a USB style
link from the LINDY KVM IP to the computer / KVMA switch. You may use
the USB Virtual Media link with any combination of other devices. You must
not mix USB and PS/2 style keyboards and mice on the same device.
Local console. Why?
A locally connected keyboard, video monitor and mouse are
required during the initial configuration of the LINDY KVM IP.
However, these are also useful during normal use to allow quick
local control of any connected host computers.
5V
2A
A
M
O
D
E
M
DV
I
DV
I
VG
A
VG
A
K
/
M
K/M
V
M
PO
WER CONTR
OL
IN
D
O
O
R
U
S
E
O
N
L
Y
B
1
2
C
F
G
COMPUTER / KVMA SWITCH
KVMA CONSOLE
1
2
ON
5V
2A
A
M
O
D
E
M
DV
I
DV
I
VG
A
VG
A
K
/
M
K/M
V
M
PO
WER CONTR
OL
IN
D
O
O
R
U
S
E
O
N
L
Y
B
1
2
C
F
G
COMPUTER / KVMA SWITCH
KVMA CONSOLE
1
2
ON
PS/2 style keyboard and mouse connections USB style keyboard and mouse connections


