1.4 Connecting the Power Cable to the 7100 Unit and the Vehicle
You will need a small screw driver to connect the power cable to the tracking unit. Loosen the 2
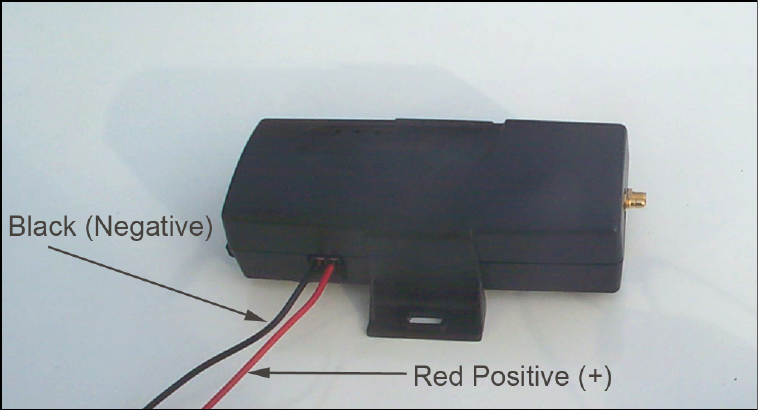
screws on the side of the unit. Insert the wires as shown in the picture below. Then tighten
the screws. Make sure the wires are firmly connected so they do not come loose.
Switches 6, 7, and 8 control how often you want the tracking unit to automatically report its’
location when the vehicle is moving. The unit will not continually send out the location when it
is stationary. This would waste airtime and dramatically increase the monthly cost. The follow-
ing chart shows which switches to set according to your requirements:
Web Poll
Once per Week
Once per Day
Every 4 Hours
Every Hour
Every 30 Minutes
Every 15 Minutes
Every 5 Minutes
S6-OFF, S7-OFF, S8-OFF
S6-OFF, S7-OFF, S8-ON
S6-OFF, S7-ON, S8-OFF
S6-OFF, S7-ON, S8-ON
S6-ON, S7-OFF, S8-OFF
S6-ON, S7-OFF, S8-ON
S6-ON, S7-ON, S8-OFF
S6-ON, S7-ON, S8-ON
As an example, if you have switches 5, 6, 7, and 8 all in the ON position, then the unit will report
position only, every 5 minutes when the vehicle is moving.
Web Poll means that the unit will only report its location when you request it by logging in and
sending a request to “Locate Unit”. This is commonly knows as “pinging” the tracking unit.
Figure 1.0 - Power Connection to the LandAirSea 7100
After you have connected the power cable to the tracking unit, take the fuse out of the fuse
holder. The fuse holder is part of the power cable. This is VERY important, so make sure you do
not forget to take the fuse out of the fuse holder.
Now connect the other end of the power cable to either the battery of the vehicle or the fuse
box. You can also connect it to any other source on the car that provides 12 volts of power.
See Figure 1.1 which shows the connection to the battery.


