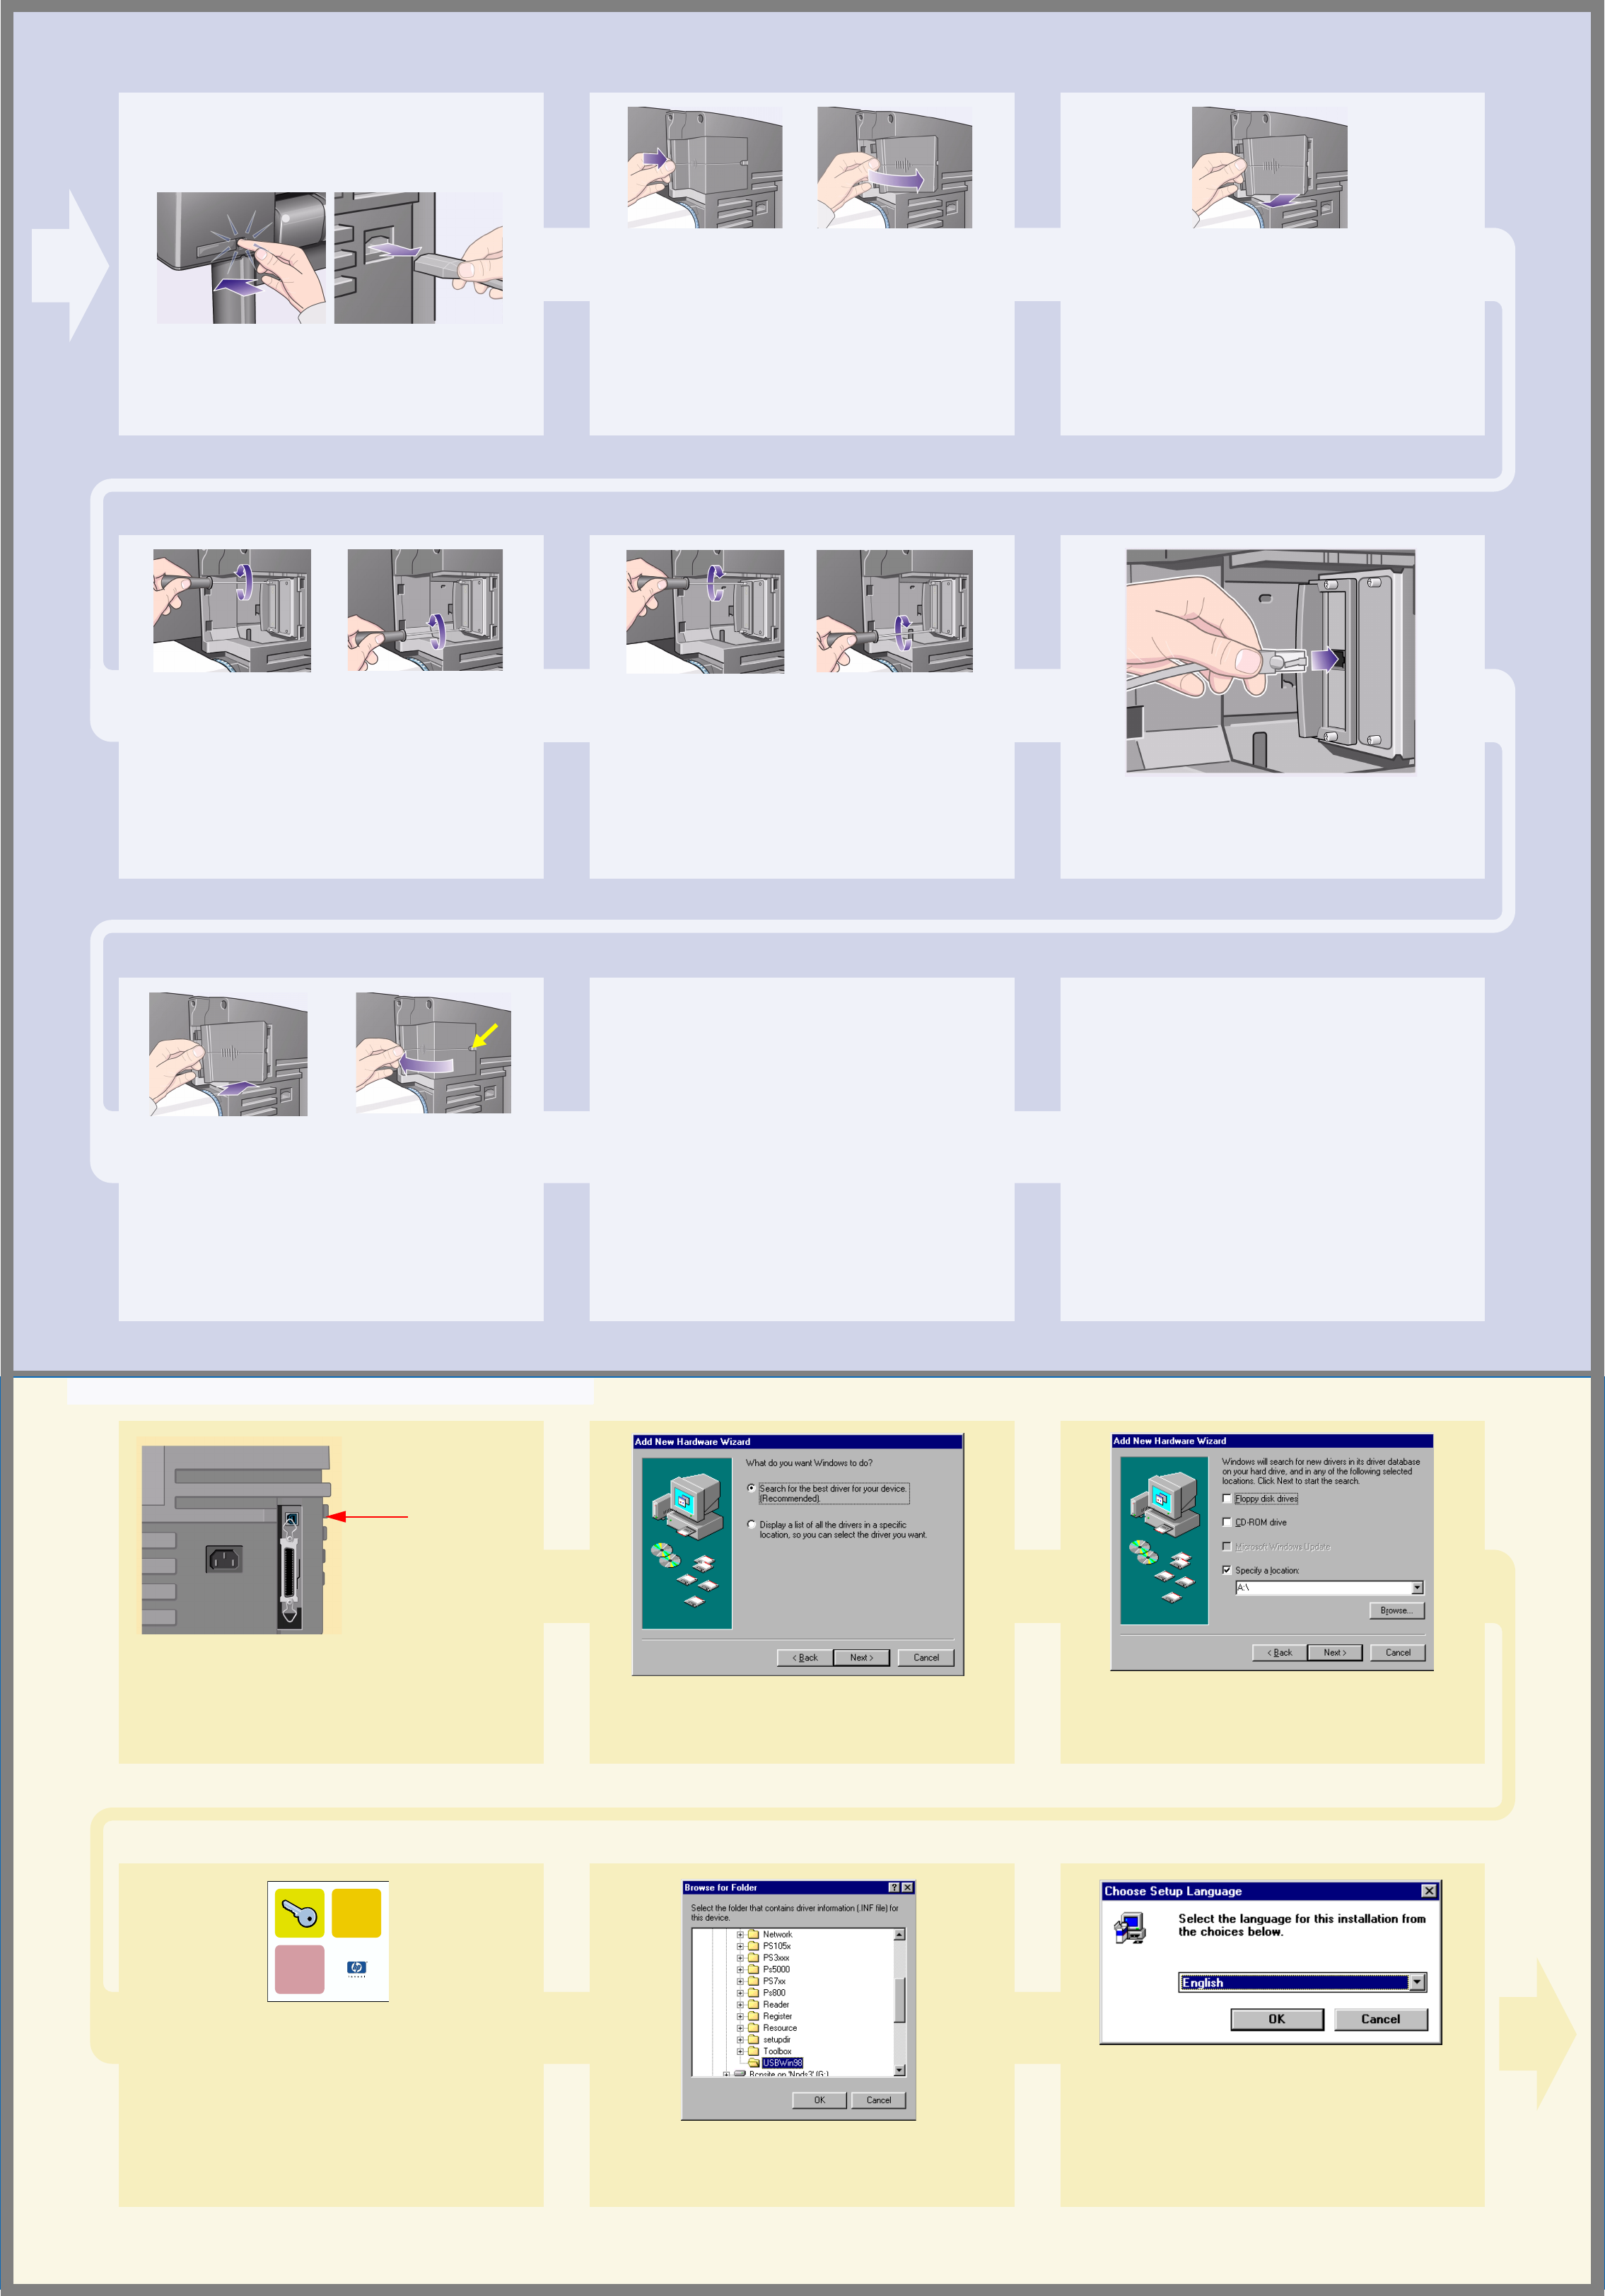
NOTE: An internal HP JetDirect Print Server may
already be installed in your printer, inside the
compartment at the top left rear of the printer. If it is,
skip to step 8 below.
1–Before installing a card, switch off the printer
and unplug it from the mains electricity supply.
2–Carefully remove the plastic cover from the
left-hand back of the printer by unclipping it.
This cover gives access to the two slots for an
Accessory card and a LAN card.
a. Press in the thumb-tab on the side furthest from the
edge that has the cable-hole.
b. Ease the cover out in the direction of the embossed
arrow, pivoting it by the hinge clips on the side that has
the edge cable-hole.
3–Remove the cover completely. Inside the
compartment there are two slots for a LAN card or an
Accessory card.
You can use either slot for either card, but we
recommend putting a LAN card on the left (nearer to the
front of the printer) and an Accessory card on the right.
In this way the cable from the LAN card can easily pass
through the slot in the door.
4–To insert a LAN card (or an Accessory card),
remove the metal cover from the appropriate
slot by unscrewing its two screws. You can use a
screwdriver or do it manually.
5–When you have inserted the card, screw it
into place, using its two screws (at the top and bottom
of the card). Again, this can be done with a screwdriver
or manually.
6–Insert the LAN cable into the LAN card–it is
simply pushed into place with a click.
7–Carefully replace the plastic cover by
clipping it back into place:
a. Put the two hinge clips on the side that has the edge
cable-hole into their slots.
b. Swivel the cover in the direction opposite to the
embossed arrow and clip the other two tabs on the
opposite side into their slots. Ensure that the LAN
cable passes correctly through the edge cable-hole
(shown by the yellow arrow) and avoids touching the
roll of paper on the spindle.
8–Network Printer: To obtain the information you’ll
need when you install the software:
• Go to the Set-up menu in the printer’s front panel.
• Select I/O Set-up and press Enter.
• Select Card ID and press Enter.
There you will find the hardware address of your
printer, as MAC=xxxxxxxx.
You may also require an IP address or an AppleTalk
name, for which the software will prompt you.
You have now finished the hardware assembly
and set-up of your printer. If you are running
Windows 98 and a USB (Universal Serial Bus)
connection to your printer, continue with Stage 13.
Otherwise
connect the LAN cable (if any) to your
network and turn to the next page.
Now you are ready to start the software set-up.
Turn to the next page. (If you are running Windows 98
and are connecting your printer with a USB (Universal
Serial Bus) cable, continue with Stage 13.
1–To use a USB port on a PC running Windows
98 or Windows 2000, connect the USB cable to your
computer and then to the printer. For Windows 2000,
go next to Stage 14, “Set Up Your Software” on page 8.
For Windows 98 the “Add New Hardware Wizard”
should appear on your computer screen. Click “Next>”.
USB socket
2–What do you want Windows to do? [The rest of
Stage 13 applies to Windows 98 only.] Select “Search
for the best driver for your device” and click “Next>”.
3–Windows will search for new drivers...
In this screen, select “Specify a location” and click
“Browse...”.
4–Insert the HP DesignJet Printers Software
Setup CD into your CD-ROM drive...
Software setup
For Windows users
hp designjet printers
5–...and browse to the USBWin98 folder. Select
that folder and click “OK”. Windows will then install the
USB driver for the printer.
6–You are now ready to install other software
for your printer.
When Windows finishes the USB
driver installation, you should see the screen above. If
you don’t see this screen, run the SETUP.EXE program
in the root directory of the HP DesignJet Printers
Software Setup CD.
Follow the on-screen instructions to install the software.
13. Using a USB Connection (all models under Windows 98)


