Setting the Date and Time
With the unit powered on, press the Step 1: Menu Button.
Press the Step 2: Directional Buttons to adjust the year, and
press the Menu Button to set the year.
Press the Step 3: Directional Buttons to adjust the month,
and press the Menu Button to set the month.
Press the Step 4: Directional Buttons to adjust the day, and
press the Menu Button to set the day.
Press the Step 5: Directional Buttons to adjust the hour, and
press the Menu Button to set the hour.
Press the Step 6: Directional Buttons to adjust the minute,
and press the Menu Button to set the minute.
Press the Step 7: Directional Buttons to adjust the second,
and press the Menu Button to set the second.
The time and date are now set.Step 8:
To view the time and date, select the “Clock Disp” •
option in the menu.
Loading Photos onto the Unit
With the unit powered off, connect the unit to a Step 1:
computer using the included USB cable.
Use the Step 2: Directional Buttons to select “USB
Download”.
USB Play will allow you to browse and play photo
content while the unit is powered by the USB
connection.
USB Download will allow you to download photos
directly onto the unit.
Press the Step 3: Menu Button.
A window will pop up on the connected PC computer Step 4:
asking “What do you want Windows to do?”.
Double Click “Run the Program”.Step 5:
In this program, photos can be added or deleted to or Step 6:
from the unit.
Click on the “Select Files” button on the top left to Step 7:
ndaphototoload.
After the desired image is selected, highlight it in the Step 8:
“File List” in the program, and crop it to size using the
selection tool in the “Image Editor”.
After the red box is placed, click the blue “Add” Step 9:
arrow, to add the photo to the unit.
Adjusting the Brightness
With the unit powered on, press the Step 1: Menu Button.
Use the Step 2: Directional Buttons to select the
“Brightness” feature, and press the Menu Button.
Press the Step 3: Directional Buttons to adjust the brightness
of the unit.
When the desired level of brightness is reached, press Step 4:
the Menu Button.
Deleting an Image
With the unit powered on, press the Step 1: Directional
Buttons to select a photo you wish to delete.
Press the Step 2: Menu Button.
Highlight “Delete” using the Step 3: Directional Buttons,
and press the Menu Button to select the highlighted
option.
The current photo will be deleted from the unit’s Step 4:
memory.
Adjusting the Display Mode
With the unit powered on, press the Step 1: Menu Button.
Highlight “Display Mode” using the Step 2: Directional
Buttons, and press the Menu Button to select the
highlighted option.
Select one of the following options using the Step 3:
Directional Buttons:
Auto Slide - A slideshow of photos will automatically
play when the unit is powered on.
Manual Slide - The Directional Buttons must be
pressed in order to cycle through loaded photos.
Press the Step 4: Menu Button to select “Auto Slide” or
“Manual Slide”.
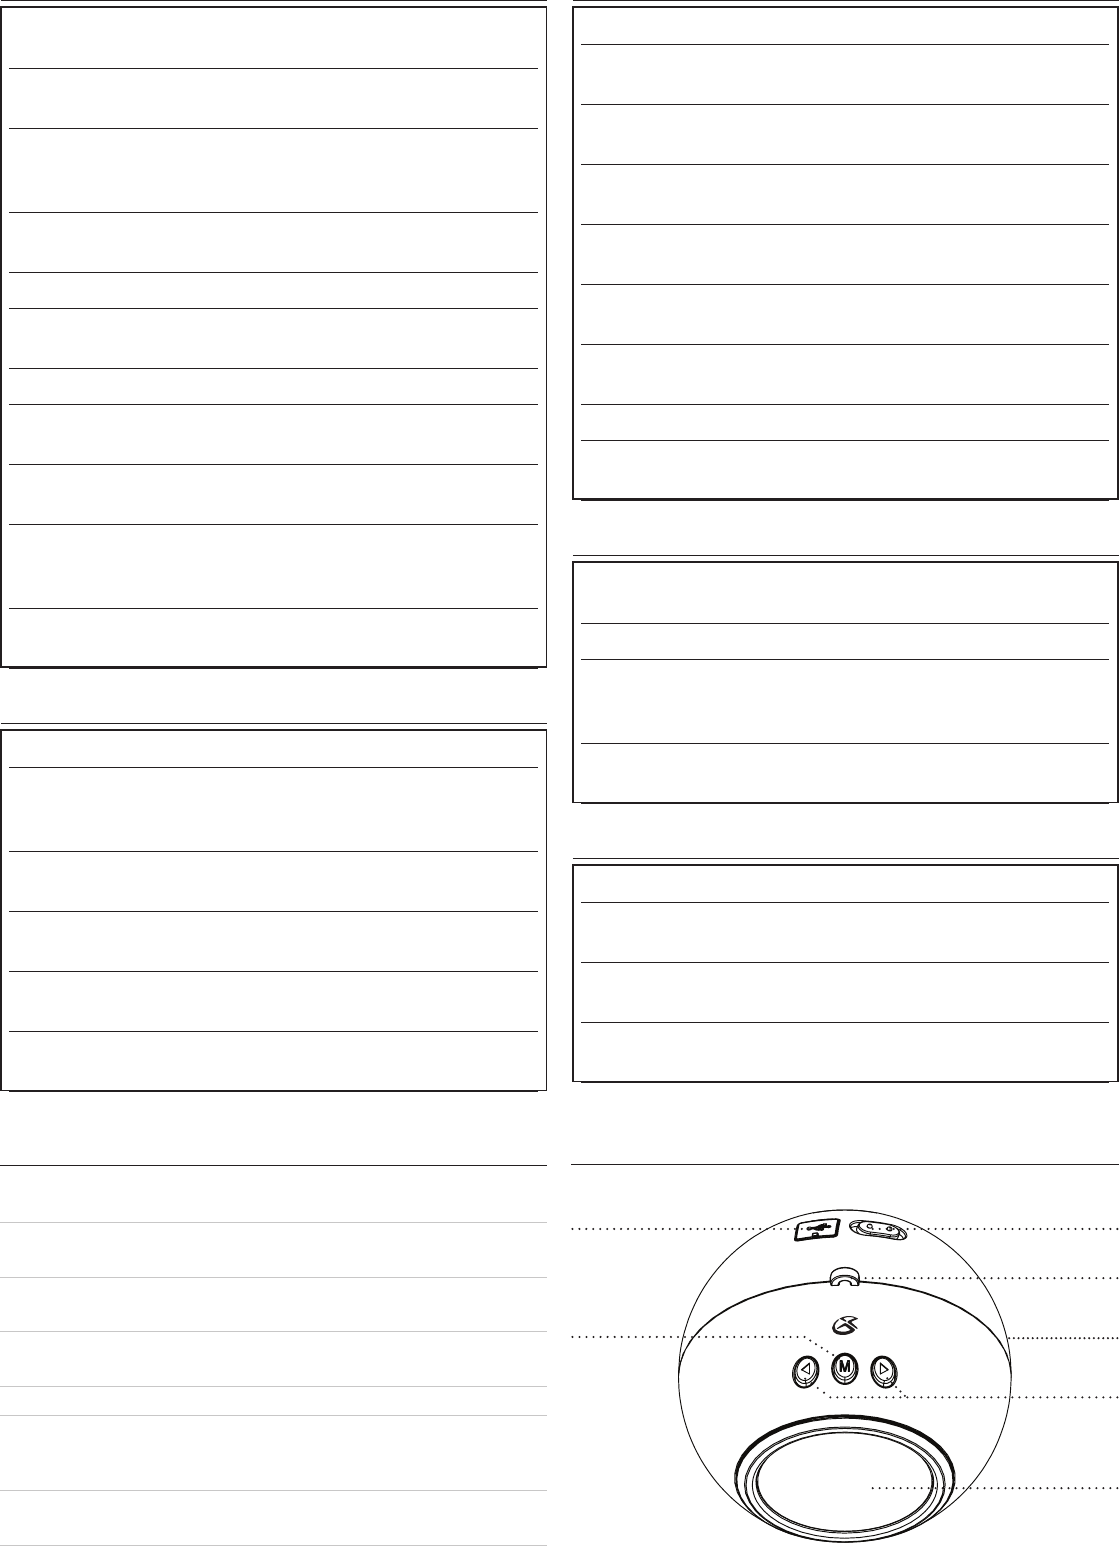
ControlDenitions
Locations of Controls
Mini USB Connection1.
Use the Mini USB Connection to connect the unit to a computer.
Menu Button2.
Press the Menu Button to access the unit’s menu.
Power Switch3.
Adjust the Power Switch to turn the unit off or on.
Hook Connection4.
Use the Hook Connection to connect an ornament hook to the unit.
Battery Compartment (Requires 2 AAA Batteries, not included)5.
Directional Buttons6.
Use the Directional Buttons to navigate through a slideshow of photos, or
through the unit’s menu.
LCD Display7.
The LCD Display displays photos, the time and date, and menu information.
1
4
3
2
6
7
3
4
5


