P/2 DA2 WM/EC/D/AAP Series • Controls and Installation
P/2 DA2 WM/EC/D/AAP Series • Controls and Installation
2-13
Controls and Installation, cont’d
#4-40 Nut w/ Captive
Washer
P/2 DA2 WM F AAP EC
(up to 3 plates)
P/2 DA2 WM F AAP
(up to 4 plates)
Adapter Plate
INPUT
AUTO POWER
ID PIN 4
UNITY
GAIN/PEAKING
100%
50%
ID PIN 11
AUDIO
BUFFERED
LOCAL MONITOR
P/2 DA2 WM F AAP
AUTO POWER
P/2 DA2 WM F AAP EC
ID PINS
100%
UNITY
50%
GAIN/
PEAKING
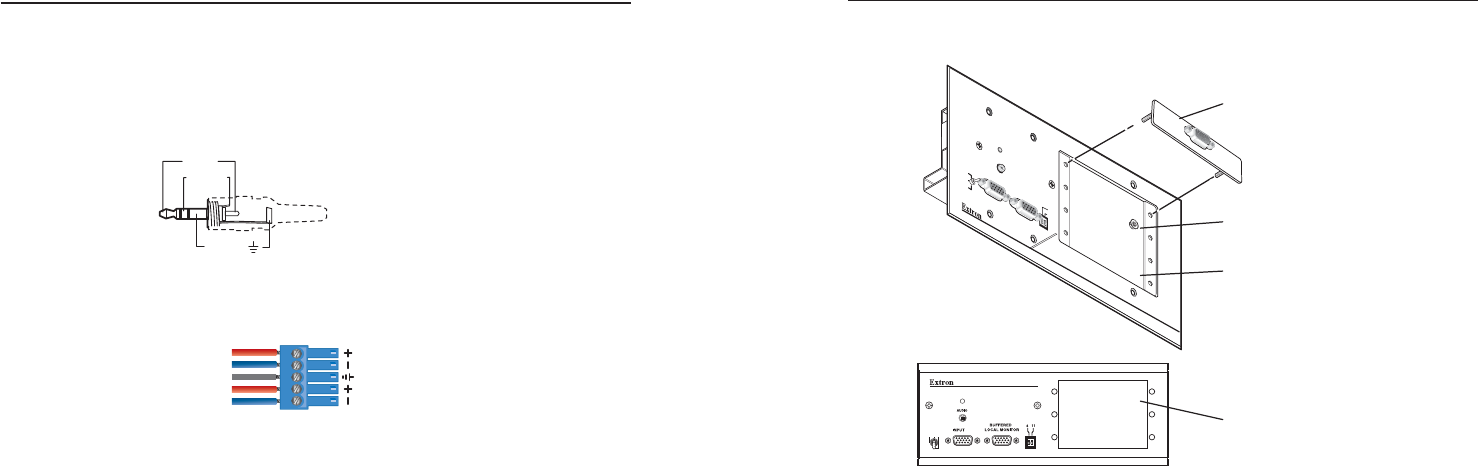
Installing adapter plates
2. Attach the output cables to the back side of the adapter
plate. Some adapter plates may require that conductors be
soldered to the connectors. Attach foil and braided shields
to ground connections.
Balanced audio
To attach the distribution amplifier to a balanced audio system,
do the following:
1. Attach the audio cable to a balanced speaker input
connector (tip, ring, and sleeve).
2. Attach the audio cable to the audio cable connector (Extron
part number 10-319-10). Fasten the captive screws inside
the audio cable connector as shown below.
3. Slide the audio cable connector into the audio output
connector on the distribution amplifier.
Installing architectural adapter plates
The P/2 DA2 WM F AAP may have up to four optional adapter
plates and the P/2 DA2 WM F AAP EC can have up to three
adapter plates. The adapter plates provide a convenient method
of adding various connectors for specific audio and video
requirements. The adapter plates must be ordered separately
and must be attached to the faceplate and cabled before
attaching the WM F AAP model to the wall mount bracket or
the EC F AAP model to the Euro Channel.
1. Insert the adapter plate captive screws through the front
faceplate holes. Secure the adapter plate using the
supplied washers and nuts.
2-12
Sleeve ( )
Ring (R)
Tip (L)
Tip
Sleeve(s)
Ring
Ring
Tip
Left
Right
Balanced Output


