OPERATION
SEE PAGE 13 FOR COMPONENT NAMES/NUMBERS
1. Water enters at the inlet fitting of the fill solenoid (32). The
solenoid admits water via a command from the controller.
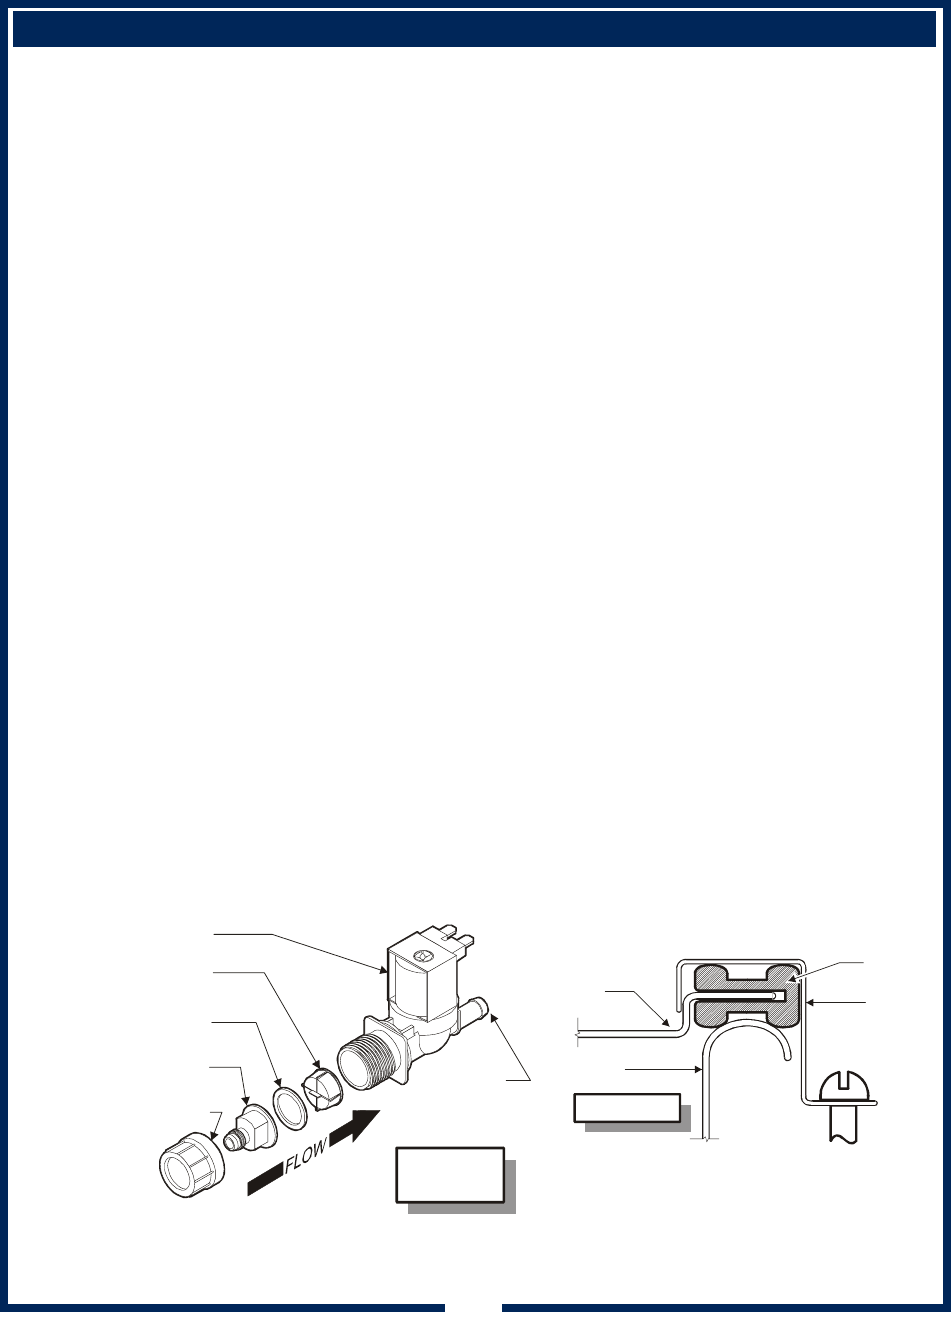
NOTE: The solenoid has an internal strainer. To clean the
strainer: Shut off water supply. Unscrew the plastic cap
protruding from the rear of the brewer. Remove the cap,
inlet fitting and washer. With pliers, grasp the bar of the
strainer and pull straight out. Wash any debris from the
strainer. Note orientation - DO NOT reverse strainer.
Reassemble and reinstall. Turn water supply back on.
2. Water enters the tank (2) thru the fill tube (16). Water is
heated in the tank by the heating element (15).
3. The tank lid (9) is sealed around the edge with a gasket
(6), and is secured by 3 clips (10).
4. Heated water is dispensed to the brew head through the
brew tube (14), brew solenoid (18), and spout of the brew
fitting (19). The brew solenoid is energized during the brew
cycle by the controller.
NOTE: The flow rate of the brew solenoid is factory set.
DO NOT adjust.
5. Hot water is sprayed over the coffee grounds by the spray
disc (24), which is sealed to the brew head by a gasket (23).
6. The tank is vented through the vent fitting (40) and vent
tubes (12 & 13).
7. Water for the hot water faucet (22) is supplied from the tank
through the faucet supply tube (11).
SOLENOID
STRAINER
WASHER
INLET
FITTING
CAP
(note orientation
DO NOT REVERSE)
FILL
SOLENOID
FLOW
CONTROL
installed)
LID
TANK
GASKET
CLIP
LID GASKET
SERVICING INSTRUCTIONS — PLUMBING
12
