M-Audio USB MIDISPORT Uno User Guide English • 2
Overview
MIDI is the acronym for “Musical Instrument Digital Interface” and is the protocol used by MIDI keyboards and other devices (sound modules, sequencing
software, virtual instruments, etc.) to communicate with each other. Uno provides your computer with one MIDI input and one MIDI output port, each
supporting 16 MIDI channels.
Windows XP & Mac OS X Installation
If you are using Windows XP or Mac OS X, simply plug in your Uno to the computer’s USB port and you’re ready to go. Since Uno is class-compliant*,
it will work without requiring any additional drivers.
Installation for Advanced Windows XP Users
While Uno is class-compliant*, advanced Windows XP users who intend to use the Uno interface with more than one application at the same time (i.e.,
“multi-client” operation), plan to use long SysEx (system exclusive) commands or are using other class compliant USB devices with audio capabilities
simultaneously should install the special M-Audio drivers for optimal performance. These drivers can be installed by doing the following:
PLEASE NOTE: Do not connect Uno to your computer until the M-Audio driver fi les have been installed. The following instructions will indicate when
you should connect the interface to your computer.
1. Insert the MIDISPORT Series CD-ROM into your computer’s CD-ROM drive.
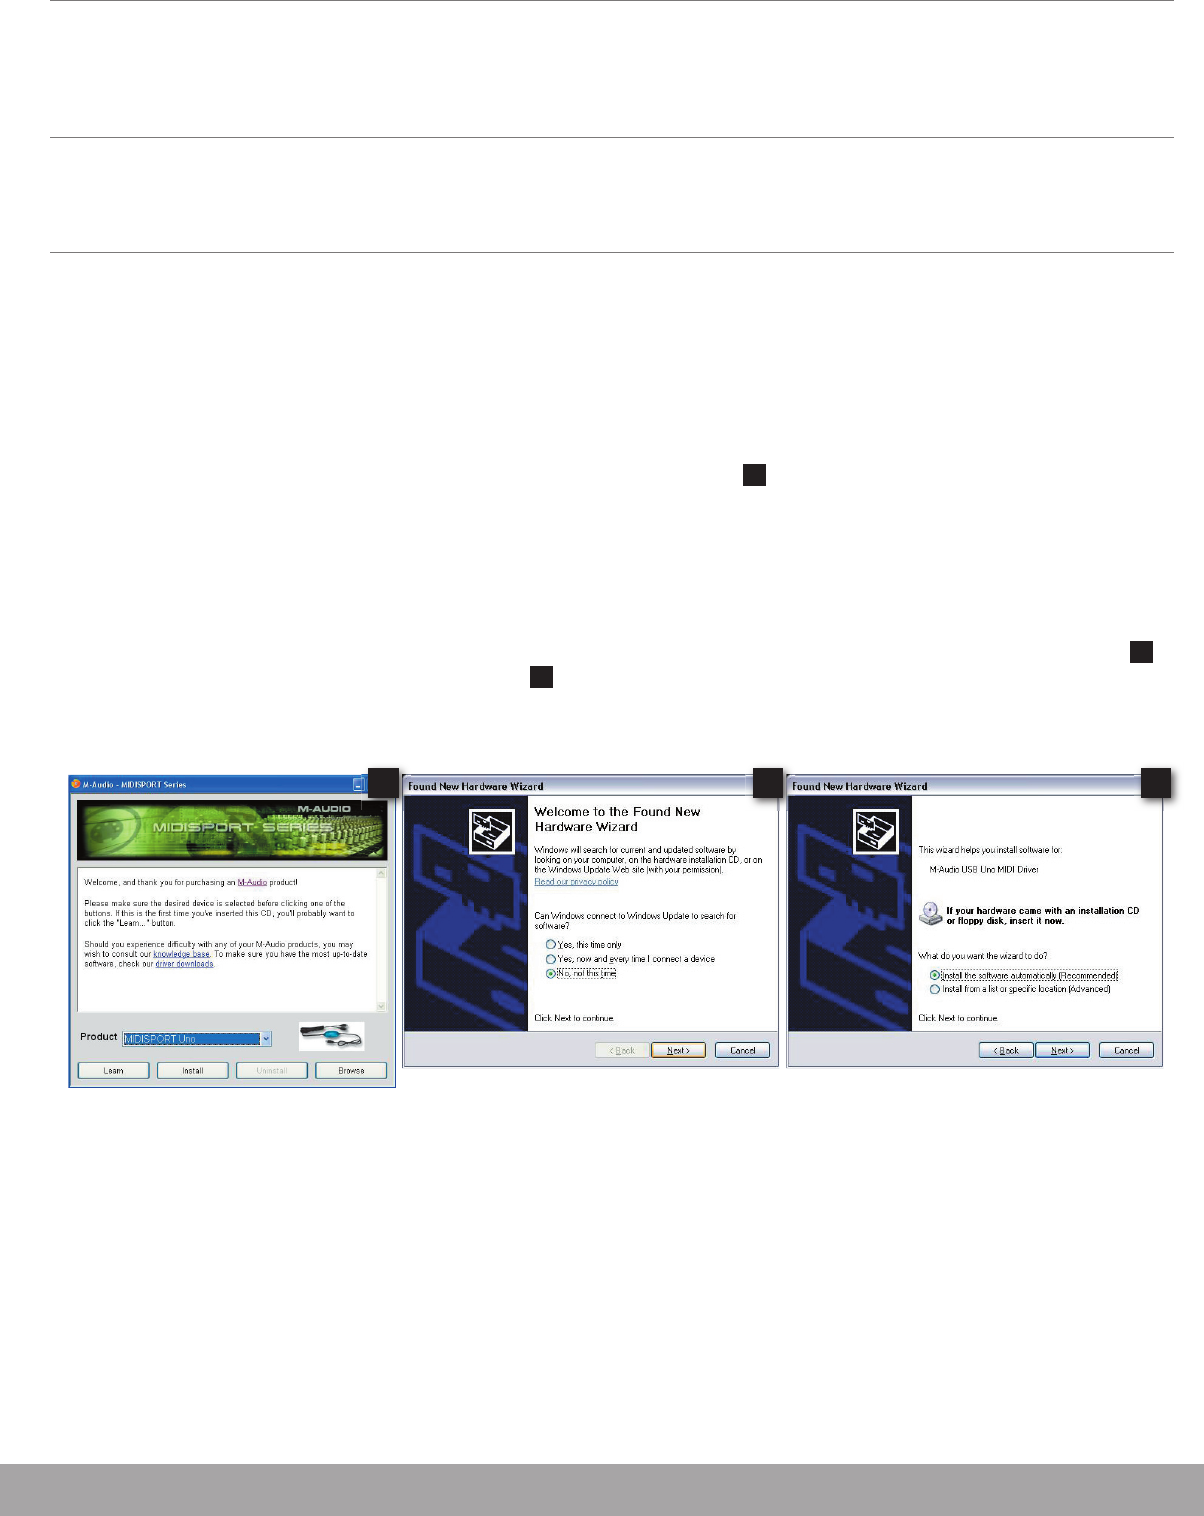
2. The computer will automatically display the interactive install screen shown in picture
1
. If your computer fails to launch the installer, manually
start the installer by clicking on Start > My Computer > MIDISPORT Series.
3. Select “MIDISPORT Uno” from the drop-down menu and click “Install.”
4. Follow the driver installer’s on-screen instructions.
5. At various points in this installation process, you may be notifi ed that the driver being installed has not passed Windows Logo Testing. Click
“Continue Anyway” to proceed with the installation.
6. Click “Finish” once the installer has completed the installation.
7. Connect your Uno to an open USB port.
8. Windows will identify the interface and will ask if you want to search the Internet for a driver. Select “No, not this time” and press “Next” (
2
).
9. Windows will display a “Found New Hardware” Wizard (
3
).
10. Choose “Install software automatically” and click “Next.”
11. Once the Wizard has completed, click “Finish.”
12. Once the installation is complete, you will see a message stating, “Your new hardware is installed and ready to use.”
1 2 3
