Page 12 For technical questions, please call 1-800-444-3353. Item 98580
SAFETY OPERATION MAINTENANCESETUP
User-Maintenance Instructions
Procedures not specifically explained in this manual must
be performed only by a qualified technician.
TO PREVENT SERIOUS INJURY FROM ACCIDENTAL OPERATION:
Turn off the tool, detach the air supply, safely discharge any residual air pressure
in the tool, and release the throttle and/or turn the switch to its off position before
performing any inspection, maintenance, or cleaning procedures.
TO PREVENT SERIOUS INJURY FROM TOOL FAILURE:
Do not use damaged equipment. If abnormal noise, vibration,
or leaking air occurs, have the problem corrected before further use.
TO PREVENT SEROUS INJURY FROM EXPLOSION:
Lubricate the tool only with specified lubricants. Lubricate the air inlet using only
pneumatic tool oil. Lubricate the internal mechanism using only white lithium grease.
Other lubricants may damage the mechanism and may be highly flammable, causing an explosion.
Cleaning, Maintenance, and Lubrication
Note: These procedures are in addition to the regular checks and maintenance
explained as part of the regular operation of the air-operated tool.
1. Daily - Air Supply Maintenance:
Every day, maintain the air supply according
to the component manufacturers' instructions.
Maintain the lubricator's oil level.
Drain the moisture filter regularly.
Performing routine air supply maintenance
will allow the tool to operate more safely
and will also reduce wear on the tool.
2. - Lubrication Maintenance:
Before and after every use, lightly lubricate
the Cutters with machine oil.
3. Quarterly (every 3 months)
- Tool Disassembly, Cleaning, and Inspection:
Have internal mechanism cleaned, inspected, and
lubricated by a qualified technician. If the vanes
need replacement, replace them all as a set.
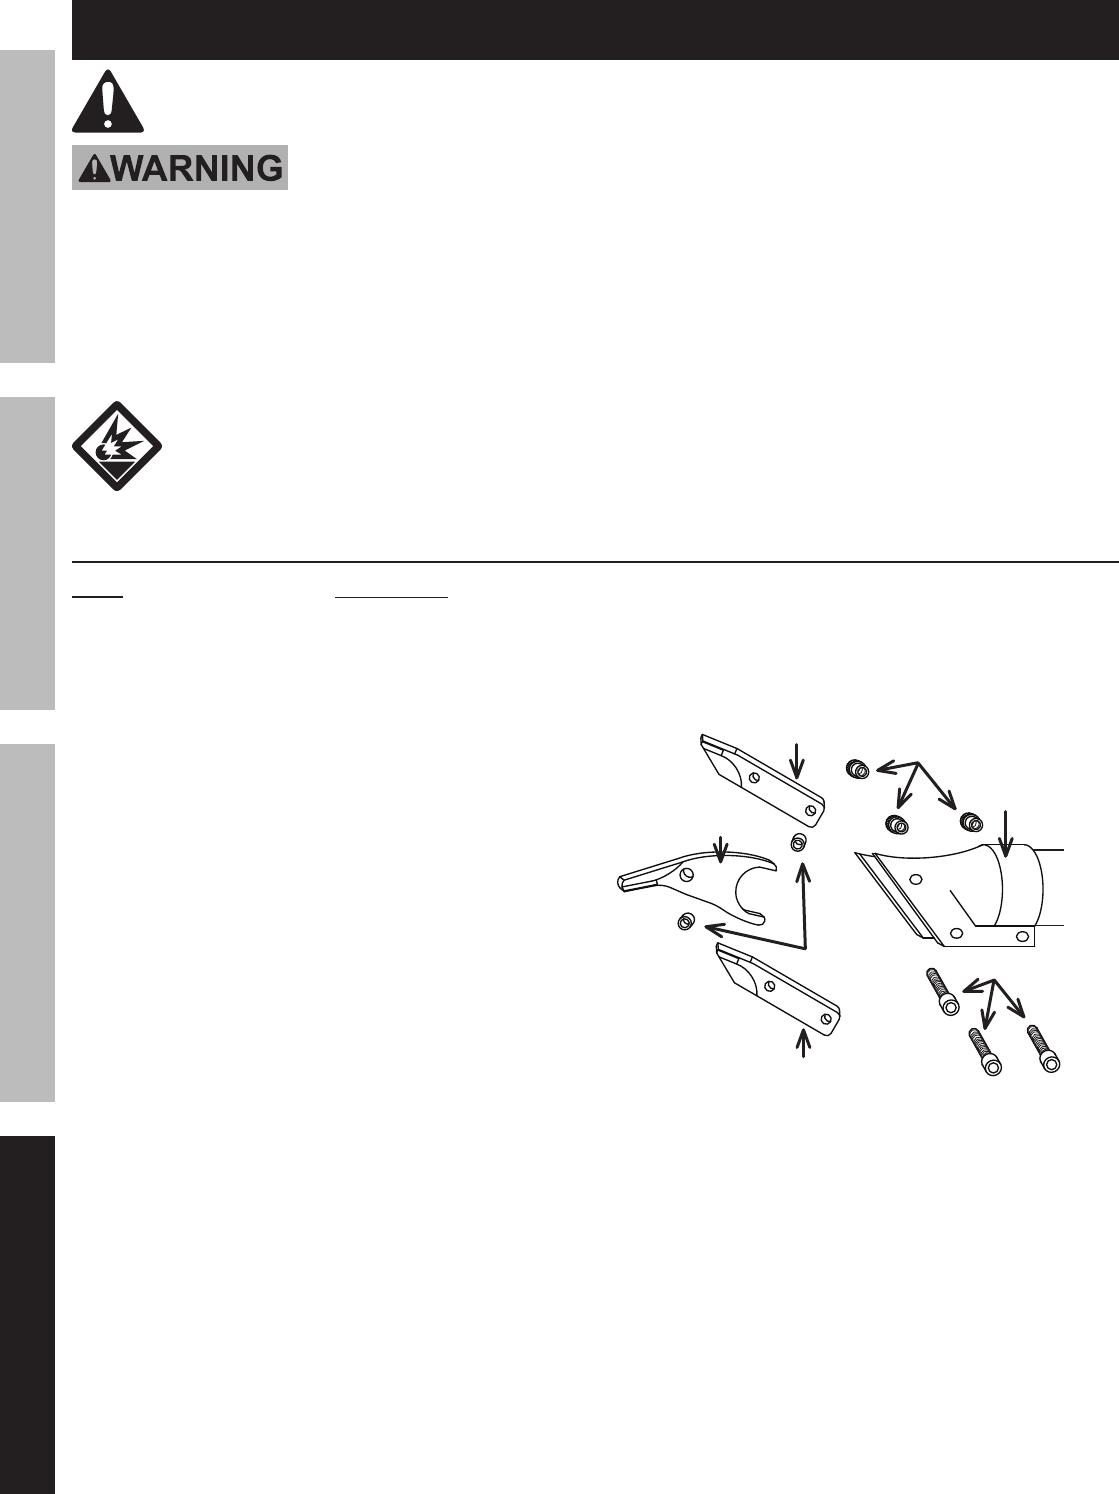
4. Replace the Blades if they become dull or damaged.
Replace with Item 98948. To replace the Blades:
a.
Figure 2
Socket Head Screws
(30)
Nuts (31)
Left Blade (32)
Center Blade (34)
Right Blade (35)
Bushings (33)
Cutter
Housing (38)
Remove the two Socket Head Screws
(30) and Nuts (31) from the Cutter
Housing (38) of the Shear.
b. Remove the Blades (32, 34 and 35)
and two Bushings (33), noting how the
Bushings and Blades are arranged.
c. Arrange the two Bushings in the same
way between the new Blades, and
insert into the Cutter Housing.
d. Insert and secure the Socket
Head Screws and Nuts.


