


108590 Rev. A
18
IX.
29
I
27
E
F
D
J
30
28
G
H
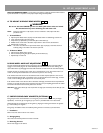
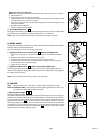
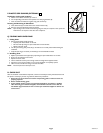
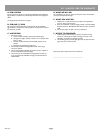
2. Re-squaring Your Casters
Gently pry cap (A) off of both caster tubes. Locate the set screw (B) inside the right caster tube and
loosen using an 1/4 inch hex key. Do not remove the set screw. Simply loosen it enough to allow the
teeth on the upper and lower splines (C) to clear one another. With the stem bolt loosened, the caster
fork should pivot freely. Place the wheelchair on the floor so that the two rear wheels and left caster con-
tact the floor. Place some weight in the seat towards the rear to help stabilize the chair. Place a square or
pocket level against the flat surface of the fork and pivot the fork until it is vertical (square) . With the
fork vertical, engage the teeth of the two splines to the closest mating position. Make certain that the
teeth are properly engaged and not crossed. Shine a bright light behind the mating spline teeth and check
for proper teeth engagement. Tighten the set screw (B) to secure the spline mating position. The set
screw should be tightened to 192 in-lbs. (21.7 Nm) to ensure that it does not loosen during use.
Record the teeth engagement position of the splines on the right fork, and adjust the left fork in a similar
fashion to the same position. Reassemble both casters, and re-check that they are square. Replace caps.
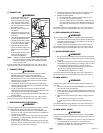
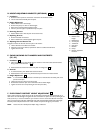
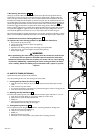
3. Fixed Front Frame Caster Housing Adjustment
To reposition the caster housing hardware for Quickie 2 Lite Fixed Front
a. Remove cotter clip (D) from pin (E).
b. Using a 7/16 wrench remove two caster housing bolts (F)
c. Remove clivis pin (E).
d. Reposition caster housing hardware onto frame lining up with preset holes.
e. Insert clivis pin (E) , insert and retighten two caster housing bolts (F)
f. Reinsert cotter clip (D)
WARNING
After repositioning the caster housing always check for interference with footrest
or rear wheel. Do not operate a wheelchair that has interference with these
components. Ensure the caster fork is square (see section “N” for caster squaring
instructions). Additionally, repositioning the caster housing will affect the wheel-
chair’s stability. Check the stability of your wheelchair with a spotter to prevent
a tip-over.
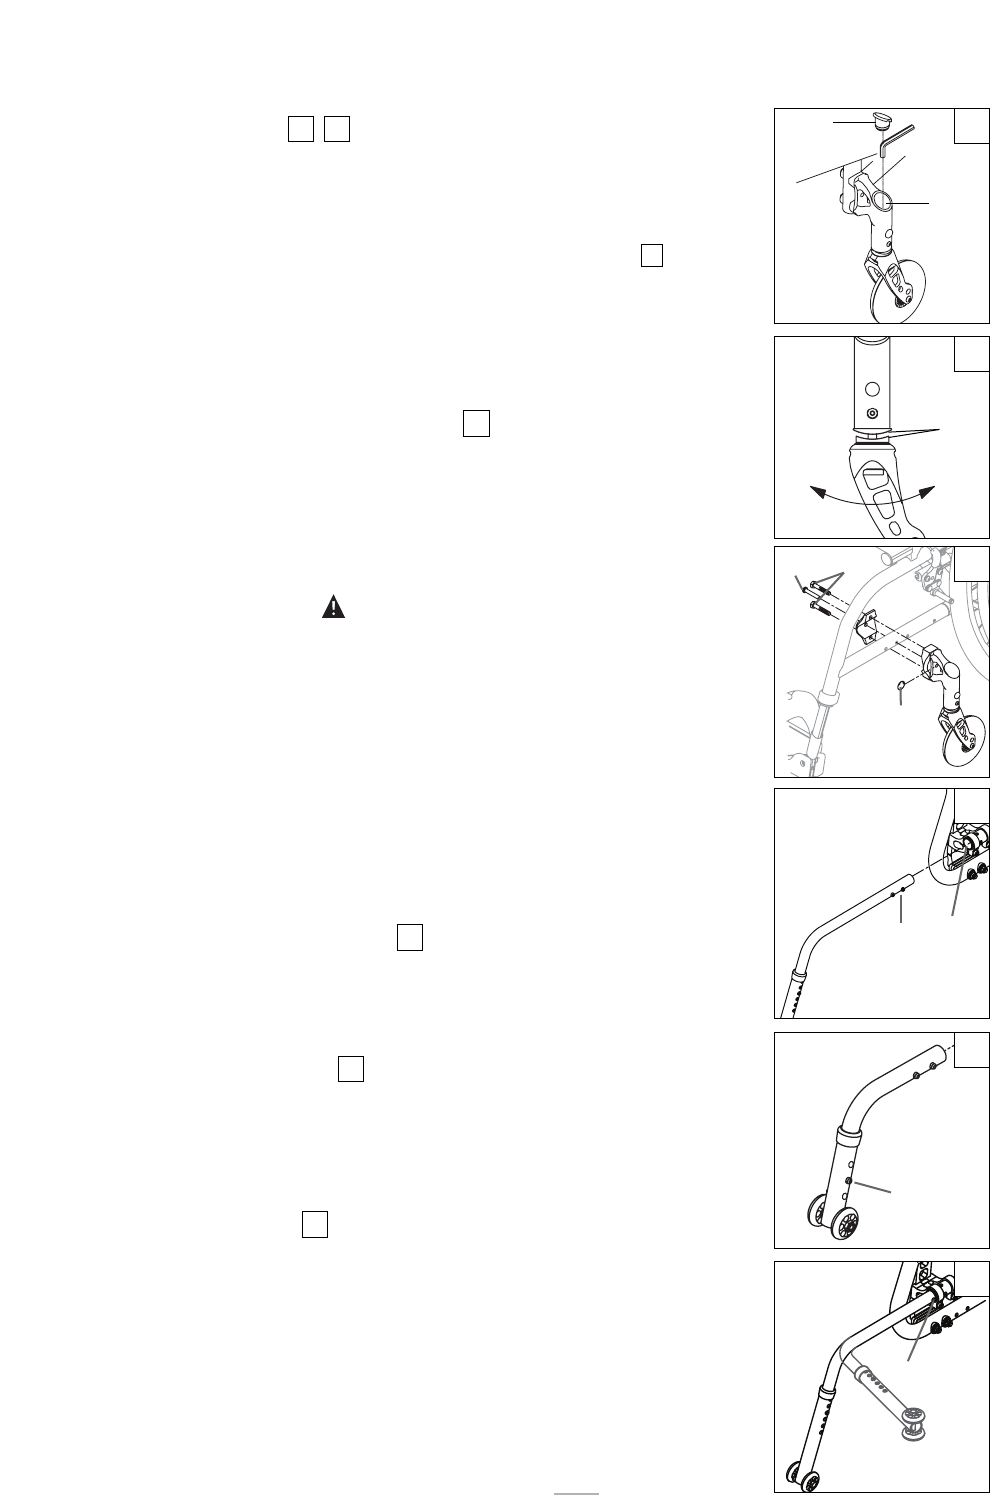
O. ANTI-TIP TUBES (OPTIONAL)
Quickie recommends anti-tip tubes for all wheelchairs.
Use a torque setting of 100 in.-lbs. when setting up the anti-tip tubes.
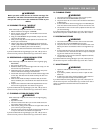
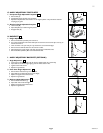
1. Inserting Anti-Tip Tubes Into Receiver
a. Press the rear anti-tip release pin (G) on the anti-tip tube so that both release pins are drawn
inside.
b. Insert into the anti-tip tube receiver.
c. Turn the anti-tip tube down until release pin is positioned through the receiver mounting hole (H).
d. Insert second anti-tip tube the same way.
2. Adjusting Anti-Tip Tube Wheel
The anti-tip tube wheels may have to be raised or lowered to achieve proper clearance of 1 1/2" to 2".
a. Press the anti-tip wheel release pin (I) so that the release pin is drawn inside.
b. Raise or lower to one of the three predrilled holes.
c. Release pin.
d. Adjust the second anti-tip tube wheel the same way.
Both wheels should be at exactly the same height.
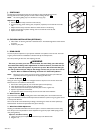
3. Turning Anti-Tip Tubes Up
Turn anti-tip tubes up when being pushed by attendant, overcoming obstacles or climbing curbs.
a. Press the rear anti-tip tube release pin (J).
b. Hold pin in and turn anti-tip tube up.
c. Release pin.
d. Repeat with second anti-tip tube.
e. Remember to return anti-tip tubes to down position after completing maneuver.
30
29
28
27
24
2625
A
B
25
C
26