


6
Assembly
of Your Joerns Bed
Installation of Head and Foot Panels (for
more information refer to Bed Panel Installation
Sheet)
Tools required: Phillips head screwdriver
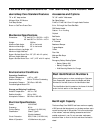
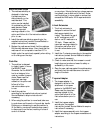
Head Panel Installation:
• The head panel is the larger of the two panels
and has a sticker on the back side.
• Place panel on ground with sticker side down
(four holes should be visible).
• The head panel brackets are the longer of the
two sizes (fig. 1)
• Install the
head panel
brackets
with the
four short screws
provided. The open
side of the bracket
should face up (fig.
2). Do not tighten
screws until after
fitting the mounting
brackets onto the
bed.
• Completed head
panel (fig. 3).
• Go to final
assembly step
below.
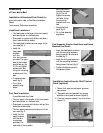
Foot Panel Installation:
Frame-Mounted Foot Panel
• The foot panel is the smaller of the two panels
and has a sticker on the back side.
• Place panel on ground with sticker side up (four
holes should be visible).
• The foot panel brackets are the shorter of the
two sizes (fig. 4).
• Install the foot
panel brackets
with the four
long screws
provided. The
open side of the brackets
should face down
towards the panel
(fig. 5). Do not
tighten the screws
until after fitting
the mounting
brackets onto the
bed.
• Completed foot
panel (fig. 6).
• Go to final assembly
step below.
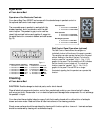
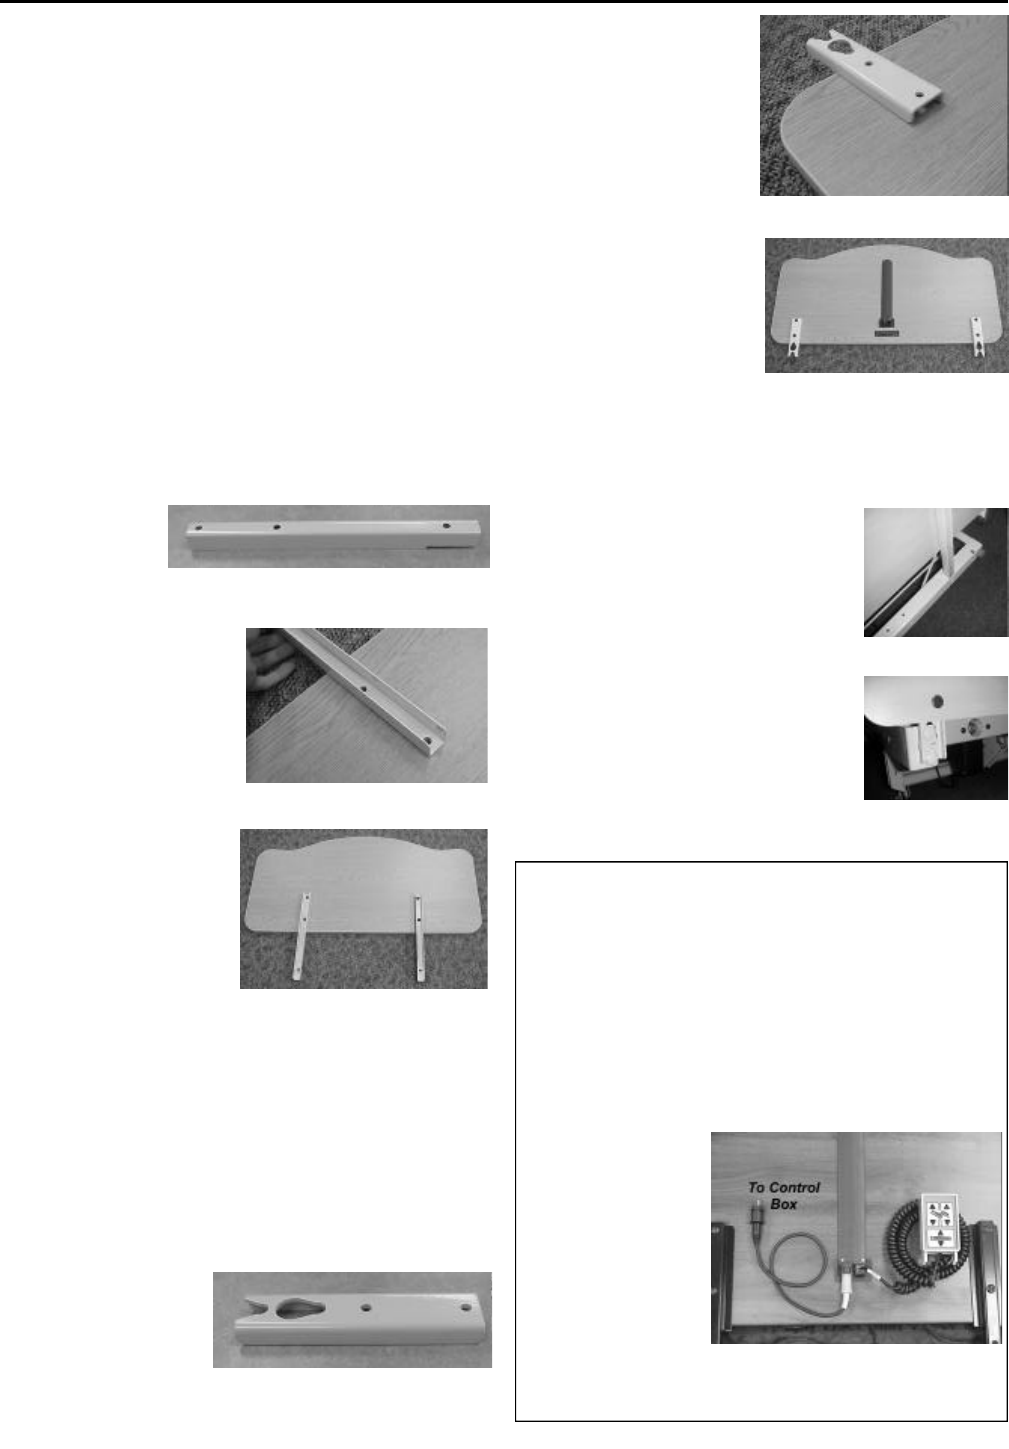
Final Assembly Step for Head Panel and Frame
Mounted Foot Panel:
• Insert the head panel as shown
with the mounting hardware
facing towards the outside of
the bed (fig. 7).
• Install the foot panel as shown
with the mounting hardware
facing toward the bed (fig. 8).
• Tighten all eight screws with
the panels in place.
Figure 1
Figure 2
Figure 3
Figure 4
Figure 5
Figure 6
Figure 7
Figure 8
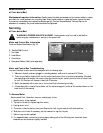
Installation Instructions for Staff Control
Panel (optional)
1. Mount foot panel on bed as per previous
instructions.
2. Plug patch cord and pendant into proper
sockets on foot panel as shown (figure 9).
2. Cord will plug into socket 2 on control box
(figure 13).
Figure 9