


9
SilverBoom 130
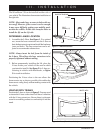
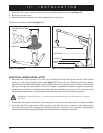
Figure 6. Motor Housing Installation
ASSEMBLING THE LIFT
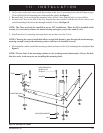
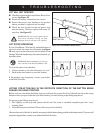
1. Insert the upper post into the L-base. See figure 4.
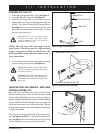
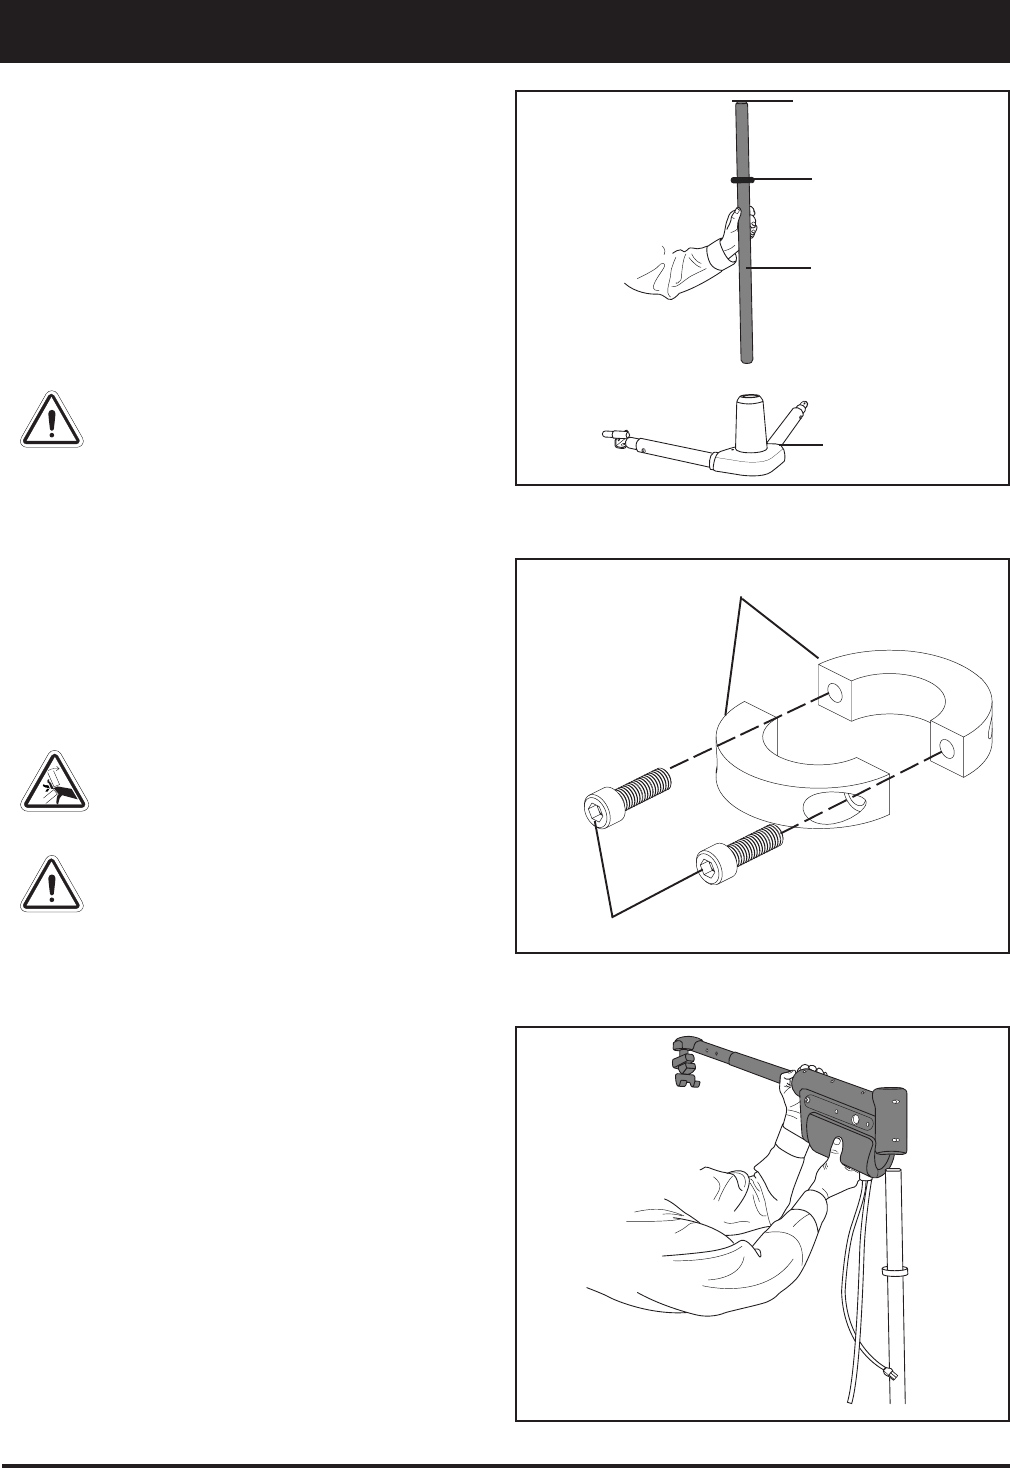
2. Assemble the split ring collar. See figure 5.
3. Slide the split ring collar over the upper post and
tighten both screws (a good starting point is approxi-
mately 12 in. down from the top of the upper post).
See figure 4. To ensure safe operation, the split
ring collar must be secured no closer than 5 in. from
the top of the upper post.
WARNING! Failing to tighten both
screws of the split ring collar could
cause damage to your lift, mobility
product, and vehicle.
NOTE: The split ring collar may need to be ad-
justed down so the boom arm has sufficient head
room to swing into a vehicle, or adjusted up so the
mobility product being lifted has ample room to
clear obstructions.
4 . Lower the motor housing over the upper post until
it rests on the split ring collar. See figure 6.
WARNING! Prevent injury! keep hands
clear of the upper post when lowering
the motor housing.
WARNING! The lift will be top heavy un-
til mounted securely. Get assistance to
help stabilize the lift while swinging the
boom arm.
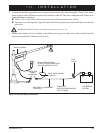
L-BASE
UPPER POST
SPLIT RING COLLAR
Figure 4. Upper Post Installation
!
!
MINIMUM OF 5”
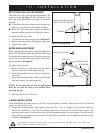
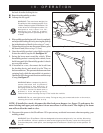
VEHICLES WITH HATCHBACKS - MINI VANS,
STATION WAGONS, ETC.
Once the lift is assembled and seated on the L-base,
close the hatch slowly to make sure the lift doesn’t make
contact with it. If the lift is too close to the rear, adjust its
position slightly until the hatch can close without making
contact with the lift. Positioning the L-base close to the rear
allows the boom-arm to stay as short as possible. This en-
ables the lift to swing into the vehicle without contacting the
far side of the vehicle.
You may need to adjust the height of the motor hous-
ing (see figures 6 and 7) or the length of the boom-
arm (see figure 8) so the boom arm can swing freely
without hitting at any point inside the vehicle.
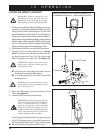
Figure 5. Split Ring Collar Assembly
2. INSERT SCREWS AND TIGHTEN
1. BRING RING HALVES TOGETHER
III. INSTALLATION