


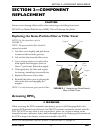


SECTION 2—COMPONENT REPLACEMENT
Part No 1150748 13 XPO
2
™
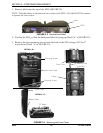
NOTE: When installing new battery, ensure the battery is label side up.
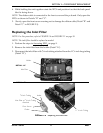
5. Position new battery on thermal pad as shown.
6. Connect the battery wiring harness to the PC board.
7. Install inlet filter with tubing into holder.
8. Re-assemble the XPO
2
. Refer to Re-assembling the XPO
2
on page 13.
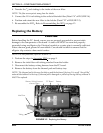
Re-assembling the XPO
2
NOTE: For this procedure, refer to FIGURE 2.3 on page 10.
1. Carefully, re-install the front cover onto the XPO
2
.
2. Turn the XPO
2
On to ensure proper operation.
3. Turn XPO
2
Off.
4. While holding the unit together, position the XPO
2
so that the back panel is facing up
(Detail “A” in FIGURE 2.3).
5. Install four mounting screws and secure the two sections of the XPO
2
together (Detail
“A” in FIGURE 2.3). Securely tighten.
6. Remove the glue residue by applying 91% isopropyl alcohol, and wiping with a clean
cloth. Make sure the surface is dry and free of any residue. This will ensure a good seal
for the new label.
7. Install replacement label on the top of the XPO
2
so that it adheres to both the front and
rear sections.
Replacement Parts
NOTE: Refer to the parts catalog at www.invacare.com for component part number.