


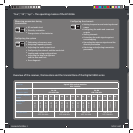

min. 0.5 m
min. 1 m
ON
OFF
ON
Please select channel!
b ch freq
Please select channel!
b ch freq
cmd mode
ch name
473
800
fs
m
HD
3:10
A1.7
CH3
473
800
fs
m
HD
3:10
A1.7
CH3
473
800
fs
m
HD
3:10
A1.7
CH3
473
800
fs
m
HD
3:10
A1.7
CH3
473
800
fs
m
HD
3:10
A1.7
CH3
473
800
fs
m
HD
3:10
A1.7
CH3
473
800
fs
m
HD
3:10
A1.7
CH3
473
800
fs
m
HD
3:10
A1.7
CH3
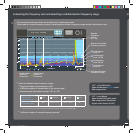
start full scan
Start fullscan
A8A7A6A5A4A3A2A1
Start scan
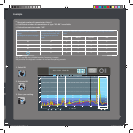
Noise level RF IN A B
active
630 654
0
0
0
0
0
0
0
0
0
0
0
0
0
0
0
0
0
0
0
0
0
0
0
0
0
0
0
0
0
0
0
0
654 678670 694 694 718 710 734 734 758750 774 774 798 MHz
6WDUWIUHTXHQF\VFDQ
IUHTVFDQ
A8
A7
A6
A5
A
4
A3
A
2
A
1
Start
sca
n
N
oise
l
eve
l
RF
IN
A
B
active
630
654
0
0
0
0
0
0
0
0
0
0
0
0
0
0
0
0
0
0
0
0
0
0
0
0
0
0
0
0
0
0
0
0
654
6
7
8
6
7
0
694
694
718
710
734
734
758
750
77
4
7
7
4
7
98
MHz
6
WDUW
I
U
HTXH
QF\
VFDQ
I
UH
T
VFDQ
Start scan
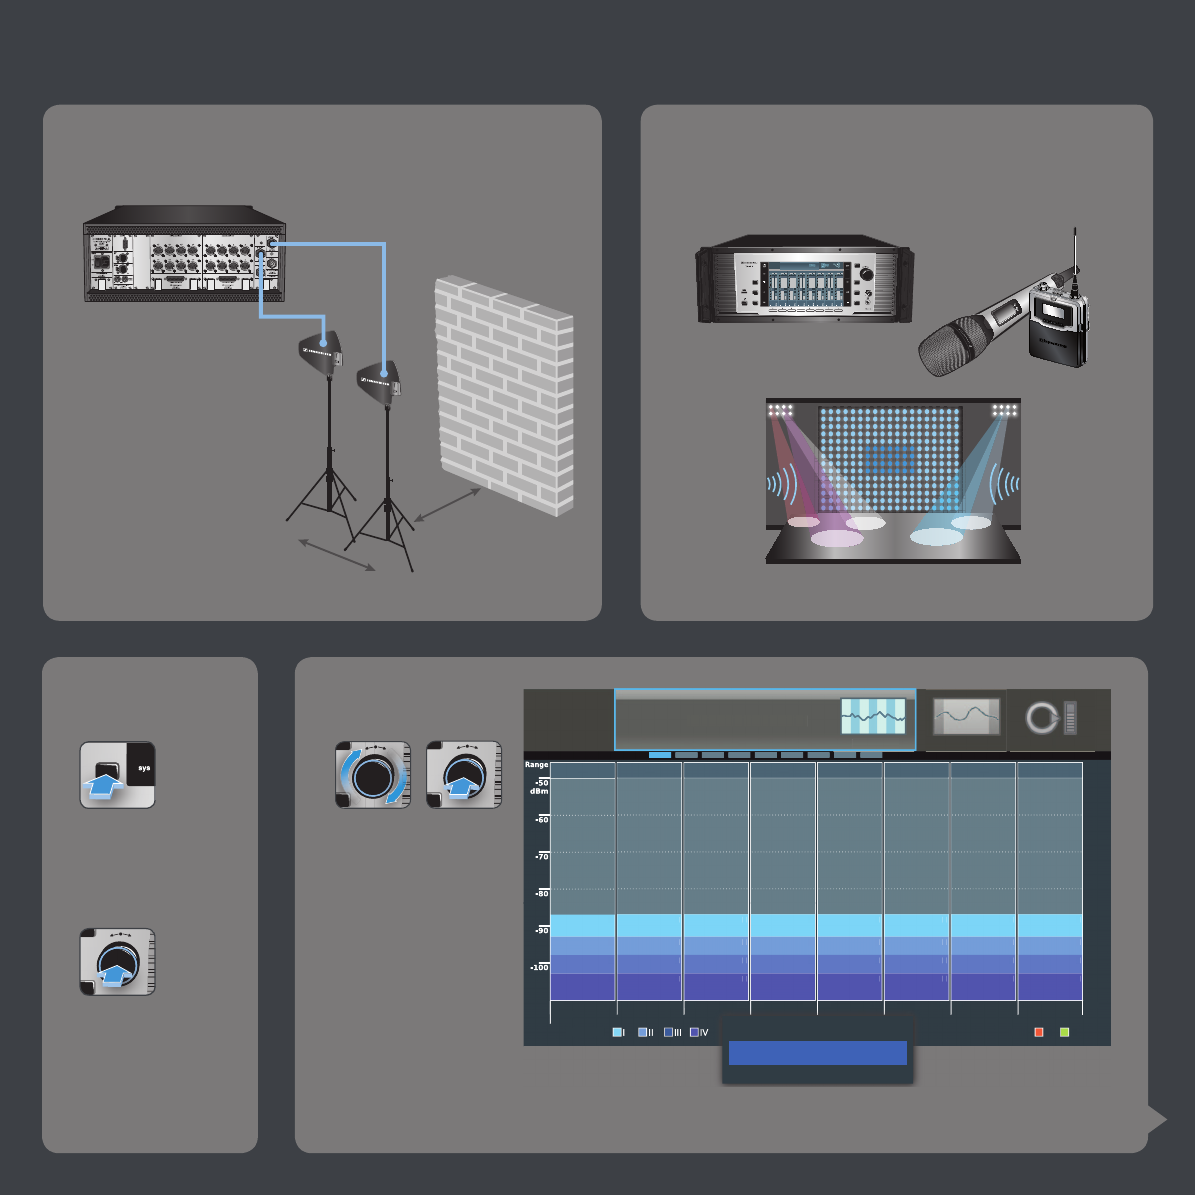
5. Start the
frequency scan.
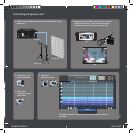
3. Call up the “sys”
operating mode.
1. Position the antennas and connect the EM 9046 to the
antennas.
2. Switch on the EM 9046, switch off the SK and
SKM 9000. Switch on all possible sources of
interference and other transmission links.
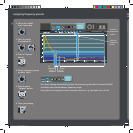
Performing a frequency scan
4. Call up the
“Frequency scan”
menu item.
All audio outputs are muted and the interference levels are
recorded.
QG_Digital9k_574011_EN.indd 3QG_Digital9k_574011_EN.indd 3 28.07.2014 14:48:5728.07.2014 14:48:57