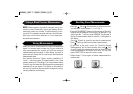
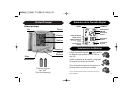
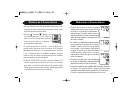
1.
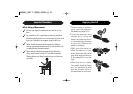
Once the cuff is properly applied and you are seated with
your feet flat on the floor you are ready to take a
measurement.
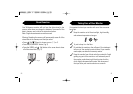
2.
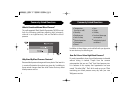
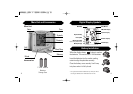
Press the
(Up) or (Down)
button
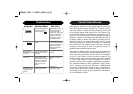
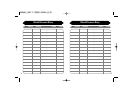
and you will see a number appear: 1,2, or
3. These are each of the 3 party memory
zones explained on page 9 (Special
Features).
*If you select zone No. 1 your blood pressure will be
recorded as on of the 40 readings available for that zone.
The same is true for zones 2 and 3. When taking
measurements, be sure and select the correct zone
number so that the measurement is stored in the
appropriate zone.
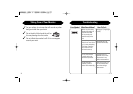
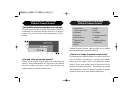
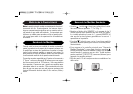
3.
Press the START/STOP button. The monitor will begin to
inflate to the level that's right for you. An upwards facing
arrow on the digital display indicates the monitor is
inflating. Remain still and do not talk during the
measurement process.
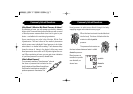
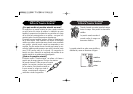
Taking a Blood Pressure Measurement
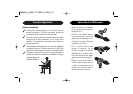
4.
You will feel the cuff get tighter around
your wrist - this is normal. It should not
inflate to the point of discomfort. If this
occurs, the cuff may be secured too tightly.
To stop the inflation, press START/STOP.
The cuff will deflate automatically. Rewrap
the cuff allowing more room between your
wrist and the cuff.
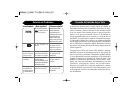
5.
Inflation will stop automatically to begin
the measurement process. You will see a
downward facing arrow and the numbers
decreasing as the cuff is deflating. You
will also see a flashing heart to indicate
the measurement is taking place.
6.
When your measurement is complete the
monitor will deflate automatically, releasing
the air pressure in the cuff.
7.
The entire measurement process should
take less than a minute. Your blood pressure and pulse
readings are displayed and automatically stored in the
memory.
Taking a Blood Pressure Measurement
18 19
/MIN.