


10. A FEW TIPS ON CLIPPING
• Use the clipper on hair that is clean and dry.
• Dry your hair in the style you are aiming to achieve.
• Check that the clipper is correctly lubricated.
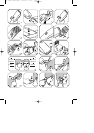
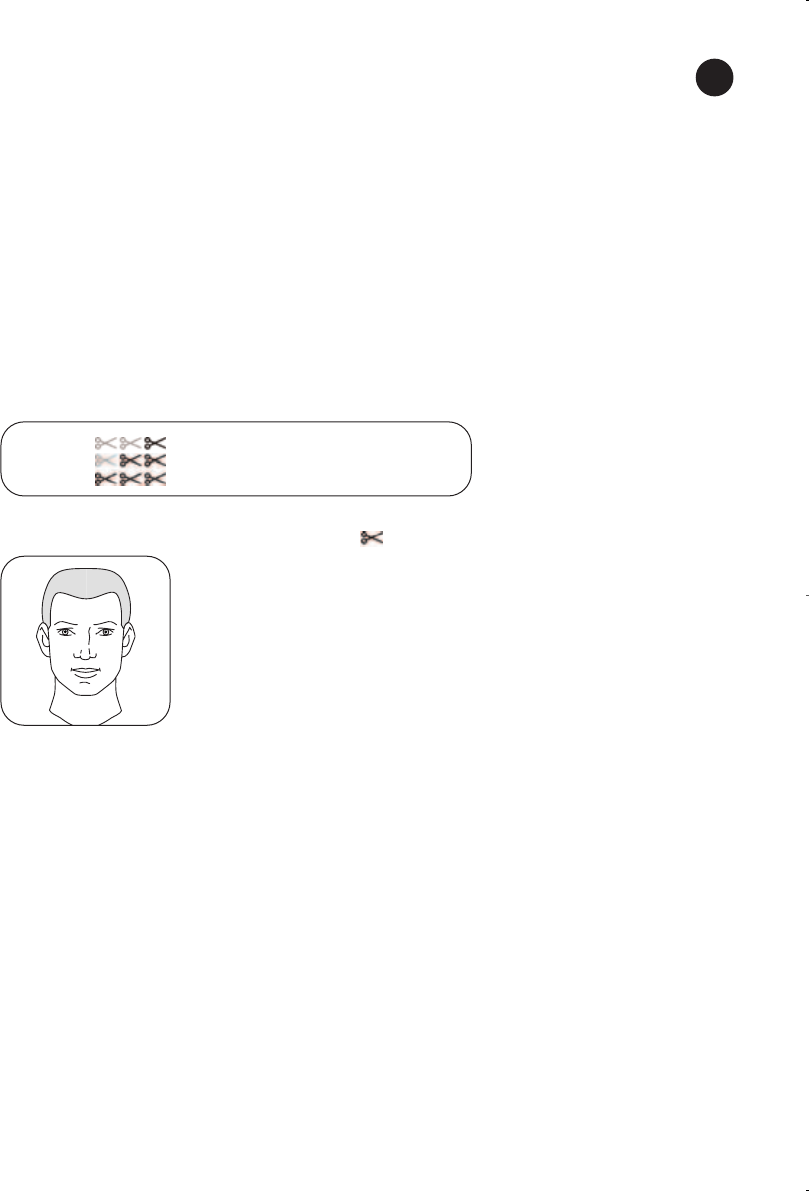
• Position the person whose hair you are going to cut in such a way that you can easily see the top of
their head (Fig. 12).
• Place a towel around their neck and on their shoulders.
• Before clipping, use a comb to make sure that the hair is not tangled.
• Before you start clipping, take note of:
- the way the hair grows and any tufts,
- the hollows and bumps on the head, often situated at the base of the neck (if you apply the clipper
directly onto a bump, it will leave a clear patch).
• Make sure the clipper always stays at an angle to the head.
• To start with, cut only a small amount of hair at a time, until you are familiar with the length left by
the comb's different settings.
• To obtain an even cut, never force the clipper to move too quickly through the hair by pushing it.
• Never stop moving the clipper in the middle of the hair.
• Start by using the comb's maximum setting (i.e. the one that leaves the greatest length of hair)
before trying the others.
Key: = easy,
= requires some experience of clipping,
= difficult.
11. TECHNIQUE FOR A CREW CUT
BASIC TECHNIQUE
With this technique, the cut follows the shape of the head.
• Adjust the cutting setting in function of the desired hair length (Fig. 13).
• Don't forget to adjust the comb's setting at the different stages of the cut.
1st STAGE:THE CUT
a) The neck.
• Comb the hair.
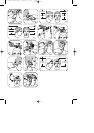
• Start by clipping the hair on the neck from the base up,
using the 21 mm setting.
• Hold the clipper firmly against the hair, with the teeth of the comb pointed slightly upwards (Fig. 14).
• Slowly move the clipper up and away from the hair, cutting only a small amount of hair at a time.
• When the hair on the neck is evenly cut to 21 mm, change the setting to the desired length and
repeat the first 3 steps (Fig. 15).
• Stop clipping at regular intervals, comb the hair and check the result obtained..
b) Sides and top
• Repeat the procedure to clip the sides.
• Change the comb settings as you clip different zones (see Fig. 13).
• For the top, use the same technique, working from the forehead to the crown of the head and
moving against the direction of hair growth (Fig. 16). Then, even up the top and sides.
2nd STAGE: OUTLINING
a) The neck and the sideburns.
• Comb the hair.
• Remove the comb attachment.
• Trim around the hairline, holding the clipper upside-down and perpendicular to the head, and moving
downwards. Use short strokes (Fig. 17 and 18).
• Repeat the procedure for the sideburns (Fig. 19).
GB
NOT TOND 030052.QXD 31/03/04 17:09 Page 13