


Cleaning your shaver
TO ASSURE OPTIMAL PERFORMANCE,
IT IS RECOMMENDED THAT YOU
CLEAN YOUR SHAVER AFTER EACH
USE.
Detach the handheld unit from the
power supply cord before cleaning.
The cutting system of this shaver
was designed to be cleaned by rins-
ing under warm running water or by
brushing.
Cleaning your Remington
®
branded
shaver is easy.
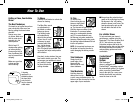
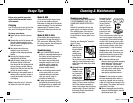
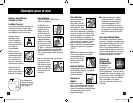
■ Open the hair
pocket by press-
ing the release
button and
rotating away
from the body
of the shaver.
You may blow out the stubble thor-
oughly, or rinse the shaver head in
water. Rinse both sides of the head
assembly.
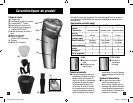
■ At Least Once a
Week: For more
complete clean-
ing, remove the
cutter retainer
assembly from
the hair pocket
by turning the center knob approxi-
mately 1/4 turn counter clockwise.
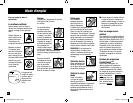
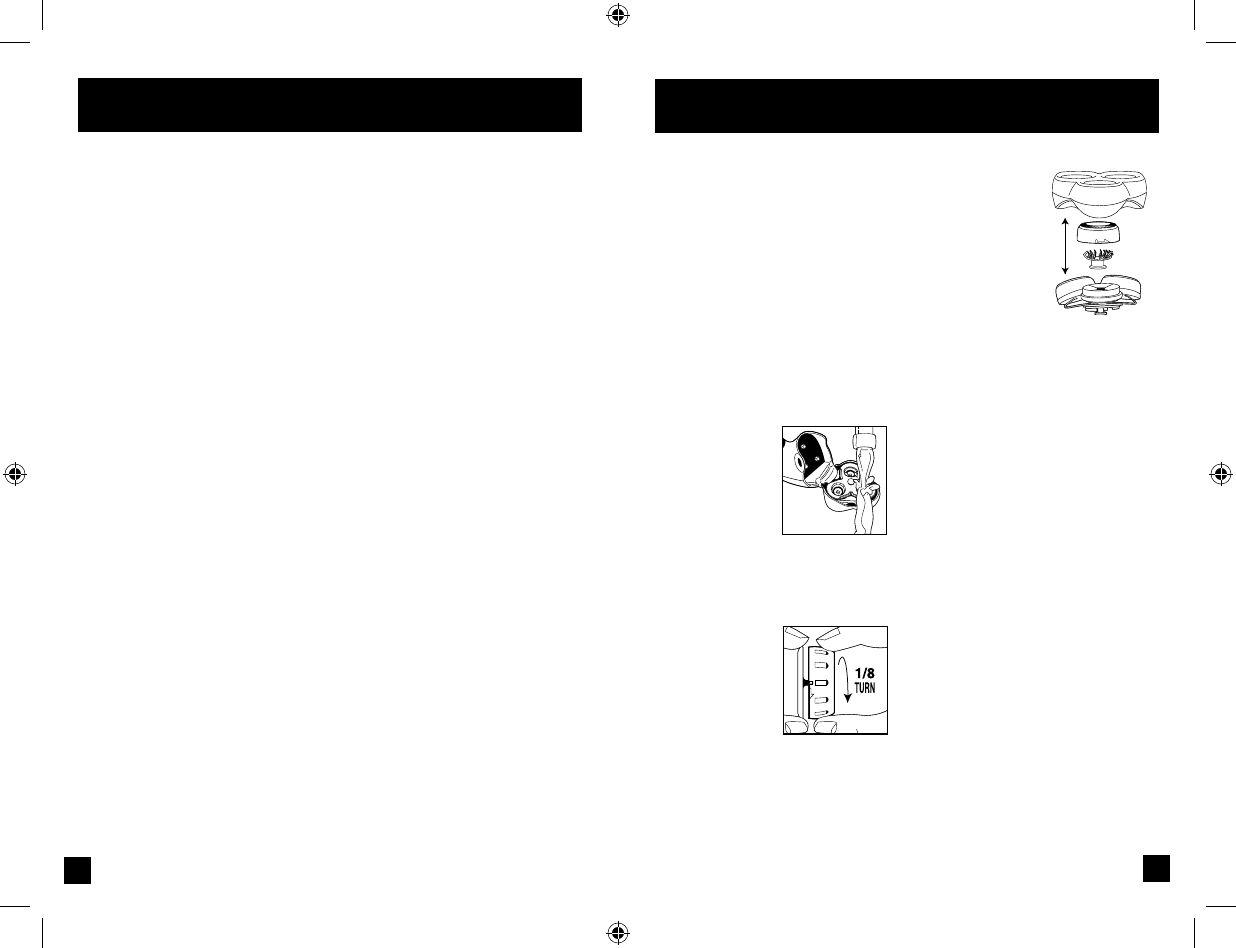
Hold cutter retainer assembly as
shown, and remove head by turning
approximately 1/8 turn in the direc-
tion shown. Brush clean both the
head and the cutter.
Reassemble head
to cutter retainer
assembly by align-
ing and turning
head 1/8 turn in
the opposite direc-
tion. Repeat this
process for each
of the 3 heads.
Clean each head and cutter set one
at a time to prevent mixing cutter
components. (These should be kept
as sets). After cleaning, place cutter
retainer assembly in the hair pocket,
and secure by turning center knob
approximately 1/4 turn clockwise.
Caution: Never put the shaver com-
pletely under water. Do not use any
aggressive cleansing agent as this
may destroy the shaver coatings.
■ To clean and lubricate your
shaver’s cutters and head assembly,
apply Remington
®
Shaver Saver
®
(SP-4) Lubricant. The lubricant
helps remove hair clippings while
reducing wear. A quick spray after
each shave keeps your shaver
operating at peak performance.
Caution: Do not remove or replace
the head assembly while shaver is
running or plugged into an electrical
outlet as it may cause damage to the
unit’s cutters. The shaver shall not be
used until it has dried.
■ Worn or damaged parts should be
replaced with Remington
®
branded
replacement parts only.
Cleaning & Maintenance
Usage Tips
8
Before using read the important
safety instruction section in front
of the manual.
Charging
Prior to using your shaver for the first
time, put it on charge for 24 hours.
To charge your shaver:
■ Make sure your shaver is turned
off.
■ Connect the cord to the shaver and
then the charging adapter to the
electric outlet. A charging indicator
light will come on.
■ Your shaver cannot be over-
charged, so you can leave it
plugged in and charging between
shaves.
■ Use only the charging adapter
supplied with the shaver.
■ Special feature allows you to run
the shaver directly off the cord.
Your shaver will not recharge while
you are shaving, so after shaving
directly from the cord, turn the unit
off and set aside to charge.
■ Provides up to two weeks worth of
shaving after a one hour charge or
a single shave after five minutes
of charging.
Note: It may take up to 3 cycles for
the battery to reach full capacity.
Model R-800
A blue indicator light shows charg-
ing. A red low-battery indicator
illuminates to show when the shaver
needs recharging. This also indicates
approximately 5 minutes of shav-
ing time left when the indicator first
comes on.
Model R-825, R-825s
A blue lighted fuel gauge displays
the amount of charge remaining in
20% increments. When only 20% of
the charge remains, the recharge red
warning light illuminates.
Troubleshooting:
■ If your R-800/825/825s shaver
battery is completely discharged or
the shaver has not been used for
an extended period of time,
the shaver may not start when
operated using the cord. If this
condition occurs, charge the
shaver for approximately five
minutes before shaving.
■ Your cord/cordless shaver should
not be used strictly as a cord-
operated shaver, as continued
cord only use will result in
reduction of battery life.
■ In order to preserve the life of
the batteries, they should be fully
discharged every six months and
then fully charged for 24 hours.
9
34378_R825s_IB.indd 8-9 6/26/07 4:47:52 PM