Removing the headguard
Before operating your MicroScreen
®
2 TCT
®
Shaver,
remove the headguard, which protects the screen and
cutter assembly. It is important to remove the headguard
correctly to avoid damaging the clips that hold it firmly to
the shaver.
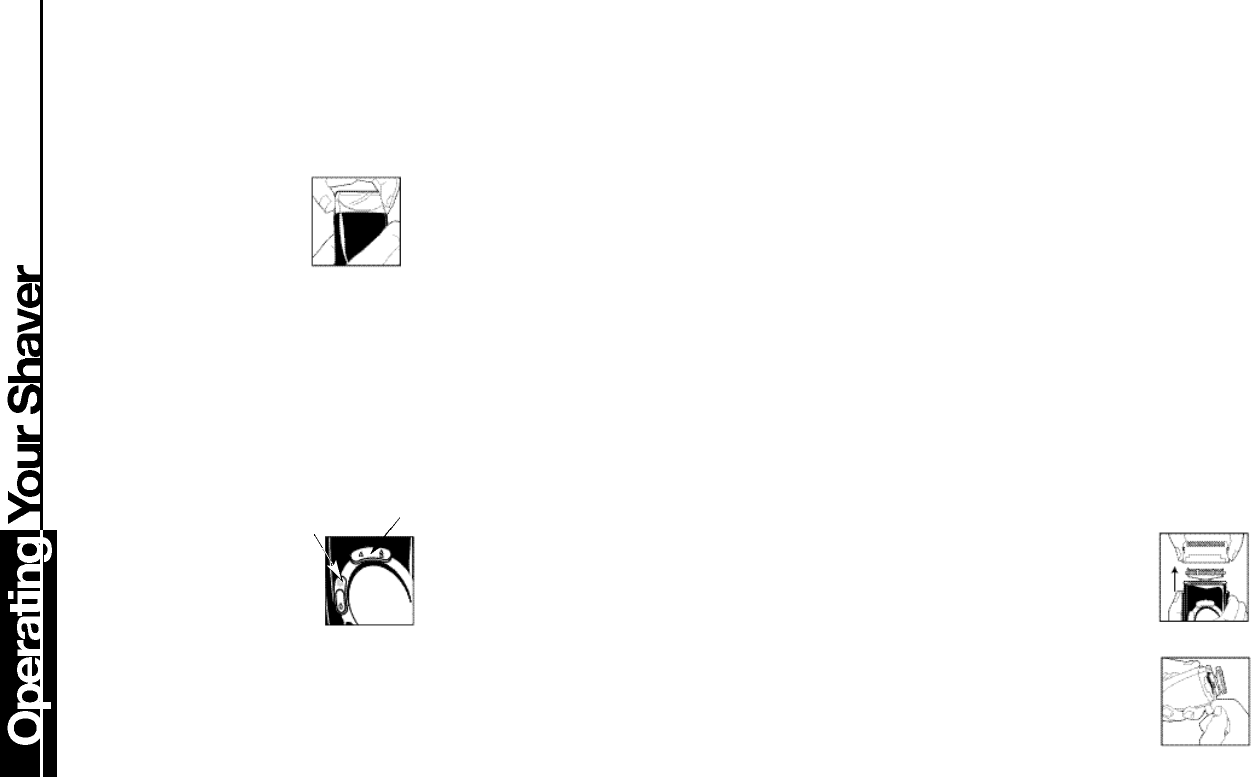
■ Press lightly on the top of the
h e a d guard.
■ Lift the lower rear edge.
■ Pull the headguard aw a y from
the shaver.
Shaver Operation
Your shaver has a Slide Power Button that has different
operating characteristics depending on which model
shaver you have.
Models MS2-90/100
Lower position: Off; slide to upper position:On
Models MS2-200,300,400
Have a switch lock button to prevent accidental operation.
Lower position: locked Off, Press button,slide to Upper
position:On
Trimmer Operation
Your MicroScreen
®
2 TCT
®
shaver is
equipped with a 3-position trimmer.
Position 1: Retracted out of the way
and "Off " .
Position 2: Long hair intercept with
floating action.
(Deployed by pressing LEFT side of trimmer button)
Position 3: Sideburn / Mustache Trimmer
(Deployed by pressing RIGHT side of trimmer button)
The Trimmer can be manually retracted at any time
by pressing down on the trimmer.
Charging
Prior to using your shaver for the first time, put it on charge for 24 hours.
To charge your shaver:
■ Slide the power button downward to the "Off " position.
■ Connect the AC power cord to the shaver and then to the
electric outlet. A charging indicator light will come on,as described
below.
■ Your shaver cannot be overcharged, so you can leave it plugged
in and charging between shaves.
■ Use only the AC line cord supplied with the shaver.
■ The MS2-200 is designed for cordless operation only. Plugging
in the cord will not power the shaver.
■ The MS2-300/400 on the other hand, comes with a special fea-
ture that allows you to shave while your shaver is plugged in for
recharging. Just follow the steps above to connect the AC power
cord. Turn on the shaver by sliding the power button upwards. Your
shaver will not be recharging while you are shaving, so after shav-
ing, turn off the shaver by sliding the power button downward, and
leave it plugged in so it can be recharged.
■ The MS2-300/400 will provide a week's worth of shaving after
a one hour charge or a single shave after five minutes of charging.
Model MS2-400 The green indicator lights show that the shaver
is charging.The lights will start to flash as the battery charge rate
slows. A fully charged shaver will only flash intermittently. This
shaver features a lighted fuel gauge that displays the amount of
charge remaining. When only 20% of the charge remains, the red
"low battery" warning light illuminates. This indicates approximately
5 to 6 minutes of shaving time left when first illuminated.
Model MS2-300 The green indicator light shows that the shaver
is charging.This light will start to flash as the battery charge rate
slows. A fully charged shaver will only flash intermittently. While
running,a red "low-battery" warning lamp illuminates when the
shaver will soon need recharging. This indicates approximately
5 to 6 minutes of shaving time left when first illuminated.
Model MS2-200 The green indicator light shows that the shaver
is charging.
Troubleshooting:
■ Your MS2-300 /400 cord/cordless shaver should not be used
strictly as a cord-operated shaver, as continued cord only use will
result in reduction of battery life.
■ In order to preserve the life of the batteries, they should be
fully discharged every six months and then fully charged for 24
hours.
Dual Voltage
You can take your MS2-90/100/200/300/400 shaver with you when
you travel just about anywhere in the world. Your MicroScreen
®
2
TCT
®
shaver features wo
rldwide automatic voltage conversion.
Model MS2-200
:105-240 volts AC, 50 Hz/105-130 volts AC 60, Hz
Models MS2-90,100,300,400: 100-240 volts, 50/60 Hz
Just plug it in to the local outlet (you may need an adapter plug)
and use as usual. Your shaver will convert automatically to the local
current requirements.
Battery Removal:
When your rechargeable shaver reaches the end of its useful life,
the batteries must be removed from the shaver and be recycled
or disposed of properly in accordance with your state and local
requirements.
THE FOLLOWING PROCEDURE SHOULD BE FOLLOWED
FOR BATTERY REMOVAL:
■ To avoid a possible electric shock hazard, unplug cord (if used)
from electric outlet and shaver.
■ Remove head assembly by first pressing the two
side buttons.( fig.1 )
■ Un-clip the top metal bracket by prying the
lower back edge over the snap . Lift the lip of the
r u bber boot off the housing. ( fig. 2 )
■ Pry off the front panel.( fig.3 )
■ Remove the two screws securing the cord
opening.( fig.4 )
■ Squeeze the front housing and pull the back off
to expose the PCB and batteries.( fig.5 )
■ Pry the PCB assembly out of the shaver
housing.( fig.6 )
Power
Button
Trimmer
Button
Fig. 1
Fig. 2


