


3
ASSEMBLY AND SET-UP
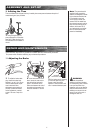
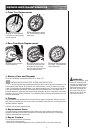
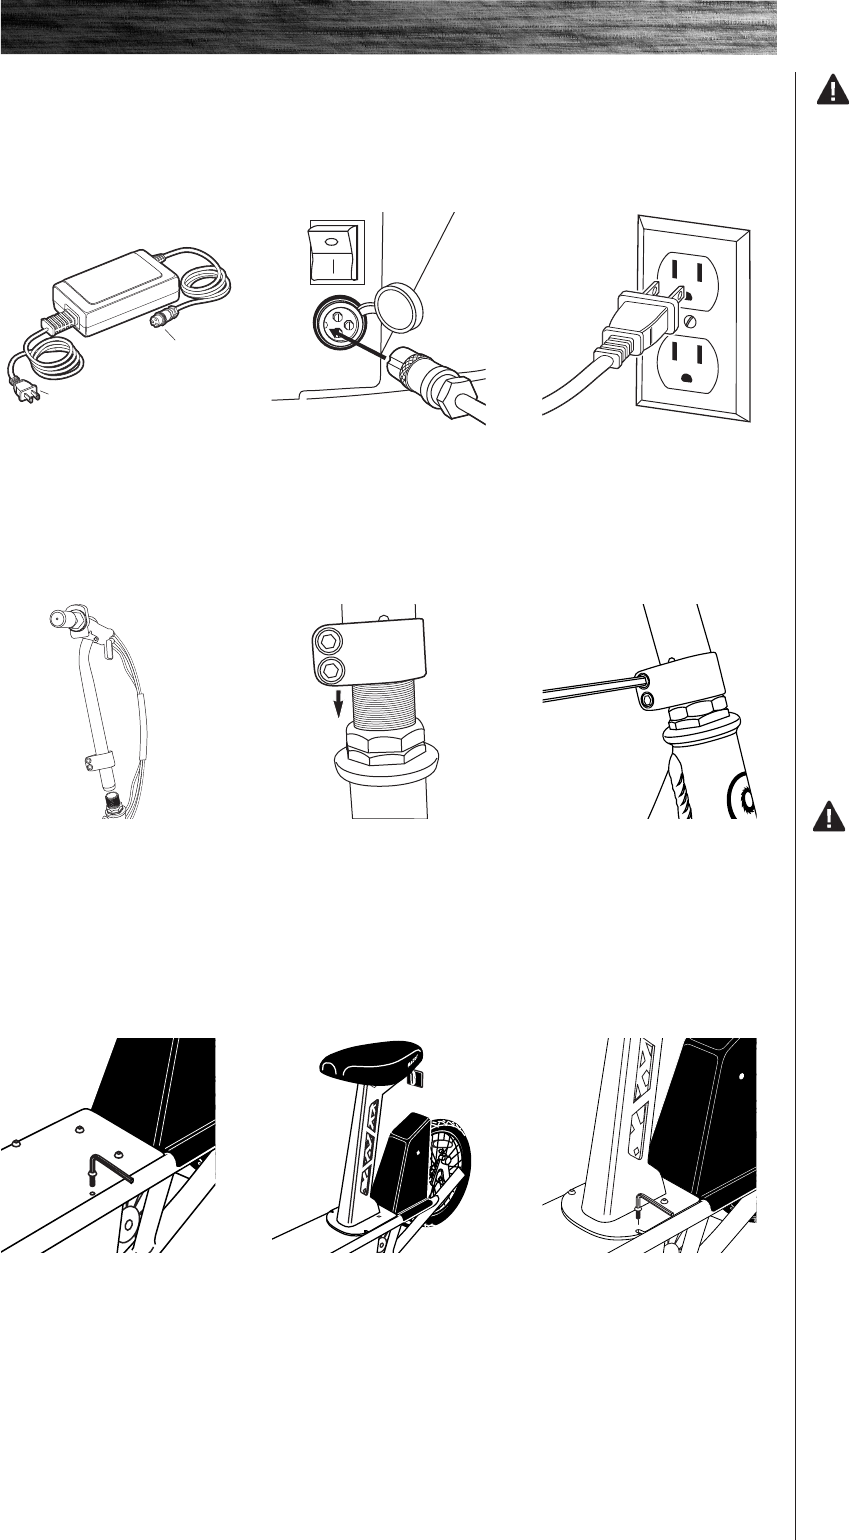
q Attaching the Handlebars
WARNING:
Failure to properly tighten
the collar bolts may allow
the handlebars to dislodge
while riding and may cause
you to lose control and fall.
When correctly tightened, the
handlebars will not rotate out of
alignment with the front wheel
under normal circumstances.
Note: The cable and wire
assembly from the handlebar
must be routed as shown in
step 1, not wrapped around
the steering tube or handlebar.
Sharp bends or twisting of the
brake cable can cause the
brake to malfunction.
q Charging the Battery
Your electric scooter may not have a fully charged battery. Therefore it is a good idea to charge the battery
prior to use.
• Initial charge time: 12 hours • Run time: up to 40 minutes
• Recharge time: up to 8 hours, • Average battery life: 250 charge/discharge cycles
depending on the level of depletion
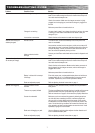
1 Plug the charger port into
the port on the scooter. The
charger works with the power
switch in either the on or off
position.
2 Plug the charger plug into a
wall outlet.
WARNING:
Always disconnect your E500S
scooter from the charger before
cleaning with liquid.
Note: If your charger does
not look like the one illustrated,
your unit has been supplied
with an alternative charger. The
specifications and charging
procedure would not change.
The charger has a small
window with one LED or two
LEDs to indicate the charge
status. Refer to the illustration
on the charger unit for the
actual “charging” and “charged”
status indications for your
model charger.
Chargers have built-in over-
charge protection to prevent
battery from being over-
charged.
Be sure to properly align the
groove on the charger input
plug with the corresponding
socket on the case; otherwise,
no charging action will occur.
Charger
Plug
Charger
Port
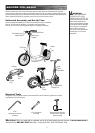
1 Remove the four bolts
from the frame with the 5 mm
hexagonal key wrench.
2 Position seat onto frame and
align holes.
q Attaching the Seat
1 Insert handlebar assembly
into fork.
2 Handlebar assembly should
be all the way in with the collar
covering the threaded portion
of the fork. Spin the handlebar
stem clockwise down onto the
fork to ease installation.
3 Once stem is all the way
down and no more threads
on fork are visible, tighten
two collar bolts with 5 mm
hexagonal key wrench.
3 Secure seat with the
four bolts.
q Riding Your Scooter
Testing the Brake – To use the brake, squeeze the brake lever to increase the pressure on the brake.
The brake lever is fitted with a cable adjuster to compensate for cable stretch and/or to fine-tune the
lever movement to brake engagement. If brake is not engaging properly, follow instructions for adjusting
the brake on page 4.