


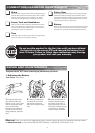


Remove contents from box. Remove the foam separators that protect the components from damage during
shipping. Inspect the contents of the box for scratches in the paint, dents or kinked cables that may have
occurred during shipping. Because the scooter was 95 percent assembled and packed at the factory, there
should not be any problems, even if the box has a few scars or dents.
MAKE SURE POWER SWITCH IS TURNED “OFF” BEFORE CONDUCTING ANY
MAINTENANCE PROCEDURES.
Estimated Assembly and Set-Up Time
Razor recommends assembly by an adult with experience in bicycle mechanics.
Allow up to 20 minutes for assembly, not including initial charge time.
Allow up to 18 hours for initial charge (see page 3 for charging information)
BEFORE YOU BEGIN
2
WARNING:
DO NOT USE NON-
RAZOR PRODUCTS
WITH YOUR RAZOR
ELECTRIC SCOOTER.
The scooter has been built
to certain Razor design
specifications. The original
equipment supplied at the time
of sale was selected on the
basis of its compatibility with
the frame, fork and all other
parts. Certain aftermarket
products may not be compatible
and will void the warranty.
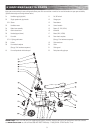
Required Tools
Need Help? Visit our web site for replacement parts, product support and a list of authorized service centers
at www.razor.com or call toll free 866-467-2967 Monday - Friday 8AM - 5PM Pacific Time.
2.5mm / 6mm key wrench
(Included)
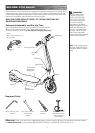
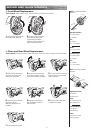
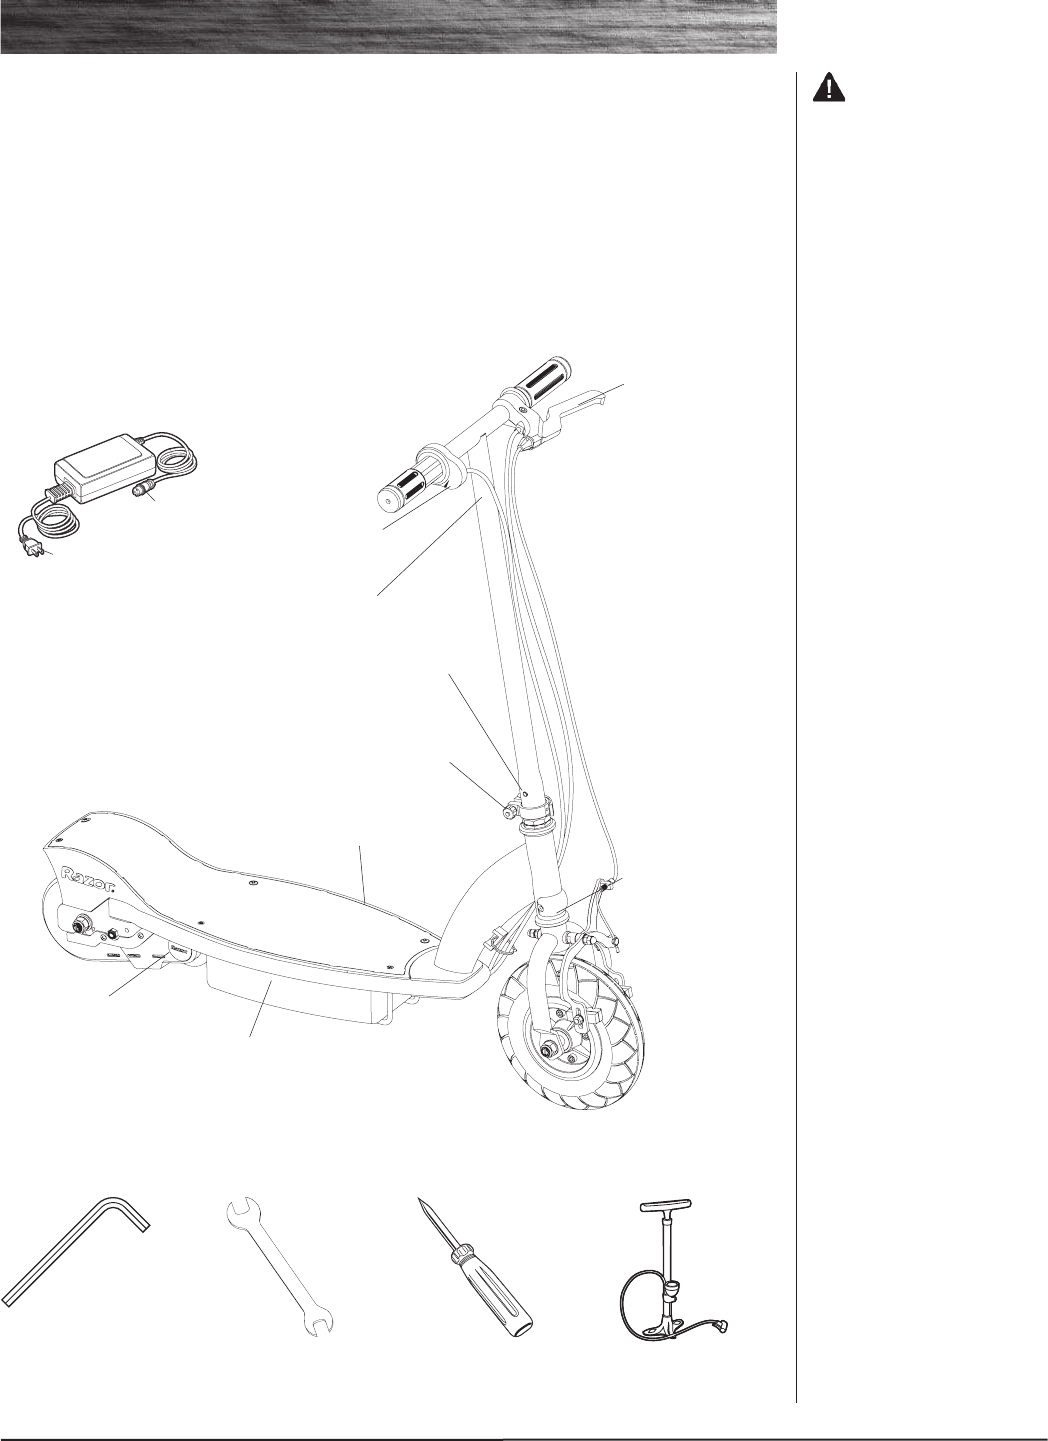
Brake Lever
Twist Grip Throttle
Handlebar
Stem
On/off switch
Reset button
Charger port
- Battery
- Control Module
Limiter
Charger
(Note: Charger design may vary
from one shown)
Charger
Plug
Charger
Port
Quick Release
Bicycle-style tire pump
for Schrader valve tires,
with pressure gauge
(Not included)
8mm, 10mm, 13mm and
17mm wrenches
(Included)
Screwdriver
(Included)
Push Button
Motor
Note: Electric scooter must be
moving at 3mph/4.8km before
twisting the throttle to engage
motor.