


4
Need Help? Visit www.razor.com for replacement parts, product support and a list of authorized
service centers or call toll-free at 866-467-2967 Monday - Friday 8:00 AM - 5:00 PM Pacific Time.
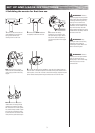
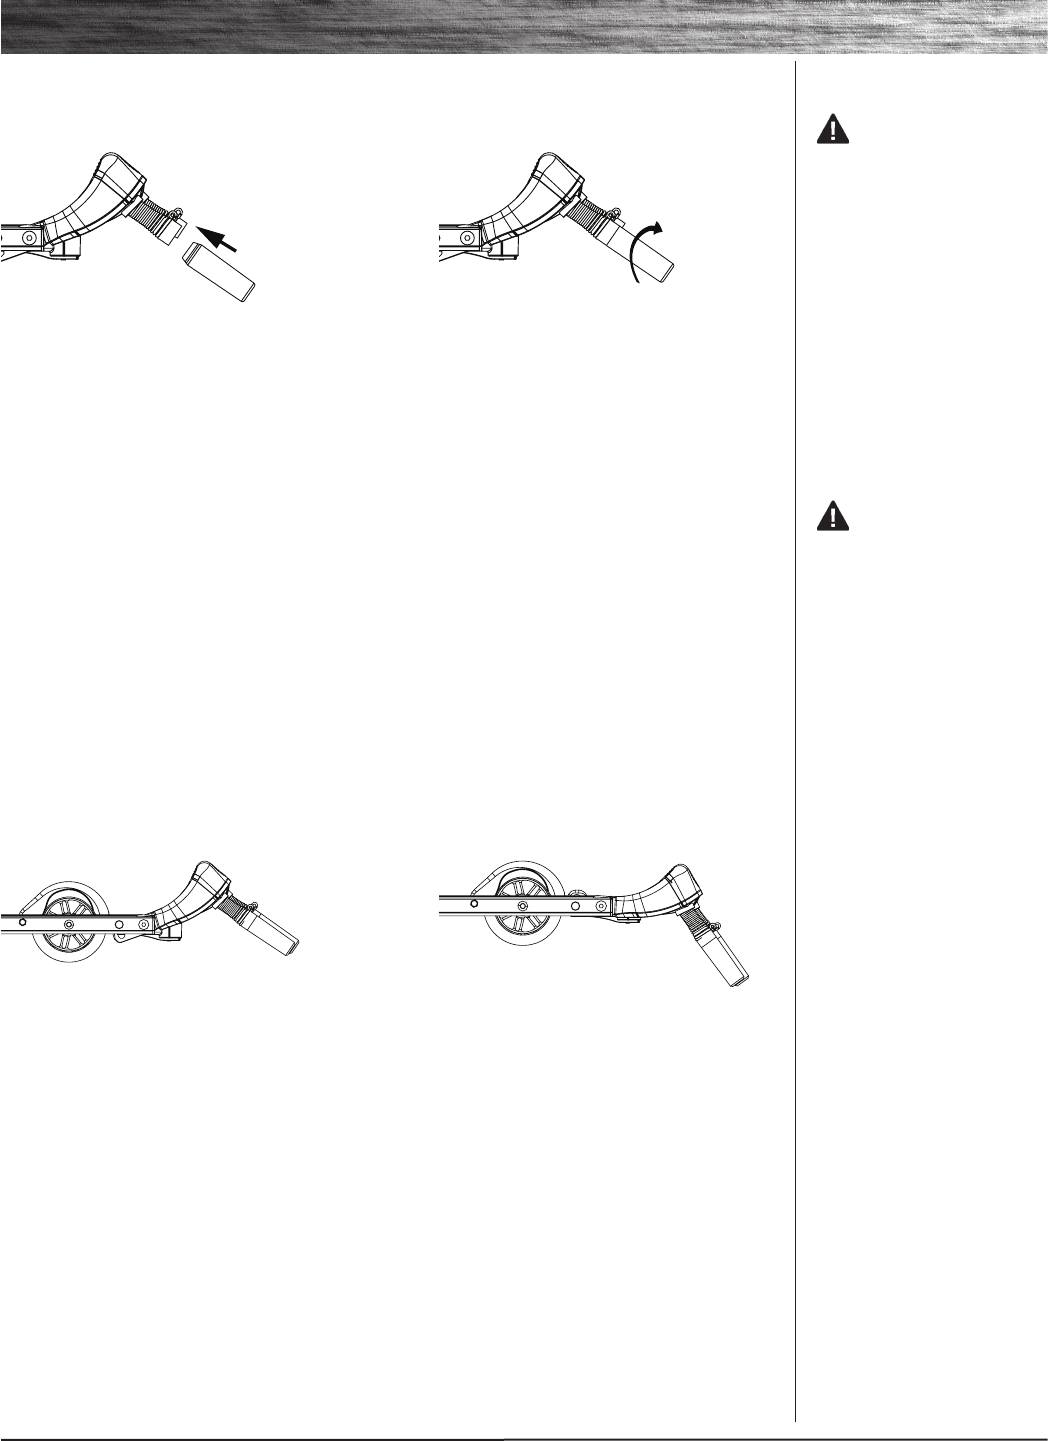
1 Insert the tapered end of the
chalk into the spring.
q Installing your chalk
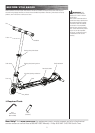
SET UP AND USAGE INSTRUCTIONS
WARNING: Keep fingers
clear of chalk bar hinge and fender
brake.
q How to Ride
Place one foot on the baseboard, push forward with the other foot. Steer. For enhanced cornering, lean slightly into the
direction of the turn. For controlled stops, apply the brake by stepping on the rear fender/brake. Razor recommends that
you practice applying the brake at various speeds and in an open area free from obstructions before riding your Razor
around others.
When riding, place ball of foot on the chalk bar and apply pressure until the chalking mechanism clicks into place. Only
use enough pressure to cause chalk to make a mark. To stop chalking, place ball of foot on chalk bar and apply pressure
until it clicks to the desired position.
q Using the Chalk Bar
WARNING: Applying too
much pressure on the chalk bar may
cause loss of control.
NOTE: Using any other part of
the foot or full foot may activate the
brake and prevent the chalk action.
NOTE: Chalk marks and
chalk life will vary based
on the amount of pressure
applied to the chalk bar and
the smoothness of the riding
surface.
1Up Position - No chalking 2 Down Position - Chalking
2 Twistchalkclockwise1/4turn
until chalk is set securely in the
spring. Periodically turn chalk as
needed.
NOTE: Chalkisnon-toxic.
ConformstoASTM4236.
Chalk washes off with water for
easy clean-up.