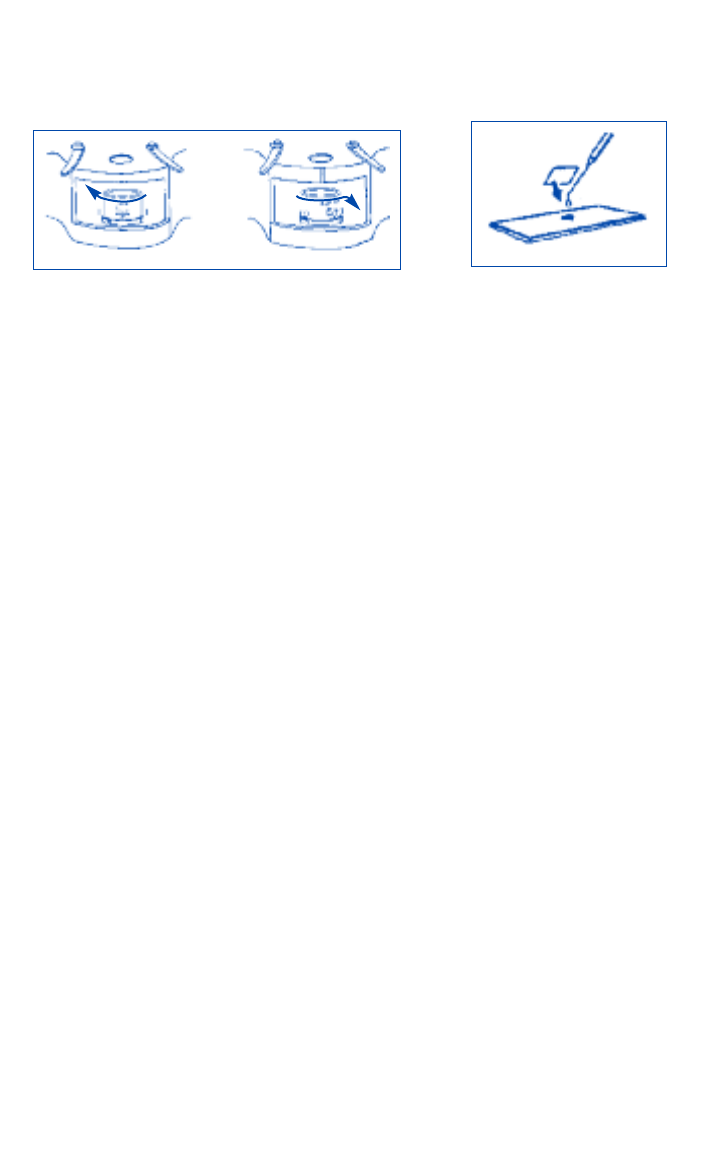
2) Changing the Bulb (Figure 3 & 4)
Allow the bulb to cool before replacing it. Unplug the Quantum and remove the faceplate and
condensing lever; see Figure 3. Grasp the light module and turn to the left to unlock it. Lift up
and the light module should come out with ease. Replace the light module with the one included
in the set. Insert the new light module that is included in the set. Twist to the right to lock it in;
see figure 4.
3) Making a Prepared Slide (Figure 5)
Prepared slides are used to view specimens you find. A specimen must be very thin so light will
pass through it, such as hair, tissue paper or a leaf. If necessary, have an adult help slice a very
thin piece from your specimen. If a specimen is too thick, it cannot be viewed because light will
not pass through the specimen. Specimens should be no larger than a 3/8inch or 1cm square.
4) Mounting a Specimen onto a Slide
Wipe the plastic slide and slide cover clean. Pick up the specimen with the tweezers and place
it in the center of the plastic slide. Place one or more drops of water on the sample, place the
slide cover over it and press down. Be sure not to trap any air bubbles. Remove any excess water
with blotting paper. The specimen is now ready for observation.
5) Viewing Slides
The Quantum projects the brightest and clearest image in a dimly lit room. To view specimens
at 10x power, slide the condensing lever to the LEFT until it clicks into position. To view
specimens under 20x and 40x power, slide the lever to the RIGHT.
Turn on the lamp. Set the magnification to 10x. Make sure the condensing lever is slid to the left
position. Place the slide on the stage and secure it in place under the clips. Turn the focusing
knobs until the image is clear. Choose a higher magnification by turning the revolving turret to
the desired magnification. Don’t forget to readjust the condensing lever to the right position
when viewing specimens at 20x or 40x.
When viewing Investigator
®
Slide Strips, use the 10x magnification and position the condensing
lever to the left position. Place a strip in upside down. Turn the focusing knobs until the image is
clear. Please remember that some of these images have already been magnified tremendously.
Further magnification may reduce image clarity.
6) Using the A/C adapter, LER 2901 (Figure 1)
Make sure Quantum is switched OFF. Insert adapter into plug on the right side of the Quantum.
Plug adapter body into a household electrical socket. The Quantum is now ready to use.
Note: The light is brightest with the adapter; however, light bulb life is longer with batteries.
CAUTION!
1. Use only the recommended A/C adapter described above. The A/C adapter is NOT a toy.
Adult supervision is recommended.
2. Examine A/C adapter cord, plug, body and other parts for damage before each use. If
damaged, repair or replace adapter before using.
7) Handling Precautions!
1. The lenses are the most important parts of the Quantum. Please take care of them.
2. When the lenses get dusty or dirty, gently wipe with a clean lens tissue or a soft, clean
lint free cloth. DO NOT USE YOUR FINGERS.
3. Place a plastic bag over your Quantum when it is not in use to protect it from dust.
3
Fig. 5
F
ig. 4
UNLOCK
LOCK
