6
QUICK REFERENCE GUIDE
1. Avoid eating, smoking, and exercising for at least 30 minutes before
taking a measurement.
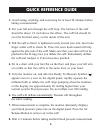
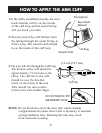
2. Put your left arm through the cuff loop. The bottom of the cuff
should be about 1/2 inch above the elbow. The cuff tab should lie
over the brachial artery on the inside of the arm.
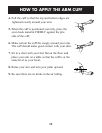
3. Pull the cuff so that it is tightened evenly around your arm. Insert one
finger under cuff to check fit. Press the sewn hook material firmly
against the pile side of the cuff. Make sure that your skin will not be
pinched in the D-ring once you inflate the cuff. Immediately deflate
the cuff and readjust it if skin becomes pinched.
4. Sit in a chair with your feet flat on the floor and place your left arm
on a table so that the cuff is at the same level as your heart.
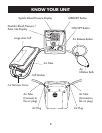
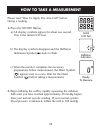
5. Turn the monitor on, and after the Ready To Measure Symbol ( )
appears next to a zero on the digital panel, rapidly squeeze the
inflation bulb to inflate the cuff. Stop pumping when the numbers
on the display are approximately 40 mmHg higher than your
normal systolic blood pressure. Do not inflate over 280 mmHg.
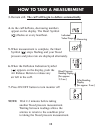
6. The cuf
f will deflate automatically. Remain still throughout
the entire reading.
7. When measurement is complete, the monitor alternately displays
your blood pressure/ pulse rate on the digital panel. Press the Air
Release Button to remove air in the cuff.
8. Wait 2-3 minutes before taking another blood pressure measurement.


