MODEL 314 DATALOGGING HUMIDITY TEMPERATURE METER
5
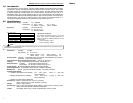
Appendix: Thermocouple Probe Specifications
Model Range Tolerances Description
TP-K01
Wire probe
-50°C to 200°C
-58°F to 392°F
±2.2°C or ±0.75%
±3.6°F or ±0.75%
Teflon insulation. Maximum insulation
temperature: 260°C (500°F)
TP-K01:
Probe for general condition measurements, especially
for complex and hard to reach places.
5.0 Calibration Procedure
5.1 Humidity Calibration
1. Turn the unit off. Press and hold the MAX MIN, HOLD and REC buttons. While
these three buttons are pressed, turn the power on. Release these buttons and all
the segments on the display will flash.
2. Within 3 seconds of releasing these buttons, press the °C/°F and TIME buttons
simultaneously to enter the calibration mode, or the instrument will revert to the
normal operating mode.
3. Upon entering the calibration mode, the humidity reading will flash, and ‘CAL1’ will
appear on the second display.
4. Insert the humidity probe into the standard humidity cavity of 32.8% RH@25°C.
Allow the system to stabilize for 20 minutes, and then press the MAX MIN button to
create the calibration data. If the instrument recognizes the value is out of tolerance,
it will sound 2 beeps and remain in the ‘CAL1’ mode. If the instrument recognizes
the value is within tolerance, new calibration data is created and the instrument will
advance into the ‘CAL2’ mode, as indicated on the second display.
5. Insert the humidity probe into the standard humidity cavity of 75.3% RH@25°C.
Again allow the system to stabilize for 20 minutes, and then press the MAX MIN
button to create the calibration data. If the instrument recognizes the value is out of
tolerance, it will sound 2 beeps and remain in the ‘CAL2’ mode. If the instrument
recognizes the value is within tolerance, new calibration data will be written into the
memory and the calibration is complete.
5.2 T1 Temperature Calibration
1. Turn the unit off. Press and hold the MAX MIN, HOLD and REC buttons. While
these three buttons are pressed, turn the power on. Release these buttons and all
the segments on the display will flash.
2. Within 3 seconds of releasing these buttons, press the °C/°F and HOLD buttons
simultaneously to enter the calibration mode, or the instrument will revert to normal
operating mode.
3. Upon entering the calibration mode, the temperature reading will flash and ‘CAL1’
will appear on the second display.
4. Insert the probe into a temperature-controlled chamber at 0°C (32°F) and allow the
system to stabilize for 20 minutes. Press the MAX MIN button to create the
calibration data. If the instrument recognizes the value is out of tolerance, it will
sound 2 beeps and remain in the ‘CAL1’ mode. If the instrument recognizes the
value is within tolerance, new calibration data is created and the instrument will
advance into the ‘CAL2’ mode, as indicated on the second display.
5. Insert the probe into a temperature-controlled chamber at 40°C (104°F) and again
allow the system to stabilize for 20 minutes. Press the MAX MIN button to create
the calibration data. If the instrument recognizes the value is out of tolerance, it will
sound 2 beeps and remain in the ‘CAL2’ mode. If the instrument recognizes the
value is within tolerance, new calibration data will be written into the memory and
the calibration is complete.
MODEL 314 DATALOGGING HUMIDITY TEMPERATURE METER
6
5.3 Notes on Humidity and Temperature Calibrations
1. While performing the humidity calibration, the environment should be maintained at
stable conditions (i.e. constant temperature and constant humidity) to optimize the
accuracy.
2. During either calibration, pressing the button at any time will return the
instrument to the normal operating mode, and no calibration data will be changed.
3. To restore factory default calibration values, press the HOLD and REC buttons
simultaneously at any time while in the calibration mode.
4. Whenever the probe is inserted into a standard humidity cavity or
temperature-controlled chamber, always allow at least 20 minutes to ensure
ambient conditions have stabilized.
5. Always begin the humidity calibration process with the 32.8% RH@25°C standard
cavity and the temperature calibration process with the 0°C (32°F)
temperature-controlled chamber. For maximum efficiency, insert the probe into the
conditioned environment 20 minutes before applying power to the instrument and
starting the calibration process.
6. During the calibration, all displayed readings are based on pre-process
calibration data.
7. The ‘Auto Power Off’ function is disabled during calibration, but is automatically
restored upon completion.
8. During the calibration, the temperature is fixed on the °F scale and it is
not selectable.


