


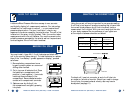
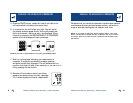
If the exhaust velocity range is not within 2 to 5 mmHg, make
the following adjustment with the unit turned off:
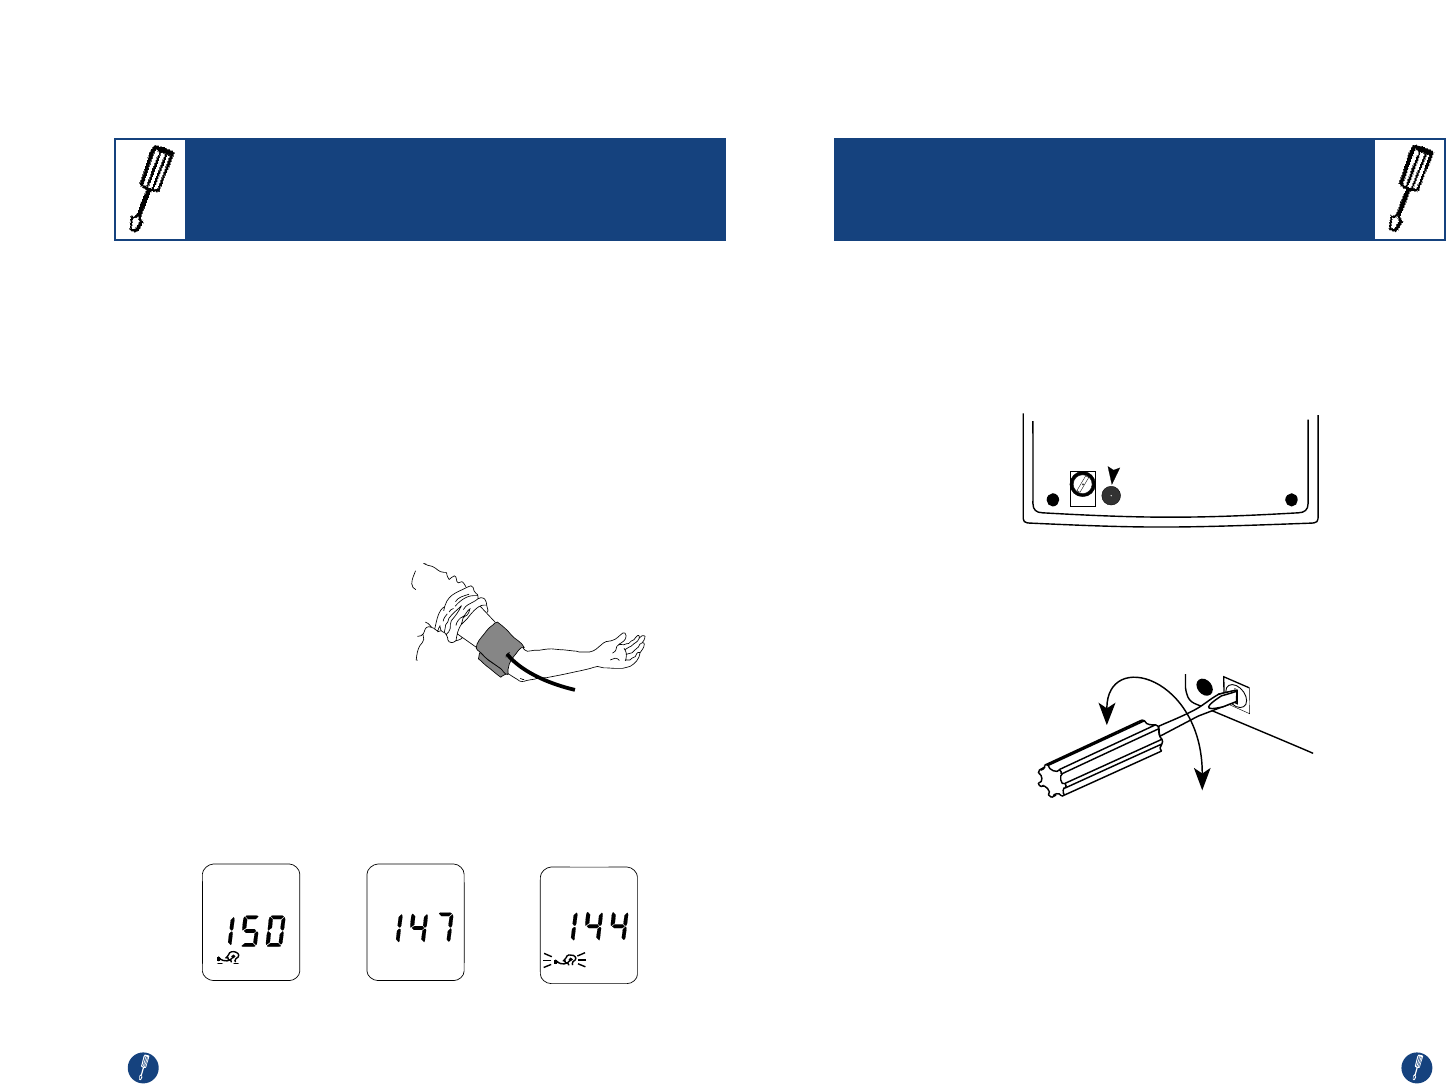
1. With the edge of your fingernail, peel off the thin black plastic
disk covering the adjustment screw. If there is no thin plastic
disk, proceed to step 2.
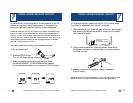
2. Using a small screwdriver, rotate adjustment screw about
45 degrees clockwise (to raise the rate) or counterclockwise
(to lower the rate).
3. Repeat the test until the exhaust velocity is between
2 and 5 mmHg.
NOTE: Once the monitor is adjusted to a new cuff size, further adjust-
ments should not be required unless cuff size is changed again.
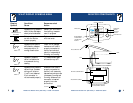
REMOVE THE COVER
FROM THE
ADJUSTMENT SCREW
CHECK/ADJUST EXHAUST VELOCITY
Exhaust velocity is the rate at which the air pressure in the cuff
deflates during the course of measurement. It is preset at the
factory and generally does not need any further adjustment.
NOTE: The exhaust rate of your monitor was preset and tested at the
factory to ensure proper measurement. The rate set is dependent on
cuff size, not arm size. If using a cuff other than the one shipped with
the unit, you may need to adjust the exhaust velocity rate. There is no
need to adjust exhaust velocity when changing between a medium
cuff and a large cuff with a valve.
To check the exhaust velocity rate, proceed as follows:
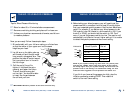
1. Put on the arm cuff.
2. Press the START button.
The unit will begin taking a reading.
3. Watch the display screen as the cuff deflates. When
the MEASUREMENT IN PROGRESS symbol appears,
the numbers should decline in increments of 2 to 5 mmHg.
➠
➠
CHECK/ADJUST EXHAUST VELOCITY
11
12
LifeSource Health Line (Toll-Free): 1-888-726-9966LifeSource Health Line (Toll-Free): 1-888-726-9966