22
106548-CA (9437)
Kohler Co., Kohler WI
16. OPTIONAL K-1507 APRON INSTALLATION
NOTE: For use with K-1205 and K-1206 models.
NOTICE: Before installing the optional K-1507
Apron: verify that both the finished floor and the bath
rim are level (and therefore parallel to each other). This
is necessary to ensure proper fit and appearance of the
apron. This apron should be installed after the finished
wall material is applied.
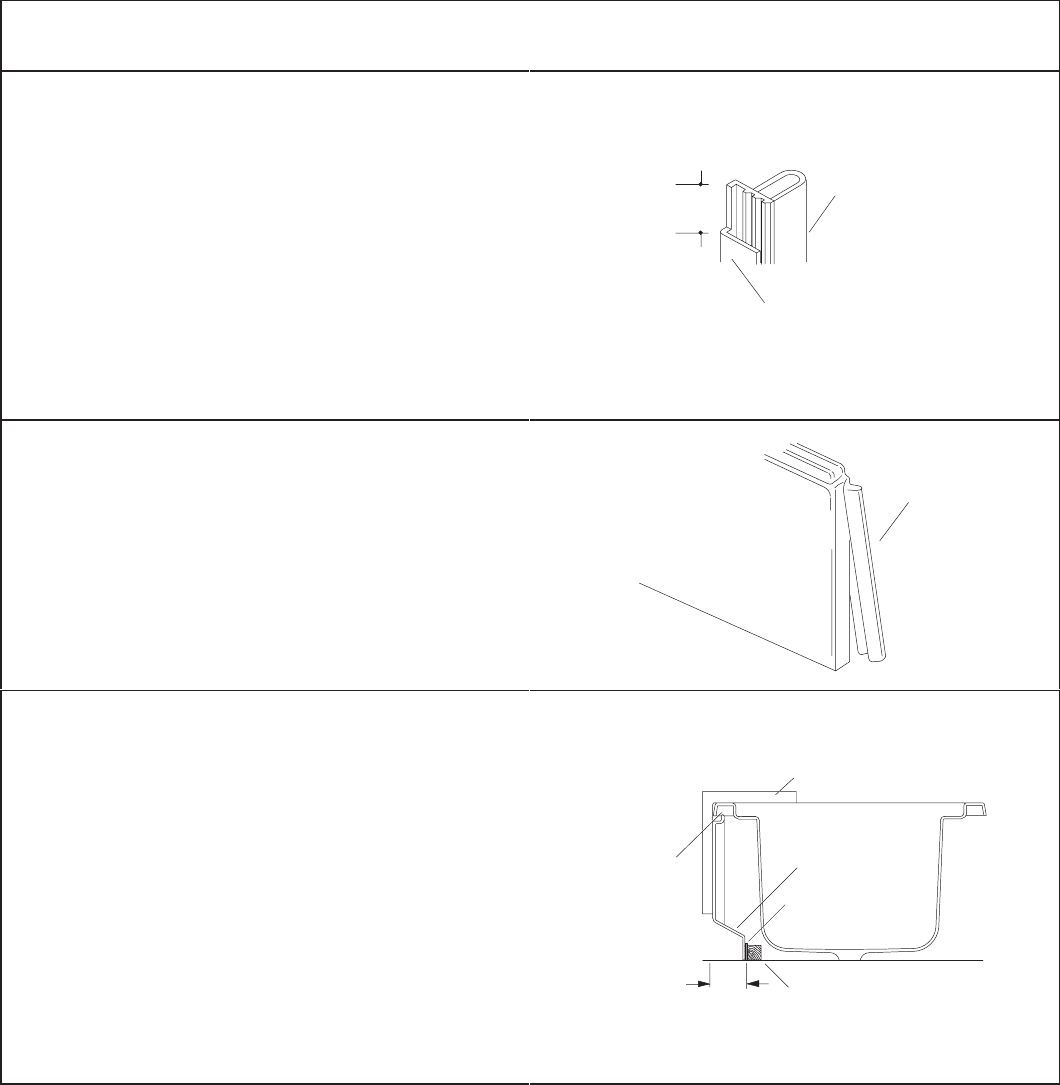
On one of the pieces of vinyl extrusion, use a hacksaw
and trim away or notch about 1” (25 mm) of the top end
rigid portion, leaving the flexible portion fully intact.
Repeat operation for the extrusion which will be installed
on opposite side of the apron. This procedure will
provide a better fit upon final installation.
Flexible
Rigid
1”
Install the vinyl extrusions on the right and left side of the
apron.
Vinyl Extrusion
Cut a 4’ length (approx.) of 2 x 2 batten board. Position
the board on the floor so that it will be centered between
the right and left sides of the apron, parallel with the bath
rim (apron side), and 3-3/4” (95 mm) inboard of the bath
rim outer edge (vertically-projected to the floor). Anchor
the 2 x 2 board to the floor.
Remove the mating half of each velcro strip from the
bottom of the apron. Staple the velcro strips to the front
face of the 2 x 2 board.
Carefully insert the top lip of the apron into the extrusions
on the underside of the bath rim. Press the base of the
apron securely onto the velcro strips of the 2 x 2 board.
NOTE: The apron is removable to allow limited ser-
vice access, if required.
Carpenter’s Square
Velcro Strip
Apron
Bath Rim
Extrusion
2 x 2 Board
3-3/4”


