USE AS A MICROSCOPE
(Requires optional 10x eyepiece tube)
1.Rotate the light diffusing lens (item #6) until it is under the light beam.
2.Place the unit in the horizontal position.
3.View the specimen through the 10x eyepiece tube. (optional accessory for this
model)
4.Bring into focus using the focusing knob (item #9)
MODEL TYRO
OPERATING INSTRUCTIONS
Instructions covering the use of the Ken-A-Vision Microprojector Model Tech A-11
apply except for the following:
1.Under”Vertical Projection” discard #4.
2.Under”Vertical Projection” discard #8.
LIGHTPOLARIZATION
1.Rotate the polarizing lens/analyzer (item #5-darker lens and #14) until the lens
es are beneath the light beam.
2.Place a slide containing polarizing material on the stage item (item#8).(Option to
prepare a slide, crumple a small amount of cellophane from a cigarette wrapper, stick
it to a strip of scotch tape approximately 2 inches long; then place it on a slide).
3.Bring into focus and change colors by turning the polarizing lens/analyzer.
USEASAMICROSCOPE
(requires optional 10x eyepiece tube)
1.Rotate the light diffusing lens (item#6-white) until it is under the light beam.
2.Place the unit in the horizontal position.
3.View the specimen through the 10X eyepiece tube. (Purchase as an accessory.)
4.Bring into focus using the focusing knob (item#9).
LAMP REPLACEMENT- ALL MICROPROJECTORS
1.When a lamp burns out, the switch MUST be placed in the “off”
position and the unit UNPLUGGED.
2.DO NOT replace until lamp has cooled.
3.Remove the lamp housing cap screws (item#2), lift off the lamp housing cap
(item #1), and replace the defective lamp. Use KAVGEEKL 150W lamp.Use as
soft cloth when replacing the lamp - Do Not touch with your bare hands
KEEP COVERED WHEN NOT IN USE -DUST IS ITS ENEMY
ACCESSORIES
(available from the factory)
KAVOL065 6.5mm Lens (43x) KAVOL010 10mm Lens (20x)
KAVOL016 16mm Lens (10x) KAVOL030 30mm Lens (4x)
KAVEP001 10x Eyepiece Tube T5045 Mechanical Stage
KAVGEEKL Lamp (Quartz Iodine 150 watt KAVEXPM Classroom Experimental Manual
KAVSCOACT - Laboratory Activity Book T5090 - Vinyl Dust Cover (large)
MICROPROJECTOR OPERATING INSTRUCTIONS
The microprojector will project either horizontally or vertically. When
used with a large group or entire class, project from the horizontal
position. For small groups or an individual, projectect vertically. Use
whenever possible, as everyone sees the same image, making it ideal
for study, discussions, and lectures.
VERTICAL PROJECTION
1. Turn the switch to the “ON” position.
2. Place a white sheet of paper between the legs of the base.
3. Rotate lenses (item #5 and #6)and mirror (item #15), so the light
beam will not be obstructed.
4. Rotate revolving lens turrent (item #10)
containing the three lenses,
(item #11) is positioned over until the 16mm lens so the light beam
penetrates it.
5. Rotate the Dust Proof Revolving disk (item #14)until the RED
“C”
on the side of the disk is directly under the REDline on your upper
disk.
6. Place a specimen slide between the prongs of the mechanical stage
(item #7) or under the stage clips, and center it under the light.
7. Using the focusing knob (item #9), at either side, lower the stage
(item #8)to the lowest position and then reverse the direction until
the specimen is brought into focus.
8. To use the 5x Wide Field auxiliary lens, rotate the revolving dust
proof revolving disk (item #14)until the RED“A” is under the RED
line on the upper disk.
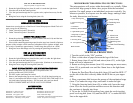
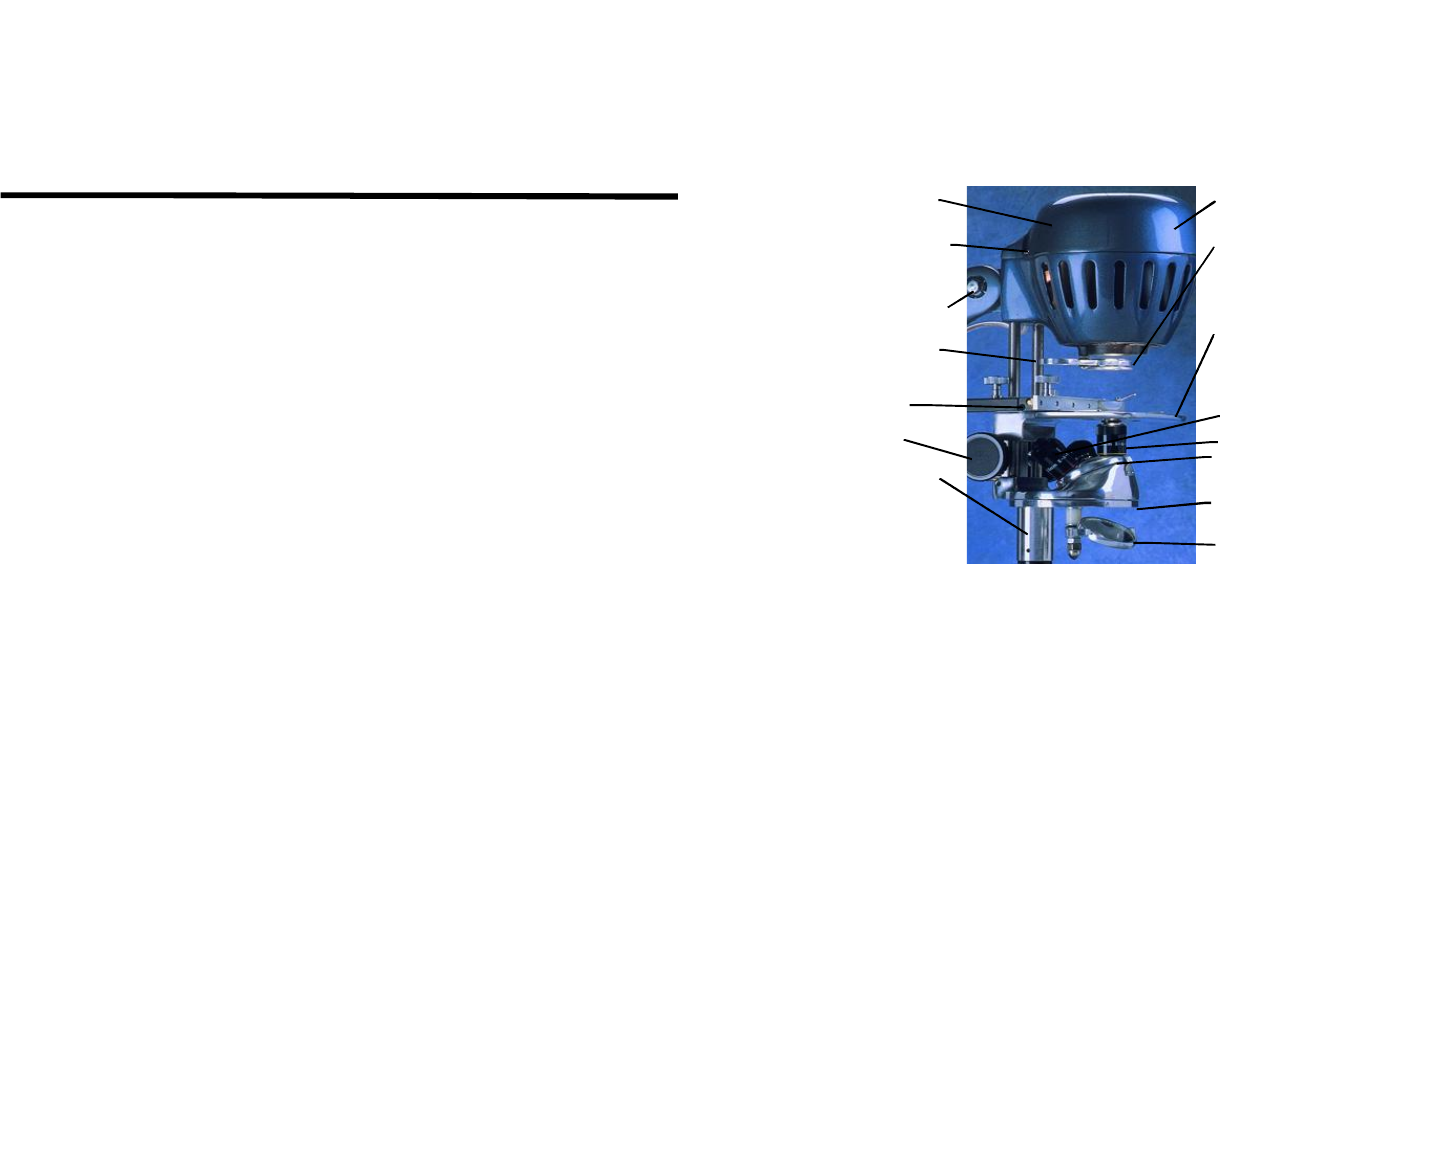
4. Lamp Housing
6. Polarizing Lens
Analyzer
8. Stage
11. 16mm Lens
12. 10mm Lens
13 6.5 mm Lens
10. Revolving Lens
Turret
14. Dust Proof Revolving
Disk
15. Mirror
1. Lamp Housing Cap
2. Lamp Housing Cap
Screw
3. Horizontal
Positioning Tension Bolt
5. Light Diffusing Lens
7. Stage Clip or Optional
Mechanical Stage
9.Focusing Knob
16. 10x Eyepiece Tube
Model X1000-1


