


SECTION 7—BATTERIES
Part No 1143150 53 TDX™ Wheelchairs
Removing/Installing the Batteries From/Into the
Wheelchair
Removing the Battery Door and Rear Shrouds
CAUTION
Place the wheelchair in a well ventilated area where work can be performed with-
out risking damage to carpeting or floor covering.
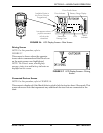
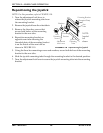
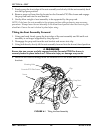
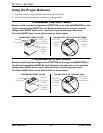
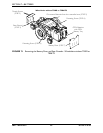
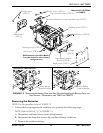
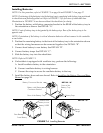
NOTE: For this procedure, refer to FIGURE 7.1 on page 54 and FIGURE 7.2 on page 55.
1. Verify the joystick On/Off switch is in the Off position.
2. Remove the two thumb screws that secure the rear shroud to the wheelchair.
3. Remove the rear shroud from the wheelchair.
4. TRRO and TRBKTS Options Only - Perform the following steps:
A. Remove two thumb screws that secure the top controller shroud (FIGURE 7.2) to
the battery box.
B. Remove the top controller shroud from the battery box.
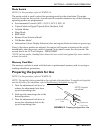
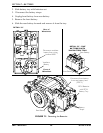
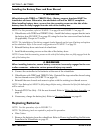
5. Formula PTO Plus ONLY - Tilt the PTO Plus back. Refer to Tilting the Seat Assembly
on page 49.
6. Remove both mounting screws from side of battery door.
7. Remove the battery door from the front of wheelchair.
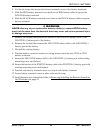
8. TRRO and TRBKTS Options Only - Perform the following steps (FIGURE 7.2):
A. Remove the four screws and four locknuts (if applicable) that secure the battery
support bracket to the battery box.
B. Remove the battery support bracket.
9. Disconnect the controller from the batteries at the rear of the wheelchair.
10. Remove the batteries. Proceed to one of the following procedures:
• Wheelchairs without Elevate - Removing the Batteries
on page 55.
• Wheelchairs with Elevate - Removing/Installing the Batteries From/Into the
Wheelchair on page 53.