


Installing Front Riggings on the At’m 2 Part No 1130250
4. Insert the proper (right or left) front rigging support bracket into the seat frame
tube until two (2) of the four (4) mounting holes on the front rigging support
bracket are aligned with the two (2) mounting holes in the seat frame tube.
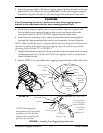
CAUTION
Two (2) mounting screws are used to secure the front rigging support
bracket to the seat frame tube for any mounting position used.
5. Install the existing mounting screw, coved washers, spacers, washers and
locknut that secure front seat support tube to the seat frame tube in the
orientation noted in STEP 2. DO NOT tighten locknut at this time.
6. Install the new mounting screw, spacer and locknut (hardware supplied)
through the large mounting hole on the seat frame tube. Securely tighten.
NOTE: Make sure that the spacer is aligned with the large mounting hole in the seat frame
tube and is properly seated against the front rigging support bracket during and after
tightening. Refer to Detail “A” of FIGURE 1.
7. Tighten the locknut securing the front seat tube to the seat frame until it is snug
and then turn an extra 1/8-turn. DO NOT over-tighten as this is a pivot joint
when folding the seat.
8. Repeat STEPS 1-7 to install the front rigging support bracket on the other side.
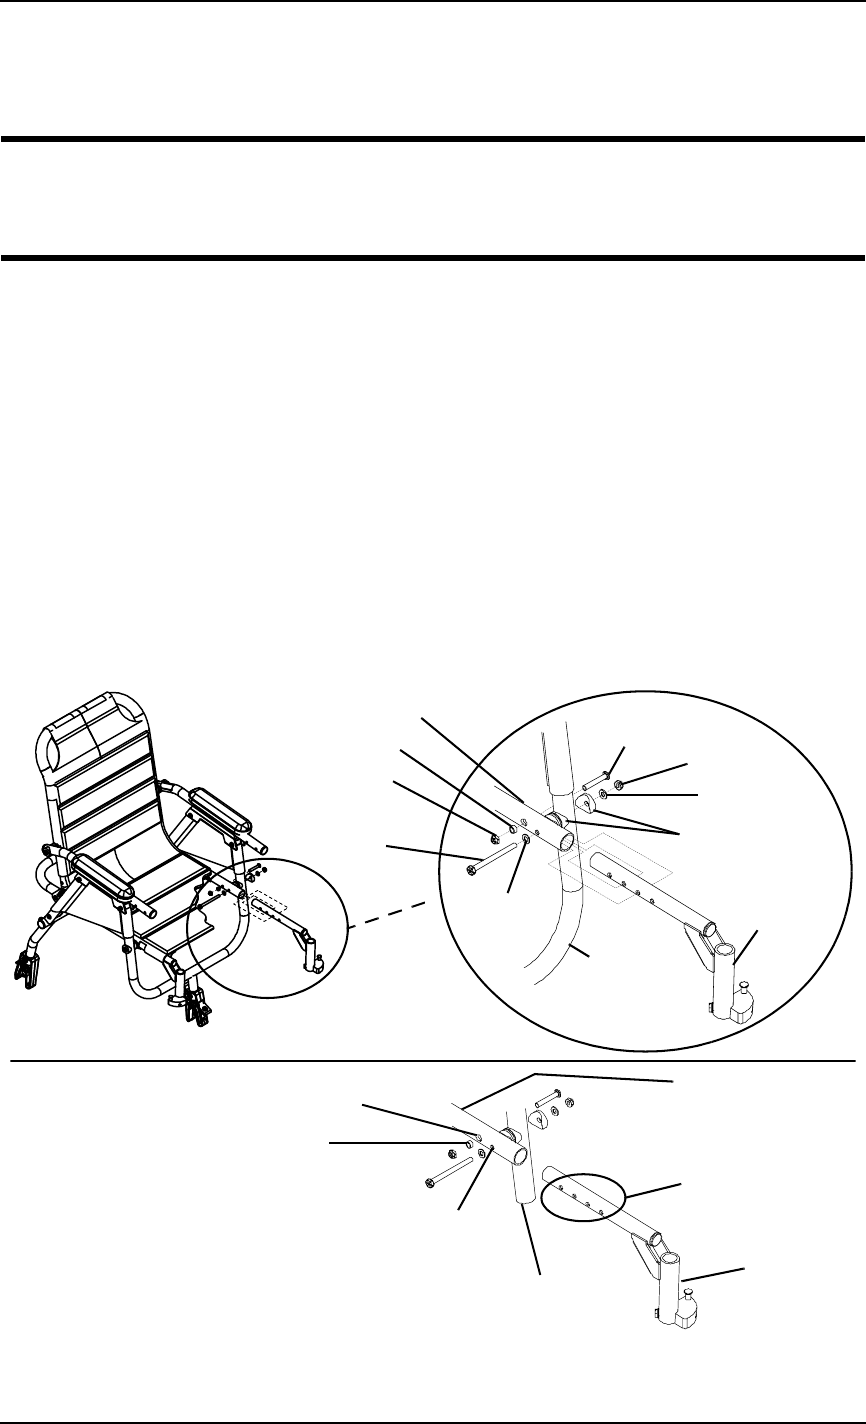
FIGURE 1 Installing Front Rigging Support Brackets
Coved Washers
Spacer
Spacer
Locknut
Locknut
Existing Mounting
Screw
New Mounting
Screw
Spacer
Front Rigging
Support
Bracket
Front Seat
Support
Tube
Seat Frame Tube
Front Rigging
Support
Bracket
Spacer
Front Seat
Support Tube
Seat Frame Tube
*Large
Mounting Hole
*Small
Mounting Hole
Mounting Holes
on Front Riggings
Support Bracket
DETAIL “A”
*NOTE: Mounting hole
arrangement on 16-inch wide
seat shown. On the 18-inch
wide seat, the mounting hole
positions are reversed.