


5
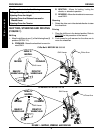
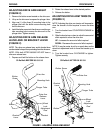
ADJUSTING DRIVE ARM HEIGHT
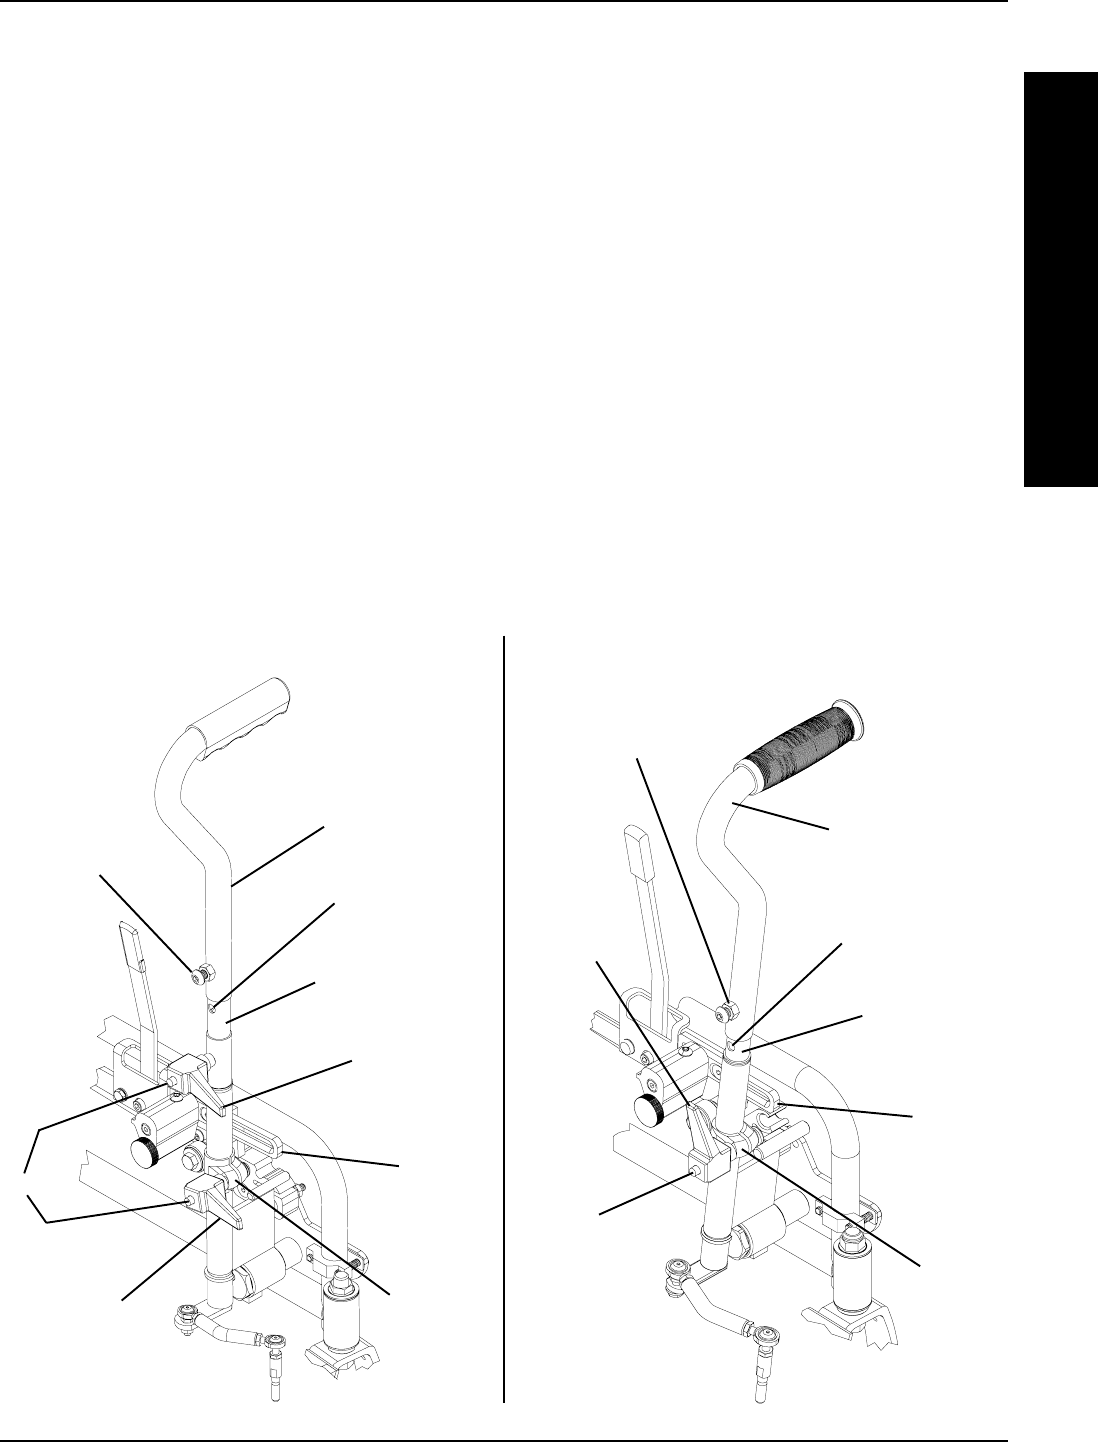
(FIGURE 2)
1. Remove the button screw located on the drive arm.
2. Lift up on the drive arm to expose the plunger tube.
3. Align one (1) of the three (3) mounting holes in the
plunger tube with the button screw mounting hole
on the drive arm.
4. Install the button screw into the drive arm and plunger
tube mounting hole to secure the drive arm to the
plunger tube. Tighten securely.
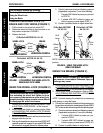
ADJUSTING DRIVE ARM RELEASE
LEVER AND/OR BRACKET LEVER
(FIGURE 2)
NOTE: The drive arm release lever and/or bracket lever
can be rotated to keep it from protruding from the drive arm.
NOTE: CLDs built AFTER 09/05/00 DO NOT have a
drive arm release lever.
1. Depress and hold the button on the release lever.
Plunger Tube
Mounting Hole
Button
Screw
Drive Arm
FIGURE 2 - ADJUSTING DRIVE ARM HEIGHT
D
R
I
V
I
N
G
2. Rotate the release lever to the desired position.
3. Release the button.
ADJUSTING DRIVE ARM TENSION
(FIGURE 2)
NOTE: Adjusting the drive arm tension will increase/re-
duce the amount of effort required to move the drive
arm.
1. Turn the bracket lever COUNTERCLOCKWISE to
loosen.
2. Slide the bracket up or down to adjust the amount of
effort required to move the drive arm.
UP - Increases the amount of effort required.
DOWN - Decreases the amount of effort required.
NOTE: It may be easier to pull up or push down on the
wheel lock adjustment lever to move the bracket up or
down.
3. Turn the bracket lever CLOCKWISE to tighten.
Tighten securely.
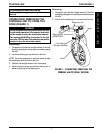
DRIVING PROCEDURE 1
Button
Drive Arm
Release
Lever
Bracket
Lever
Bracket
Wheel
Lock
Adjustment
Rod
CLDs Built BEFORE 09/05/00 CLDs Built AFTER 09/05/00
Plunger Tube
Mounting Hole
Button Screw
Drive Arm
Button
Bracket
Lever
Bracket
Wheel
Lock
Adjustment
Rod