6
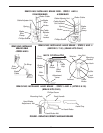
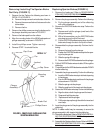
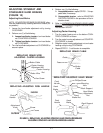
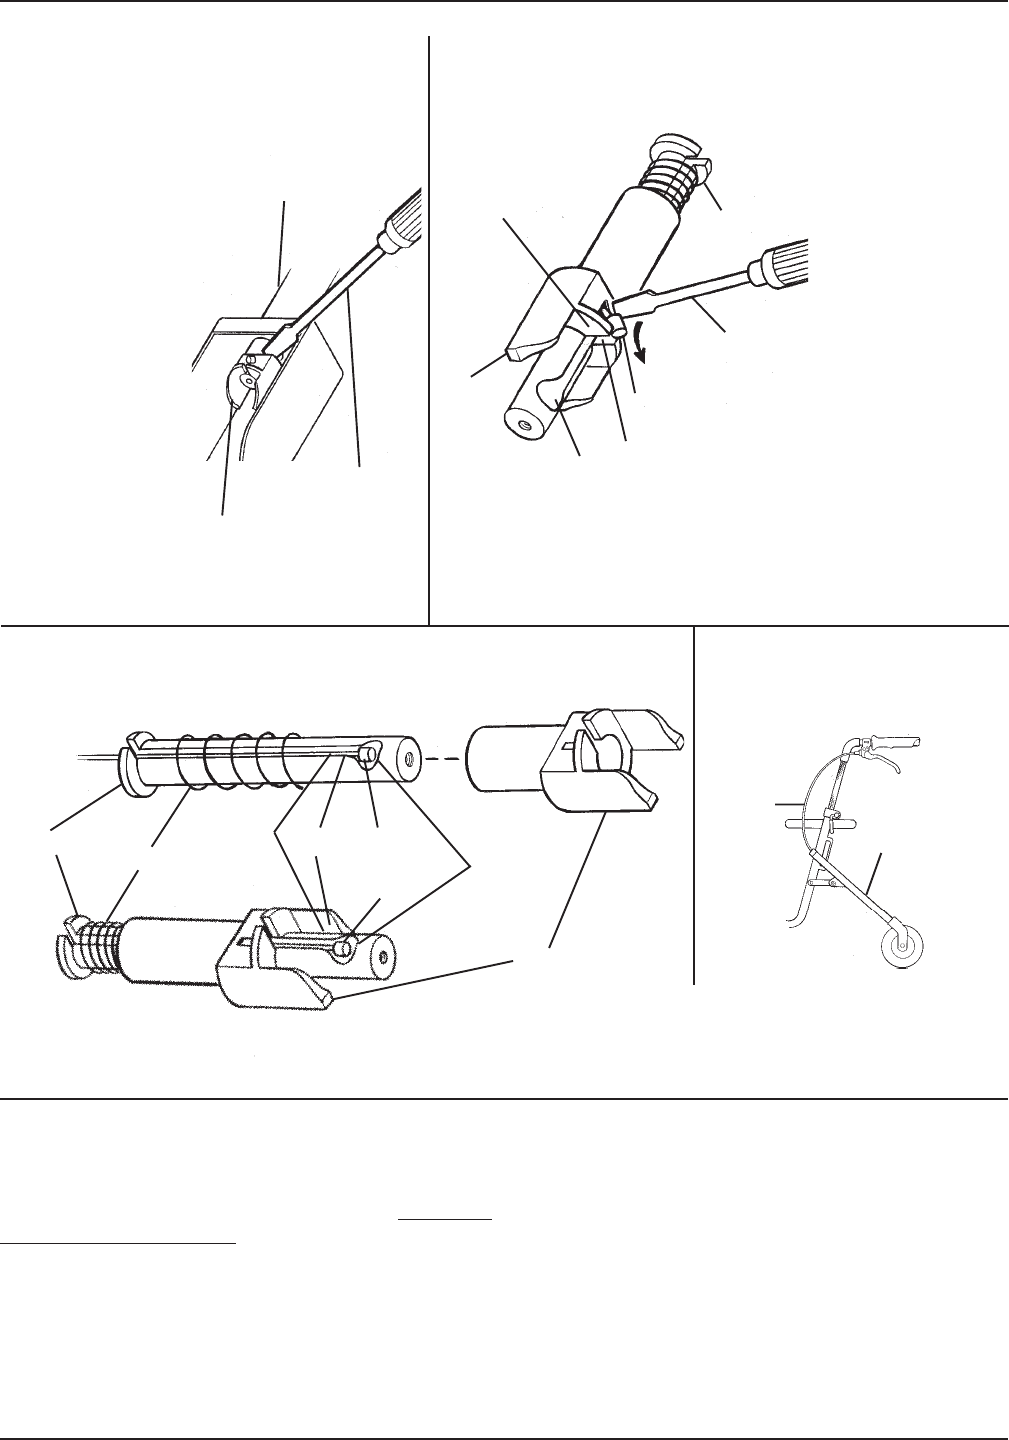
DISASSEMBLING/ASSEMBLING THE PLUNGER
ASSEMBLY - STEPS 4 AND 7
FIGURE 4 - REPLACING SPARTAN CANES AND BRAKES - REPLACING SPARTAN BRAKES
Insert
Plunger
Spring
Brake
Wire
Brake
Wire
Stop
Slot
Opening
Brake Wire Stop
Flat
Screwdriver
Plunger
Insert
Lip
Slot Opening
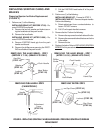
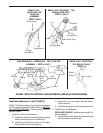
REMOVING/SECURING THE
BRAKE WIRE STOP
- STEPS 3 AND 8
Plunger
Assembly
Rear Frame
Flat
Screwdriver
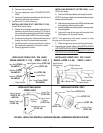
REMOVING/
INSTALLING THE
PLUNGER
ASSEMBLY
- STEPS 2 AND 9
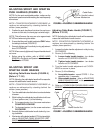
REMOVING/INSERTING
THE BRAKE CABLE
- STEPS 5-6
Rear Frame
Brake
Cable
Slot
Slot
Assembling Spartan For Use (FIGURE 5)
NOTE: The Spartan rollator should only be assembled
AFTER replacing spartan brakes. Refer to
REPLAC-
ING SPARTAN BRAKES in this procedure of the in-
struction sheet.
1. Install tire. Perform the following:
A. Position the tire so the mounting holes are aligned
with the mounting holes in the rollator leg.
B. Install the screw from the inside of the rollator,
through both sets of mounting holes.
C. Secure the tire to the rollator with the locknut.
Tighten securely.
D. Install the cap covers over the screw and locknut.
2. Perform one (1) of the following:
INSTALLING CANE KIT - Install the push handle. Per-
form the following:
A. Remove the hex bolt, washer and locknut securing
the hand brake to the push handle.


