Part No 1167433 3 Raised Toilet Seat
Model 1302RTS - Raised Toilet Seat with Adjustment Knob and Arms
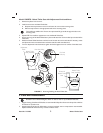
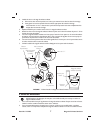
1. Remove the plastic from the arms.
2. Install the arms onto the Raised Toilet Seat.
A. Depress both snap buttons on the arm and insert the arm into the mounting tubes.
B. Slide the snap buttons to the appropriate holes in the mounting tubes.
3. Repeat STEP 2 to install the opposite arm onto the Raised Toilet Seat.
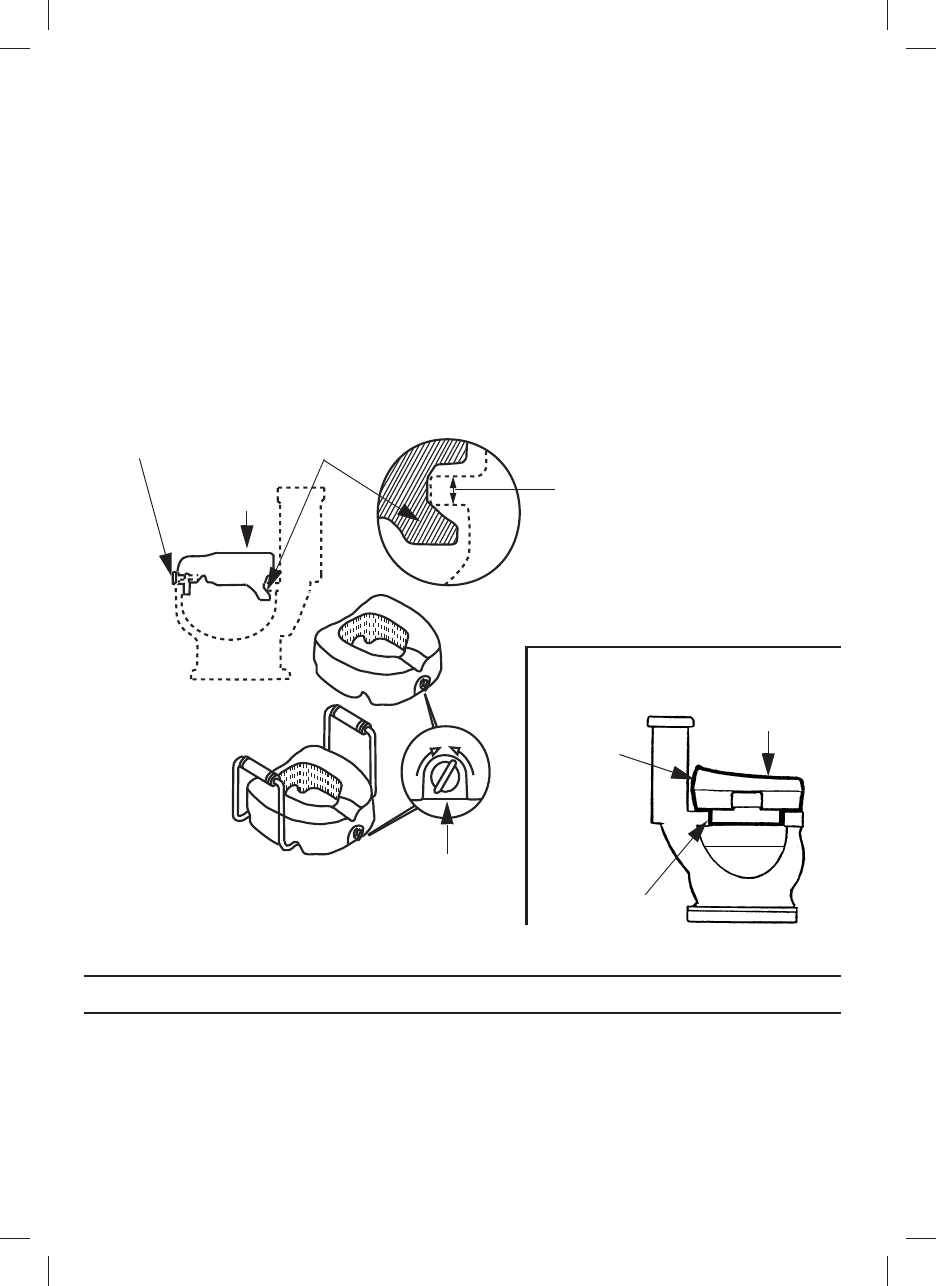
4. Put the rear wings of the Raised Toilet Seat in place underneath the 1-3/4 inch toilet lip at the back of the
toilet bowl.
5. Rotate the Raised Toilet Seat down until the front of the seat rests on the toilet bowl. If necessary, rotate
the adjustment knob counterclockwise until the bracket fits inside the toilet bowl.
6. Turn the adjustment knob clockwise to tighten the bracket against the inner surface of the toilet bowl.
FIGURE 1 Removing/Installing the Raised Toilet Seat
4 Care and Maintenance
1. Regular cleaning of the Raised Toilet Seat is recommended. Wipe all surfaces with a damp cloth and allow
all surfaces to dry before use.
2. Regular inspection of parts for deformation, corrosion, breakage, wear or compression is recommended.
Replace the Raised Toilet Seat if any of these conditions exist.
L
There will be an audible “click”. Ensure the snap buttons fully protrude through the holes in the
mounting tubes.
L
DO NOT use an abrasive detergent, cleaner or cloth to clean or dry the Raised Toilet Seat.
T
I
G
H
T
E
N
L
O
O
S
E
N
Inner Ring
Tall end of
Raised Toilet
Seat
DETAIL “A”
Raised Toilet
Seat (installed)
Raised Toilet
Seat (installed)
Adjustment
Knob
Rear Seat Wing
1-3/4 inch
Toilet Lip
Adjustment
Knob


