


Knee Walker 2 Part No 1160852
Installing/Adjusting the Push Handle
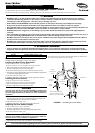
NOTE:Forthisproc edure,refertoFIGURE 2.
CAUTION
The side of the push handle with the colored marking MUST be
inserted into the frame tube on the same side as the user’s injury.
If the user’s injury is on the right side:
1. Pressthesnapbuttonsandinsertthepushhandleintotheframetubes.
2. Slidethepushhandletooneofsev enheightadjustment holes.
NOTE:Therewillbeanaudible“click”.
3. Snapthebrakeleadintothebrakeleadbrackets.
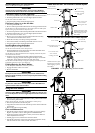
If the user’s injury is on the left side:
1. Turnthepushhandleover.
2. Removeandsnapthebrakelead bracket sont o theo ppositeframe tu be.
NOTE:Makesur ethatthebrakeleadisontheoutsideofthekneewalkerframe
beforeinsertingthepushhandleintotheframetubes.
3. Pressthesnapbuttonsandinsertthepushhandleinto
theframetubes.
4. Slidethepushhandletooneofsev enheightadjustment holes.
NOTE:Therewillbeanaudible“click”.
5. Removetwoscrewsthatsecurethepushhandlebrakeassembly
aroundtheframetube.Retainthescrews.
6. Rotatethe assemblyoverthetopofthepushhandle.
7. Securetheassemblyaround
thepush handlewith twoscrews.
8. Snapthebrakeleadintothebrakeleadbrackets.
Installing/Removing the Basket
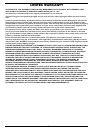
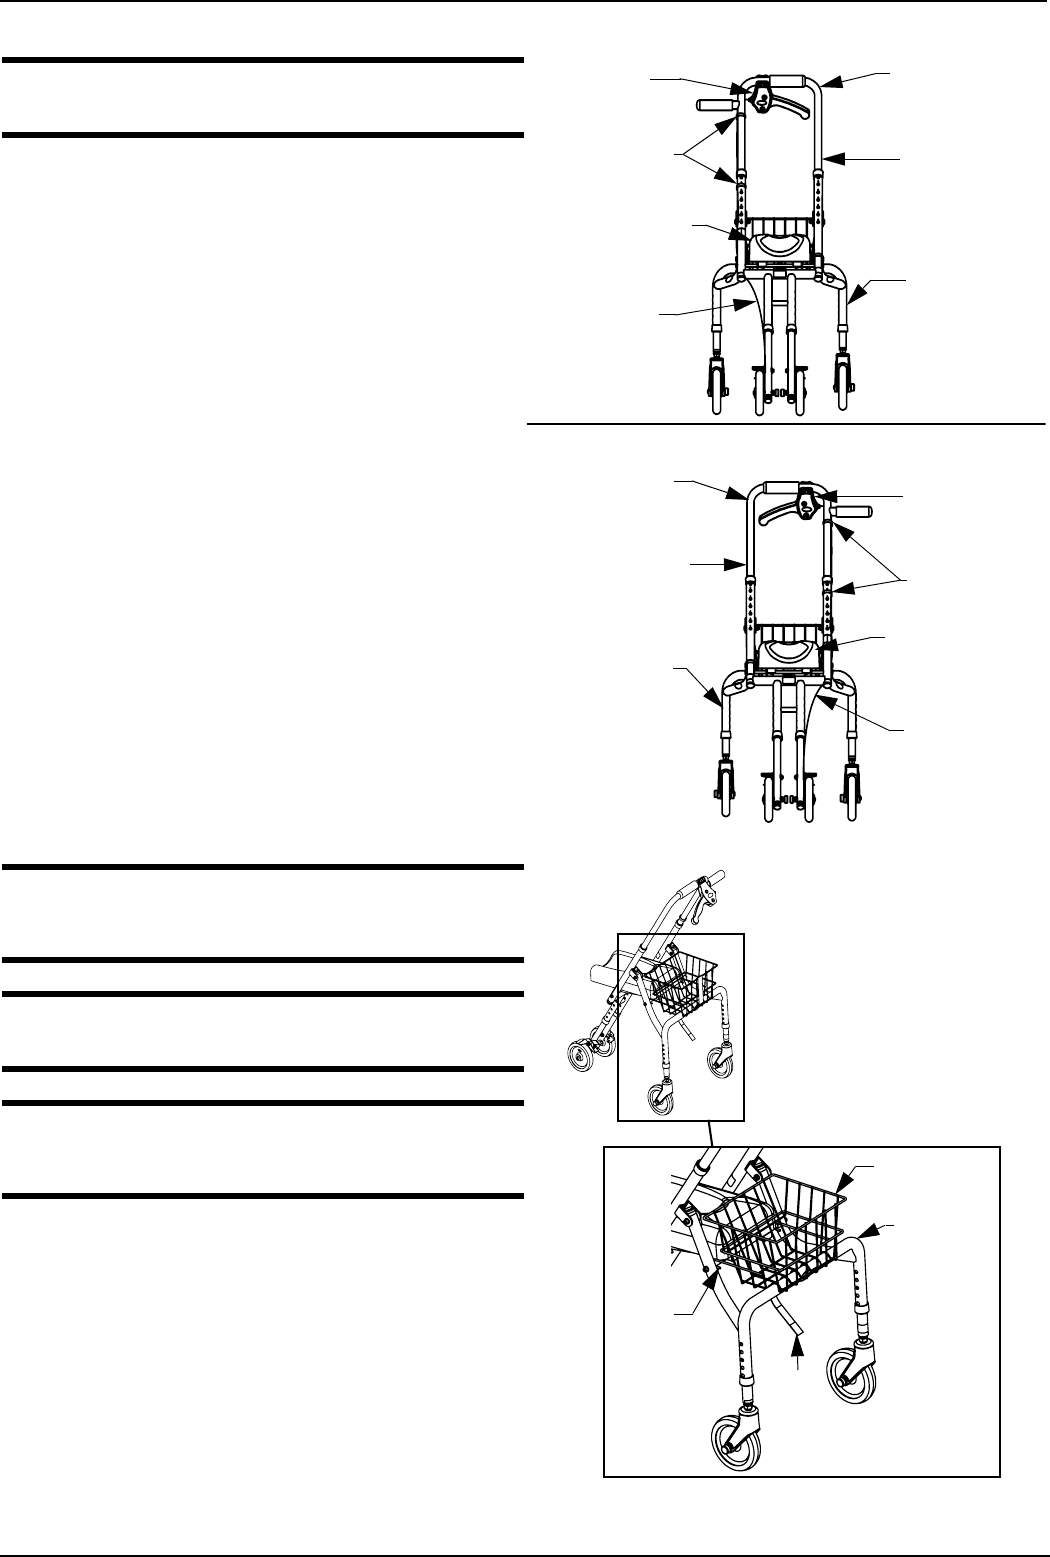
NOTE:Forthisproc edure,refertoFIGURE 3.
NOTE:Toremovethebasket,reversethisprocedure.
1. Putthebaskethooksonthe frametubeandrotateth ebasketdown
untilthebasketrestsontheframetube.
NOTE:Makesur ethatbothbaskethooksarecompletelyseatedontotheframe
tubeandthe
basketsitslevel.
2. Wrapth estraparoundtheframetubeandthro ughthebasket.
Continuewrappinguntiltheentirelen gthofthe strapisaroundthe
frametube. Applyslightpressuretotheendofthestrap .
NOTE:Makesur ethatthestrapiswrappedcompletelyar oundtheframetube
andthat
theendofthestrapissecurebeforeuse.
Folding/Opening the Knee Walker
NOTE:Toopenthekneewalker ,reversethisprocedure.
1. Engagethebrakesontherearcasters.
2. Removethebasket.
CAUTION
Pinch points exist between the knee pad and knee walker frame.
Make sure hands and body are clear of all pinch points before folding
the knee walker.
3. Liftuponthebackendofthekneepadtofo ld thekneewalker.
CAUTION
Lay the knee walker down on a flat, stable surface. DO NOT lean
against a wall or other vertical surface.
Using the Knee Walker
CAUTION
The knee walker MUST be level before use. Make sure that the cast-
ers are all adjusted to the same height adjustment holes in the frame
tubes.
1. Beforetheus erappliesweighttotheknee walker,pullthebrakehandle
intowardsthepushhandle.
NOTE:Tolockthebrake,pushdownonthehandle,toreleasepullup.
2. Placetheinjuredlimbontothekneepad.
3. Alignthefrontoftheuser’skneewiththetopof
thecutoutintheknee
padcu sh i on .
4. Releasethebraketobegi nmobility.
Care and Maintenance
• P eriodi callyinspectallpartsofthekneewalkerforwearordamage.
Replaceanybroken,wornordamageditemsIMMEDIATELY.
•Verifytheop eratio nofthebrakes.ContactyourInv acaredealerfor
brakeadjustmentifnecessary.
•Ifhandgripsareloose,DONOTuse thekneewalker.
• P eriodi callyinspectthecastersandcaster
stemsfortightness.Verify
thatthewheelsarefreeof hair ,lintandotherdebr is.
FIGURE 2 Installing/Adjusting the Push Handle
FIGURE 3 Installing/Removing the Basket
KNEE WALKER SET UP FOR RIGHT-SIDED INJURY
KNEE WALKER SET UP FOR LEFT-SIDED INJURY
Colored Marking
on Push Handle
this side
Push Handle
Brake Assembly
Brake Lead Brackets
Colored Marking on Push
Handle this side
Push Handle
Brake Assembly
Brake Lead
Brackets
Front caster tube
with colored
marking this side
Front caster tube
with colored
marking this side
Push Handle
Push Handle
Brake Lead
Brake Lead
NOTE:Thisviewisfrom
thepatient’spointofview
whensteppinguptothe
kneewalker.
Knee Pad
Knee Pad
NOTE:Thisviewisfrom
thepatient’spointofview
whensteppinguptothe
kneewalker.
Basket
Hook
Basket
Strap
Frame Tube