CAUTION
Make sure the C-Clamp is securely lodged against
the socket assembly and cam BEFORE removing the
camlock.
2. SLOWLY tighten the C-clamp and push the cam UP
to release the camlock.
3. Remove the roll pin that secures the cam to the cam
lock and discard.
NOTE: The Button Head Socket Screw, washer and
locknut replace the roll pin.
4. Remove the camlock and washer
.
NOTE: Visually inspect the washer and roll pin be-
low the cam spring for wear and replace if necessary.
6. Install the new bronze washer over the cam.
WARNING
For proper operation of the patient lift base the
camlock MUST be pointing to the RIGHT when stand-
ing BEHIND the patient lift.
7. With the camlock pointing to the right, install the
camlock onto the cam.
8. Line up the holes of the cam and camlock and insert
the button head socket screw through the holes.
9. Install the 1/4-inch washer over the button head socket
screw.
10. Securely tighten the button head screw and washer
with the locknut provided in the kit.
11. SLOWLY, release the C-Clamp fom the cam.
REASSEMBLY (FIGURES 1 and 2)
WARNING
After reassembly and before use, make sure ALL
bolts and screws are tightened securely.
1. Reinstall the cover plate onto the socket assembly
with the screws provided.
2. Lower the base assembly onto all four (4) casters.
3. Re-Insert the base shifter handle into the cam lock
assembly at the back of the base.
4. Align holes of the base shifter handle and cam lock
assembly.
5. Tighten thumb screw to secure the base shifter handle
in place.
NOTE: This should prevent the base shifter handle
from being removed.
6. Match the notch at the BOTTOM of the mast assem-
bly with the TAB INSIDE of the socket of the base
assembly.
7. Re-insert the mast assembly into the sockets and onto
the TAB.
8. Turn the mast assembly to make sure that the notch
is locked on the TAB of the socket.
NOTE: If the mast does not turn, the mast is centered
and locked in place.
WARNING
Each time the mast is removed and returned to the
socket of the base, the mast MUST be locked into
the socket of the base assembly.
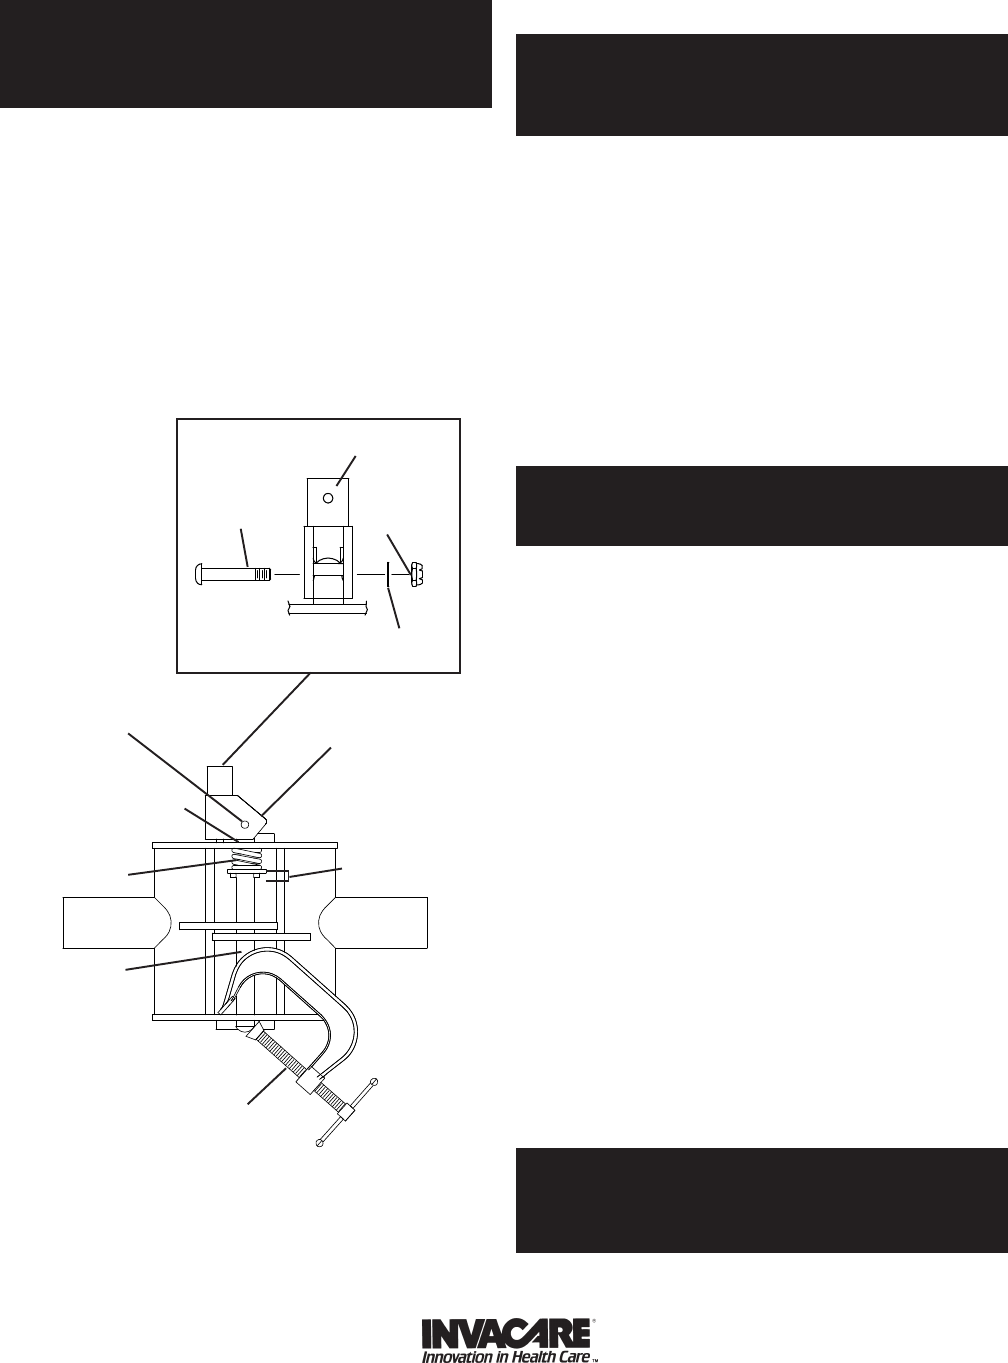
FIGURE 3 - INSTALLATION
899 Cleveland Street ● P.O. Box 4028 ● Elyria, Ohio 44036-2125 ● Phone 1-(800)-333-6900
Form No. 94-156 (1052249) (5/95) Printed in U.S.A.
C-Clamp
Cam
Cam Spring
Washer
Roll Pin
Camlock
Visually
inspect
washer and
roll pin
Locknut
Camlock
Button Head
Socket
Screw
1/4-inch
Washer


