


14 15
14 15
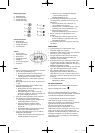
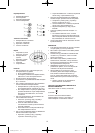
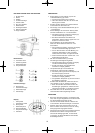
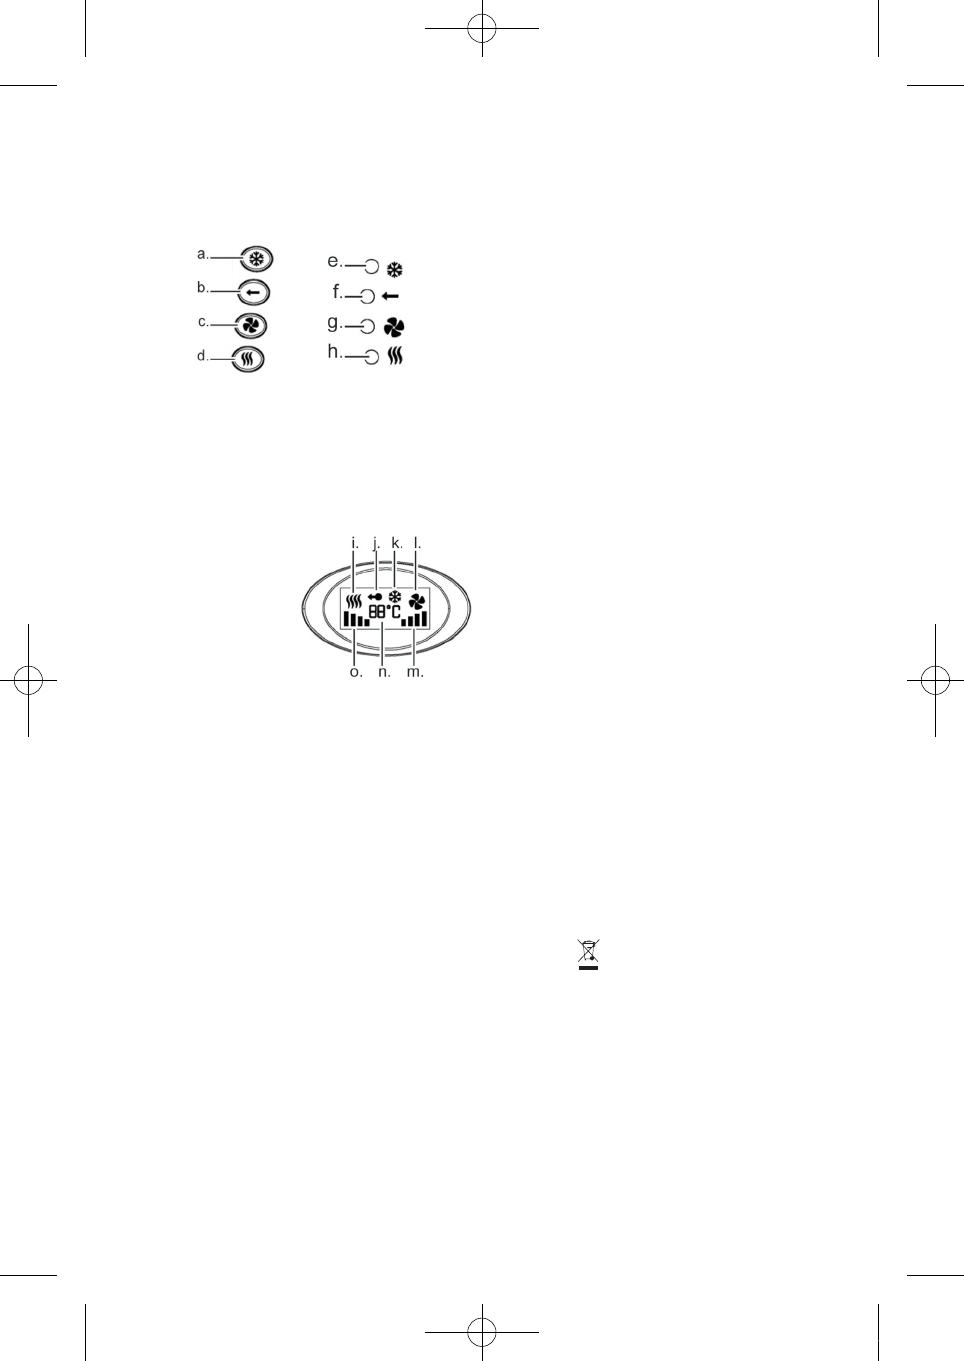
Control buttons
a. Cool shot button
b. Ionisation button
c. Speed button
d. Temperature button
Function indicator
e. Cooler indicator
f. Ionising indicator
g. Speed indicator
h. Heat indicator
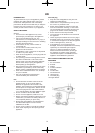
Display
i. Heat symbol
j. Ionising symbol
k. Cooler symbol
l. Speed symbol
m. Speed
n. Temperature
indication
o. Heat level
USE
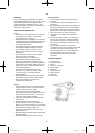
• Presstheairconcentrator(1)orthenger
diffuser (10) into position on the exhaust (2).
oThenozzlewillconcentratetheairow.
oThengerdiffuserdistributestheairthrough
many vents in a wider area.
• Insert the plug (9) in the mains socket and
switch on the power.
• Switch on the appliance by turning the on/off
button (6) to "I" (switched on).
• Press the cooler button (a) to activate or
deactivate the cooler function.
o The cooler symbol (k) is shown on the display
(4), and the cooler indicator (e) lights up.
o When the cooler function is switched on, the
appliance emits cool air. This is useful when
your hair is dry and needs to be set.
• Press the ionising button (b) to activate or
deactivate the ionising function.
o The ionising symbol (j) is shown on the
display, and the ionising indicator (f) lights up.
o This function prevents static electricity in the
hair and makes it soft and shiny.
o The ionising function may be used together
with the heat or cooler functions.
• Press the speed button (c) to set the speed of
the appliance.
o The speed symbol (l) is shown on the display,
and the speed indicator (g) lights up.
o There are 4 settings; the setting used is
shown on the speed indicator (m).
• Press the temperature button (d) to set the
temperature of the air emitted,
o The heat symbol (i) is shown on the display,
and the heat indicator (h) lights up.
o There are 4 settings; the setting used is
shown on the heat indicator (o).
o The temperature used is shown on the
temperature indicator (n) in the middle of the
display.
• Switch off by pushing the on/off button to the
"0" position.
o When the appliance is switched off, the latest
setting is saved so it can be used again when
the appliance is next switched on.
• The apparatus can be hung up using the loop (8)
at the bottom of the handle.
CLEANING
• Remove plug from the mains socket, and allow
the appliance to cool down before cleaning it.
• Never submerge the appliance in water, and no
water must be allowed to get into it.
• Clean the appliance by wiping it with a damp
cloth. A little detergent can be added if the
appliance is heavily soiled.
• Never use a scouring pad, steel wool or any
form of strong solvents or abrasive cleaning
agents to clean the appliance, as those may
damage the outside surfaces of the appliance.
• IMPORTANT! Allow to dry fully after cleaning
before using again. Do not use appliance if
damp.
• Opentherearlter(5)bypushingdownward
thengergripontheuppersideofthelter
andtiltingthelteroutanddown.Occasionally
removeanydustorhairfromtherearlterand
the air intake using a brush.
oCaution!Donotusewithouttherearlter
tted.
INFORMATION ON DISPOSAL AND RECYCLING
OF THIS PRODUCT
Please note that this Adexi product is marked with
this symbol:
This means that this product must not be disposed
of together with ordinary household waste, as
electrical and electronic waste must be disposed of
separately.
235014_IM.indd 15 2008-7-8 15:50:47