


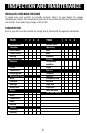
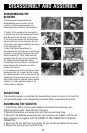

24
DISASSEMBLING THE
SCOOTER
The procedures for assembling and
disassembling are very similar for the
scooters. The following procedure is to
disassemble the scooter for transportation:
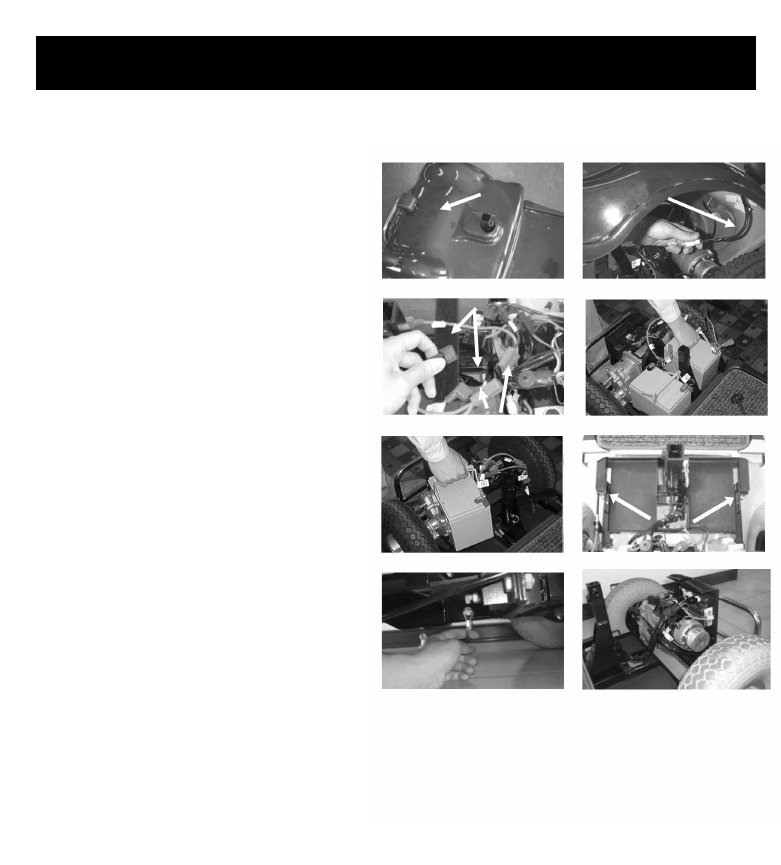
1. Switch off the scooter at the key ignition.
2. Unscrew the seat hand wheels and remove
seat. Be careful with the seat as it is heavy.
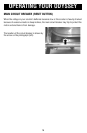
3. Lift up the rear shroud (A) and disconnect
the rear light loom at the connector (B) and
remove the rear shroud completely (as shown
in the photograph (B).
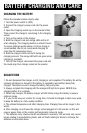
4. Next, Disconnect the batteries by
disconnecting the red connector from the red
connector (C) and black connector from the
black connector (D). Then, undo the hook-
and-loop strap (E) and remove the batteries
(F). Please see the photographs below.
5. Disconnect the main loom to separate the
wiring between the front and rear of the
scooter (not shown).
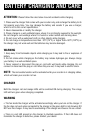
a. It is necessary to slacken off the two frame
tensioning bolts (G) in order that the locking
pin may be removed . Pull up and remove the
locking pin (H) and remove the two nuts and
bolts, which hold the separate chassis frames
together (I). Finally pull the chassis of the
scooter apart to separate.
SUGGESTION
The assembly process is essentially the disassembly process in reverse. First study the
text and photographs in the disassembly procedure before re-assembly the scooter.
ASSEMBLING THE SCOOTER
1. Push the two halves of the scooter together and reinsert the locking pin, also
tightening tension bolts . Reconnect the main loom.
2. Reinstall the batteries and secure them with the hook-and-loop strap.
3. Reconnect the batteries ensuring the two red connectors are together, and the two
black connectors are together. DO NOT CONNECT A RED CONNECTOR TO A BLACK
CONNECTOR.
4. Reconnect the rear light loom and replace the rear shroud and rubber shroud cover.
5. Replace the seat and secure with the knob.
A
C
H
I
D
B
E
F
C
A
B
G
DISASSEMBLY AND ASSEMBLY
F