


Page 3
4 Option 4:
DDNS: You can access the DVR through a static or dynamic IP address; however
a dynamic address can change from time to time. How often it changes will depend
on your Internet Service Provider. When the IP address changes, you can
determine your new IP address by going to www.myipaddress.com from the
computer attached to the same router as the DVR.
You can avoid these steps by getting a static IP address from your Internet Service
Provider so that your IP address does not change.
Another solution would be to use a dynamic domain name service to get a domain
name, and link it to your dynamic IP address. We suggest www.dyndns.com since
the DVR is setup to accept account information from this domain name service.
Create an account. Then to access the DVR through a dynamic domain name,
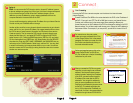
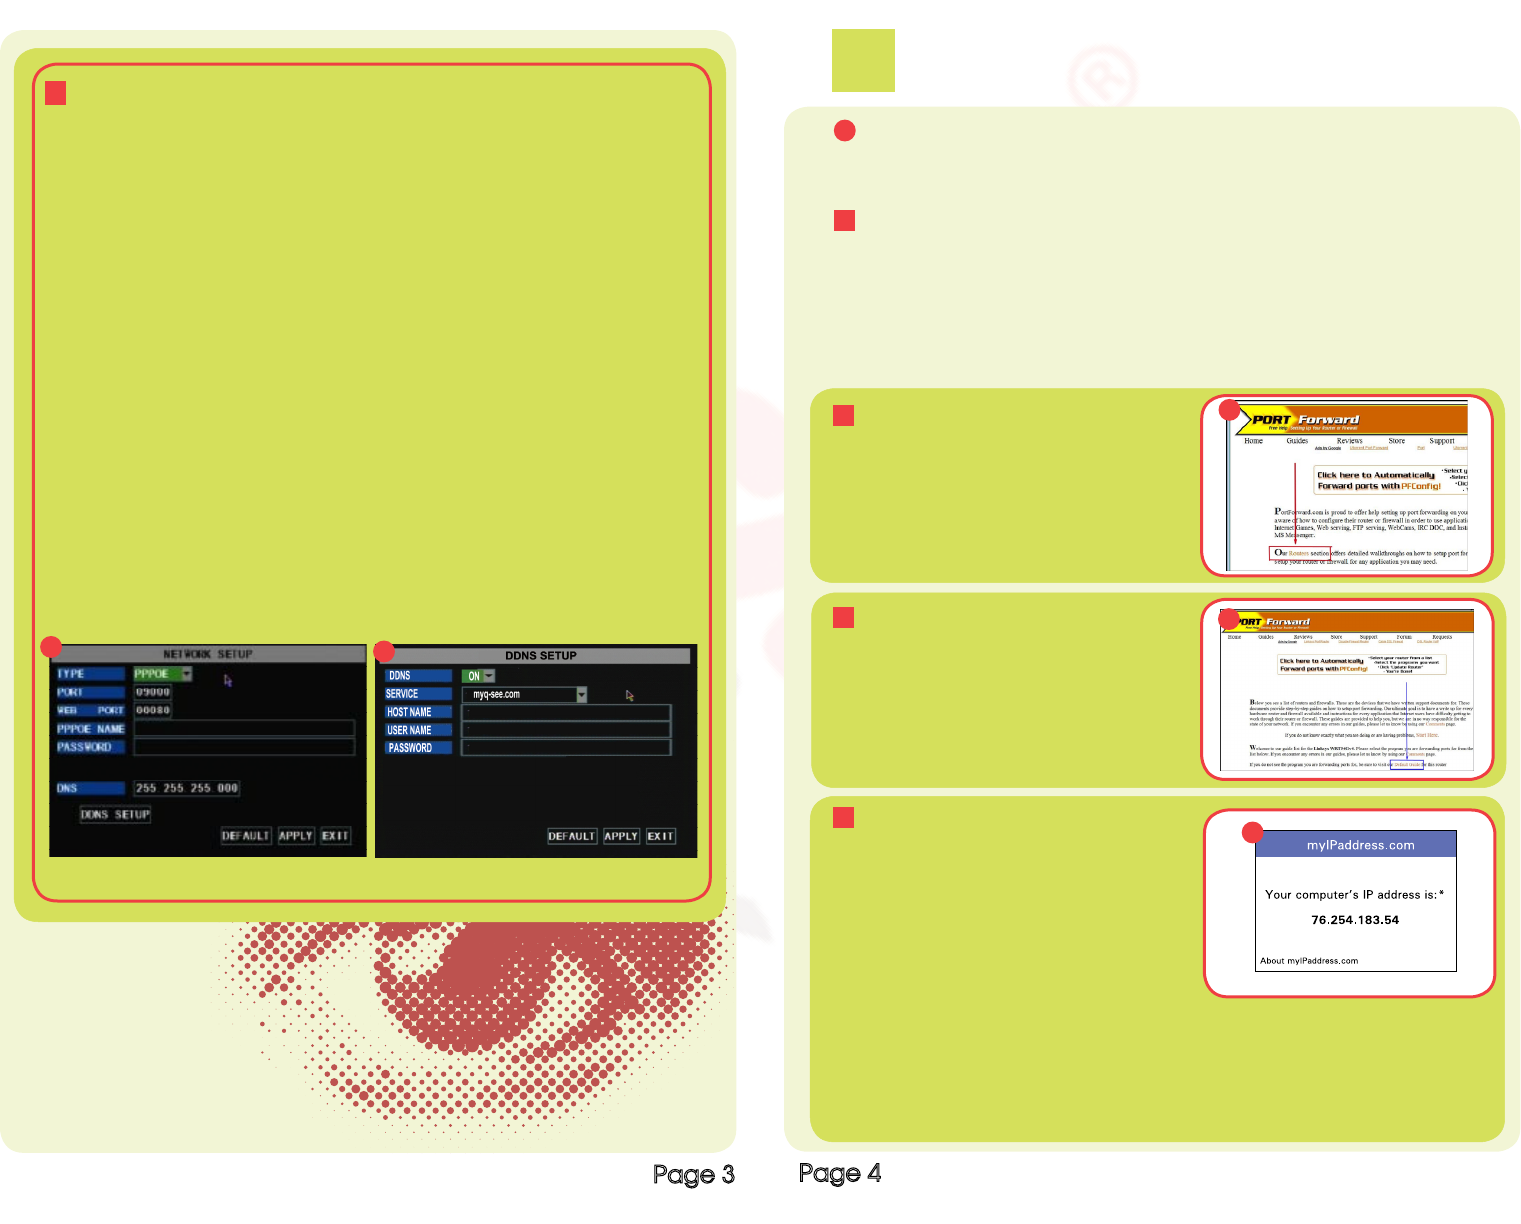
display the Main Menu (A1), and select NETWORK to display the NETWORK
screen shown in (A2). Select the DDNS Setup button (RED box, A2), and select
ON from the dropdown box (GREEN box, A6). Select dyndns from the SERVICE
drop down box, Enter the HOST NAME, USERNAME, and PASSWORD that you
have setup on the DYNDNS website. Select Apply, and then Exit. You also need
to enter this information into the appropriate section on your router. You will then
be able to access the DVR remotely by entering the domain name into a browser
window on a remote computer.
2
Connect
A Port Forwarding
To access the DVR from a remote computer over the internet via internet browser
(Internet Explorer).
Page 4
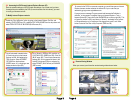
On the next page that opens, click on the
orange “Default Guide” link (BLUE box,
A2), this will take you to the port forwarding
instructions for your router.
When you access the DVR from a remote
computer, you also need to use a different
address in the Internet Explorer browser
window. Instead of entering the IP address
of the DVR, you need to enter the public
IP address of the router that the DVR is
attached to. You can get this address by
going to www.myipaddress.com from the
computer that is attached to the same router
as the DVR. This website will display the
box in (A3) that shows the IP address you
need to use. It will be in the space where the
example to the right shows 76.254.183.54.
Forward Port 80 and Port 9000 on the router attached to the DVR, to the IP address of
the DVR. *If you can’t use HTTP Port 80 or 9000 due to use or your Internet Service
Provider, use a different port in the same range. When selecting a different port,
forward the new port to the IP address of the DVR and change the settings in the DVR
Network settings. You will also need to add the new port to the end of the IP address in
the browser window. For example, if you use port 83, you add :83 to the end of the IP
address.
For instructions on the most popular
routers go to www.portforward.com Click
on the orange “Routers” link in the second
paragraph, and select your router from the
list of router manufacturers by clicking on
the brand and model number.
A3
1
2
3
4
A5
A1
A2
A6