- Eng 14 - - Eng 15 -
• Press the “START/STOP” switch to
turn the monitor off.
* When you want to stop measurement,
press the “START/STOP” switch. The
cuff is deflated and measurement
stops.
5
Finishing measurement.
START/STOP Switch
Deutsch
English
Español Português Italiano
Français
English
EspañolPortuguêsDeutsch
Français
Italiano
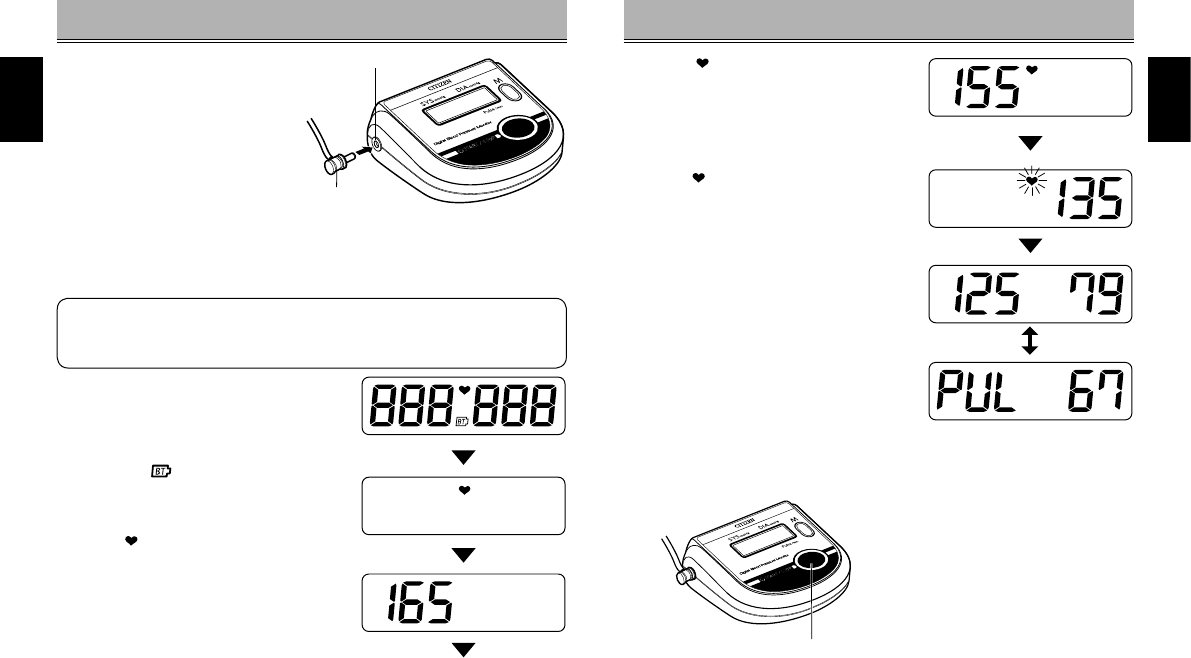
4 is displayed soon after
pressurization is complete, and
measurement begins automatically.
* If the unit judges that pressurization
is insuffi cient, it automatically
repressurizes.
5 blinks each time a pulse is
detected, and the pressure value
is displayed on the diastolic blood
pressure display.
6 Once measurement is complete, the
cuff defl ates and the measurement
results (systolic/diastolic blood
pressure values, pulse) are displayed.
* Systolic/diastolic blood pressure values
(two seconds) and pulse (one second)
are displayed alternately.
* Provided there is no error in the
measurement results, they are stored
automatically.
MEASURING YOUR BLOOD PRESSUREMEASURING YOUR BLOOD PRESSURE
• Plug the air hose connector
fi rmly into the air hose
socket on the main unit, as
illustrated.
2 Plug the air hose
connector into the main
unit.
3 Place the cuff at the height of the heart.
4 Press the START/STOP switch (the blue switch).
* If the pressurization value exceeds 280 mmHg, if pressurization feels
abnormal, or if you want to stop the measurement process, press the
START/STOP switch again. The cuff defl ates, and the power turns off.
1 All digits on the display blink for
approximately one second.
• All digits displayed is an initial
display, indicating that the monitor is
functioning normal.
The
mark will also be displayed but
this does not indicate that the battery
needs to be replaced.
2
is displayed for approximately one
second.
3 The cuff is pressurized automatically.
Air hose connector
Air hose socket


