


CMS390/CMS391 Installation Instructions
6
INSTALLATION
NOTE: The CMS390 and CMS391 ceiling plates attach to a
1-1/2" NPT threaded column in a finished ceiling with
16" on-center (CMS390) or 24" on-center (CMS391)
wood joists. In addition, both the CMS390 and CMS391
can be installed in line on a single joist.
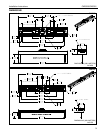
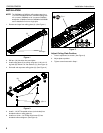
1. Remove end caps from ceiling plate (A). (See Figure 1)
Figure 1
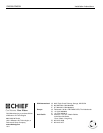
2. Drill two 1/8" pilot holes into wood joists.
3. Install ceiling plate (A) to ceiling using two 1/4-20 x 3-1/2"
lag bolts (B) and two 1/4" flat washers (C). (See Figure 2)
4. Re-install end caps onto ceiling plate (A). (See Figure 2)
Figure 2
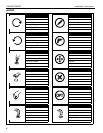
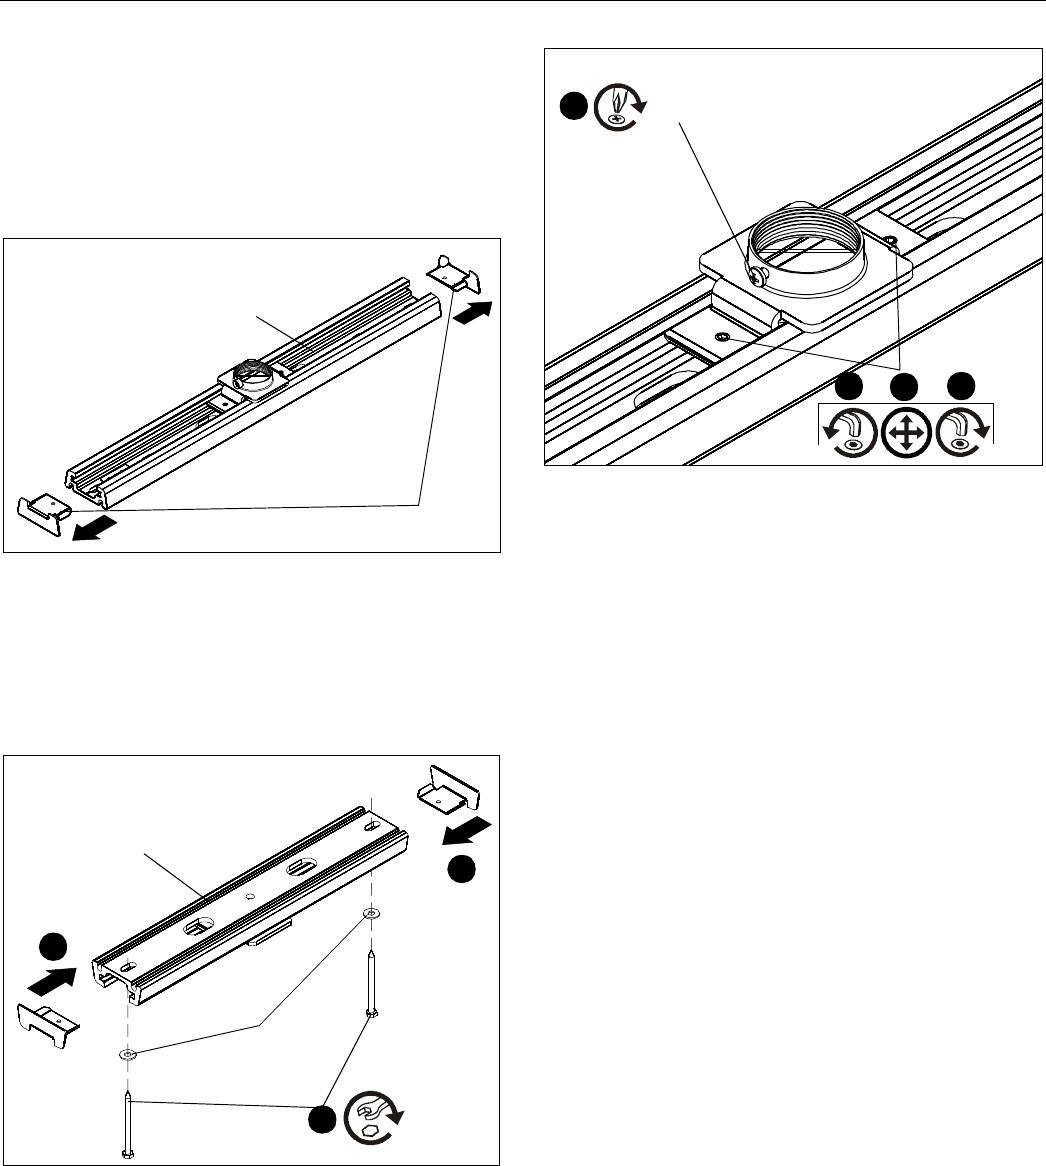
5. Install 1-1/2" NPT threaded column (not included) into
threaded collar on ceiling plate (A).
6. Install one 10-24 x 1/4" Phillips head screw (D) into
threaded collar and tighten. (See Figure 3)
Figure 3
Adjust Ceiling Plate Position
1. Loosen adjustment set screws. (See Figure 3)
2. Adjust plate to position.
3. Tighten screws loosened in Step 1.
(A)
End caps
3
4
4
(
(B) x 2
(C) x 2
(A)
6
(D) x 1
(F
3
2
1
x 2
(column not shown)