13
w On/off switch
e (–) setting button (sensitive)
r (+) setting button (intensive)
t Reset button
z Shaver display
u Shaver-to-station contacts
i Shaver power socket
o Travel case
p Special cord set
Before shaving
Prior to fi rst use you must connect the shaver to
an electrical outlet using the special cord set p
or alternatively proceed as below.
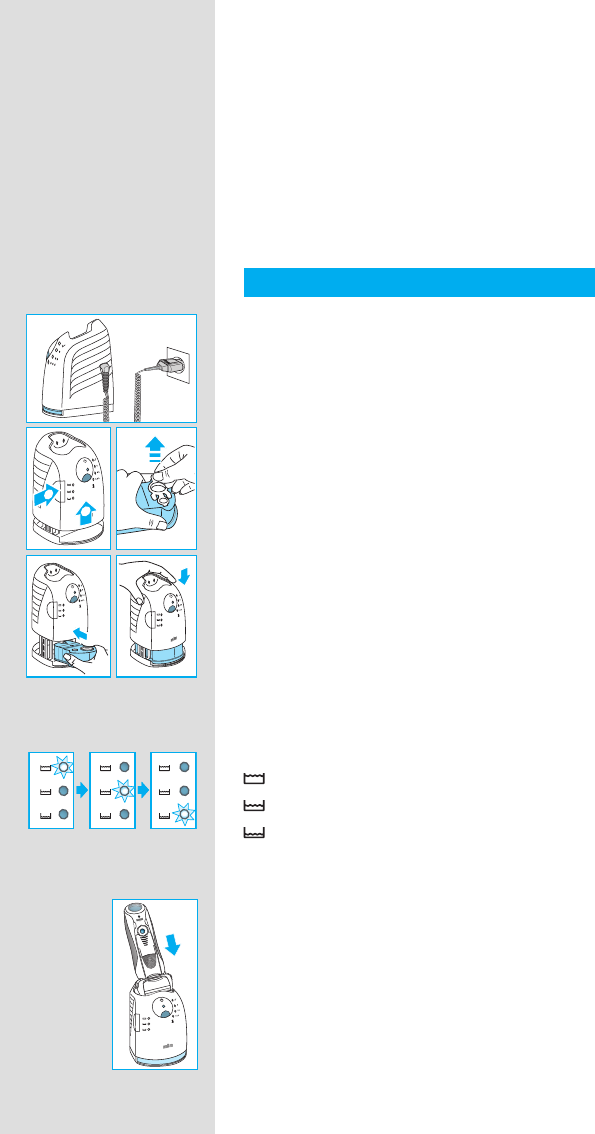
Installing the Clean&Renew station
• Using the special cord set p, connect the
station power socket 6 to an electrical outlet.
• Press the lift button 2 to open the housing.
• Hold the cleaning cartridge 7 down on a fl at,
stable surface (e.g. table).
• Carefully remove the lid from the cartridge.
• Slide the cartridge into the base of the station
as far as it will go.
• Slowly close the housing by pushing it down
until it locks.
The cleaning fl uid display 1 will show how much
fl uid is in the cartridge:
up to 30 cleaning cycles available
up to 7 cleaning cycles remaining
new cartridge required
Charging and cleaning the shaver
Insert the shaver head down into the cleaning
station. (The contacts u on the back of the
shaver will align with the contacts 3 in the
cleaning station).
If required, the Clean&Renew station will auto-
matically charge the shaver. The hygiene status
of the shaver will also be analyzed and one of
the following cleaning program indicators
5 will
light up:
new
f
a
s
t
c
l
e
a
n
f
a
s
t
c
l
e
a
n
f
a
s
t
c
l
e
a
n
2
1
new
f
a
s
t
c
l
e
a
n
f
a
s
t
c
l
e
a
n
f
a
s
t
c
l
e
a
n
2
1
trim
m
er
Series 7
trim
m
er
Series 7
99640597_790cc-4_China.indd 1399640597_790cc-4_China.indd 13 01.07.2010 9:04:34 Uhr01.07.2010 9:04:34 Uhr


