


3
4
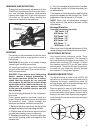
MOUNTING
1. Slightly loosen the fixing screws on the
weaver rail built into the scope.
2. Place the scope on the dovetail mount of the
fire arm making certain that the mount aligns
with the receptor attachment screw groove.
Adjust as necessary.
3. Tighten the fixing screws.
NOTE: Receptor attachment screws may need
to be tightened after continuous shooting.
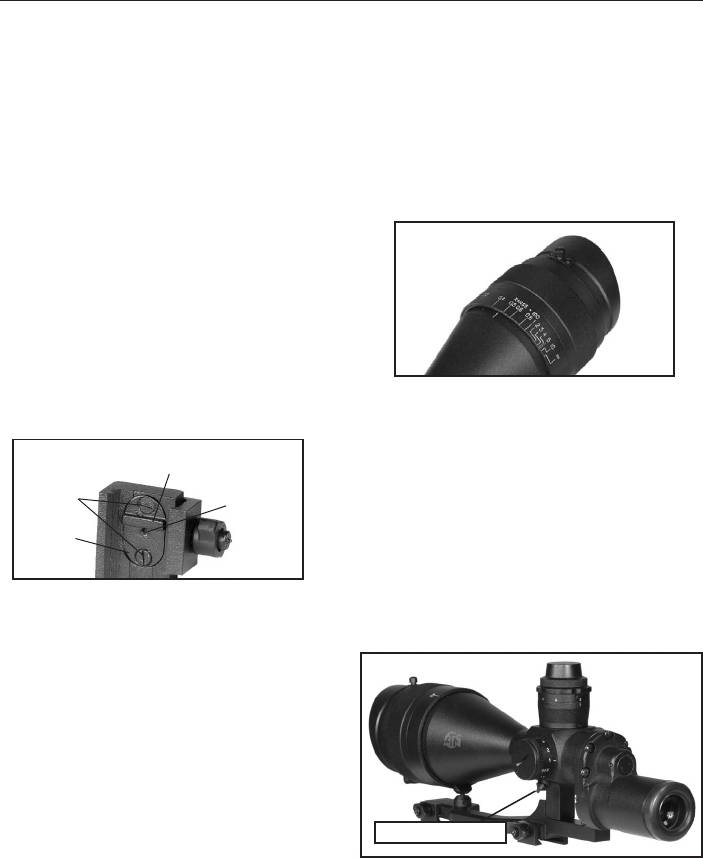
The ATN Mounting System allows to change the
position of the riflescope flexibly on the weapon
in relation to a shooter in combination with the
fixed positions already available on the weaver
rail. For this purpose in the base of the mount-
ing bracket there is a rail with a fixing projection.
There are 2 grooves in the mounting bracket
for mounting this rail. Besides it is possible to
change the position of the riflescope addition-
ally by 1/3 of inch. For doing this one needs to
about-face the rail.
To change the position of the riflescope on
the weaver rail additionally follow the steps
mentioned below:
1. Unscrew the two screws, which attach
the rail to the mounting bracket.
2. Take the rail out of the groove.
3. About-face the rail in case of necessity.
4. Place the rail into another groove.
5. Fix the rail with the two screws.
NOTE: If the rail is not taken out easily, screw up
tight one of screws into the threaded aperture in
the middle of a fixing projection of the rail. Con-
tinue rotation of the screw. Thus the screw will
push out a rail from a groove.
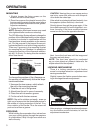
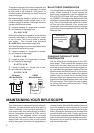
FOCUSING
While holding the scope about four inches from
your eye, quickly glance through the eyepiece
at a featureless, flatly lit bright area such as a
wall or the sky.
CAUTION: Viewing the sun can cause serious
eye injury, never look at the sun with this prod-
uct or even the naked eye.
If the reticle is not sharply defined instantly, turn
the eyepiece (either direction) a few turns.
Quickly glance through the scope again. If the
focus has improved, but is still not perfect, con-
tinue focusing. If the focus condition become
worse turn the focus the opposite direction.
Next, focus the front lens until the image and
the grain are both sharp.
NOTE: The front lens should be readjusted
as you view objects at different distances, the
diopter should not be adjusted.
LOCKING MECHANISM
There is a locking mechanism with fixation
screw for windage/elevation adjustment and
zeroing mechanism.
Slightly loosen the fixation screw before zero-
ing or windage/elevation adjustment .
After zeroing or windage/elevation adjustment
turn the fixation screw clockwise, to lock the
adjustment mechanism.
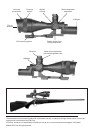
Rail
Threaded
aperture
Fixing projection
Screws
OPERATING
Fixation screw