33
Calibration procedure may be interrupted by pressing CAL
again at any time. If the calibration procedure is stopped this
way, or if the controller is switched off before the last step, no
calibration data is stored in non-volatile memory (EEPROM).
ANALOG INPUT CALIBRATION
The analog input is already factory calibrated. However, the
user may also perform a 2-point calibration at 4 and 20 mA.
It is sufficient to perform the calibration on one range only.
• Connect a mA simulator (e.g. HI931002) to the analog
input of the controller (#11 at page 7)
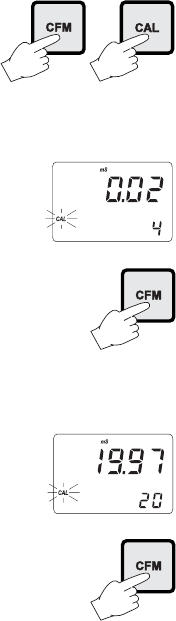
• Press and hold first CFM and then
CAL to enter the analog input cali-
bration mode.
• Execute the password procedure.
• Select code 0 via the arrow keys for analog input calibra-
tion and confirm with CFM. CAL will blink on the LCD.
• The secondary LCD will display “4”
for the first calibration point. The
primary LCD will display the con-
ductivity reading.
• Set the mA simulator to 4 mA and wait for
the reading to stabilize, CAL will stop blink-
ing and an intermittent CFM will prompt
the user to confirm the calibration.
• If the reading stabilizes at a reading significantly variant
from the first calibration point, an intermittent ERROR will
prompt the user to check the input.
• If everything is satisfactory the sec-
ondary LCD will display “20” for the
second calibration point.
• Set the mA simulator to 20 mA and wait
for the reading to stabilize, CAL will stop
blinking and an intermittent CFM will
prompt the user to confirm the calibra-
tion.
• Press CFM to confirm. The meter will return to normal op-
erational mode.
Calibration procedure may be interrupted by pressing CAL
again at any time. If the calibration procedure is stopped this


