Step One
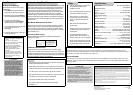
Setting the Date and Time
1. Press MODE. The month digit flashes.
2. Repeatedly press (or hold down) SET to set
the correct month.
3. Repeat Steps 1 and 2 to set the date, hour,
and minute.
4. Press MODE to complete setting.
Arm Cuff Blood
Pressure Monitor
63-1514
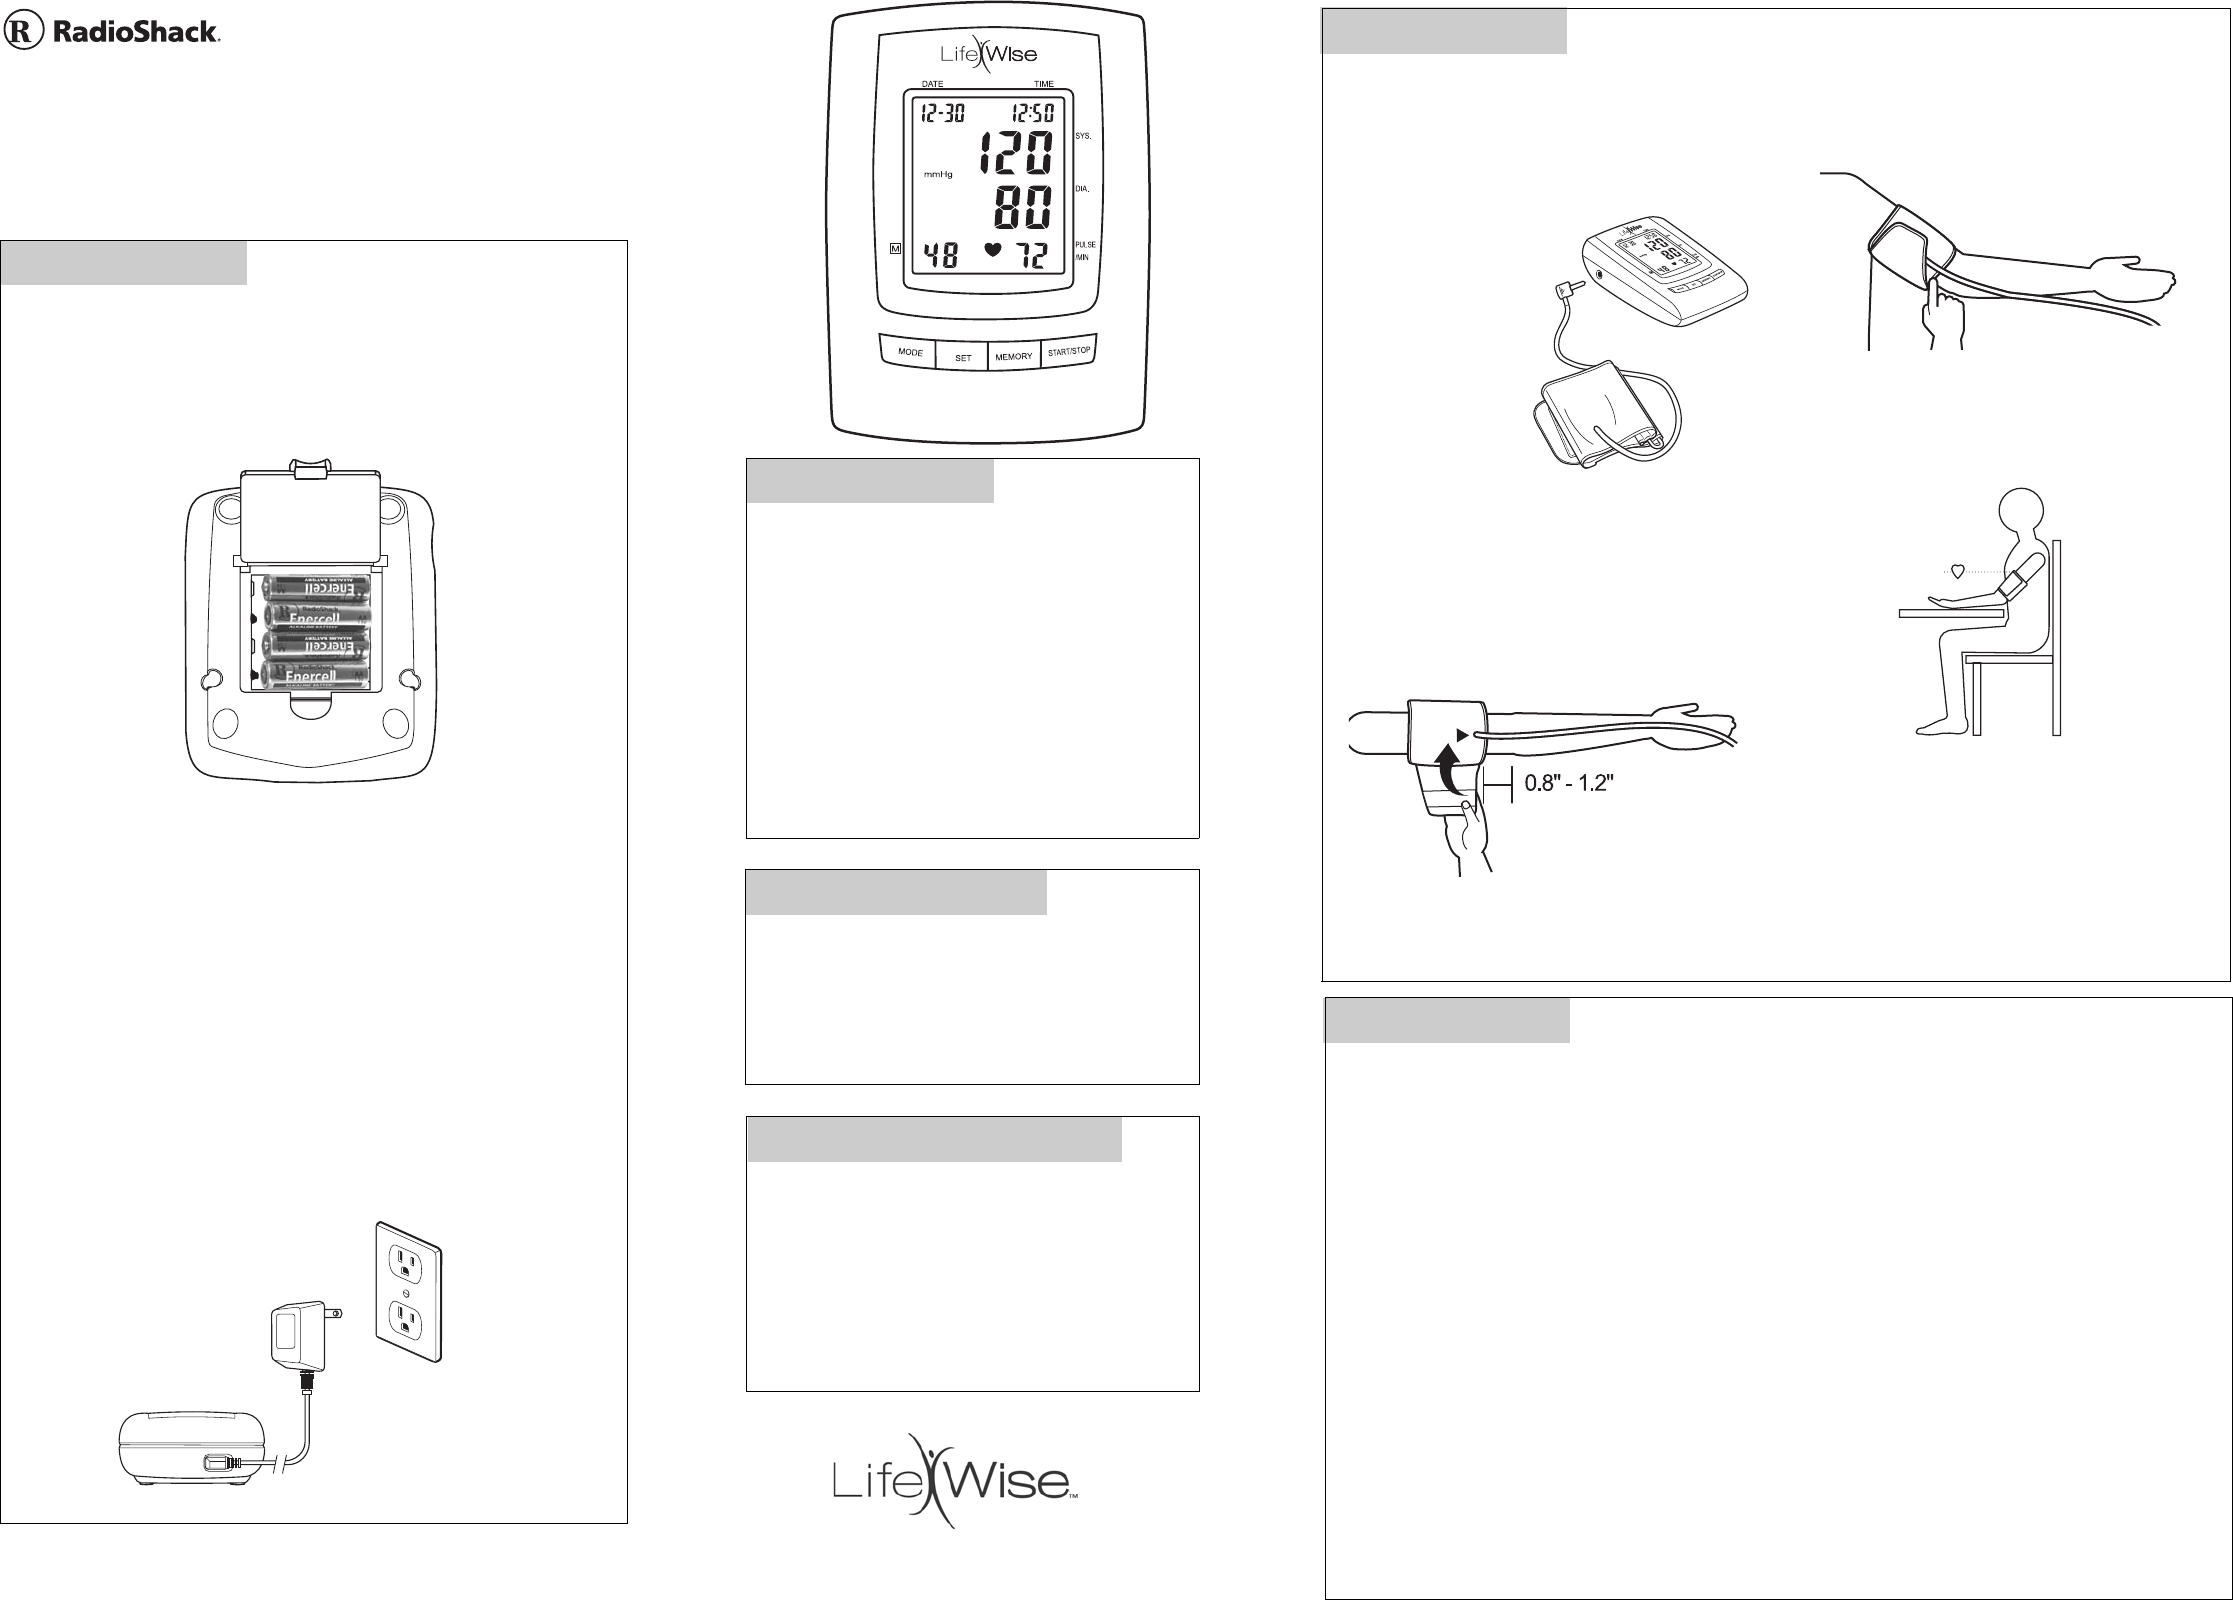
Attaching the Arm Cuff
1. Roll up your sleeve to prevent constricting
circulation to your arm.
2. Insert the plug
at the end of
the tube into
the jack on the
left side of the
monitor.
3. Sit upright on
the chair, and
with your palm
face up, thread
the cuff through your arm until it reaches
your biceps, just above your elbow.
4. Adjust the cuff so the inflation tube is on the
top of your arm as shown. Leave the cuff’s
bottom edge about 0.8 to 1.2 inches (2 – 3
cm) above the crease of your elbow.
5. Fasten the cuff snugly, leaving at least a
finger’s room in between the cuff and your
arm.
6. Place your arm on the table so the cuff is at
the same height as your heart. Be sure the
inflation tube lines up with your arm
Step Three
Step Two
What’s Included
• Auto Inflatable Arm Cuff
• Monitor
• Carry Pouch
Step Four
Measuring Blood Pressure
1. Press START/STOP. All display segments appear briefly and the monitor automatically inflates to
160 mmHg, or the necessary inflation level. The systolic rate decreases gradually,
G
appears,
and ♥ flashes at the same rate as your heartbeat.
2. Once your blood pressure is detected, the monitor deflates slowly. The blood pressure reading
and pulse rate appear. The air pressure in the arm cuff releases.
3. To stop the measurement at any time, press START/STOP.
#
appears briefly when:
• You do not wrap or position the cuff around your arm correctly.
• You talk or move the body during measurement.
• You have incorrect posture.
• The batteries become weak and
!
flashes.
Optional Accessories
• Body Fat Analyzer
• Environizer
• Rechargeable Batteries
• Battery Charger
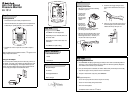
Installing Batteries
1. Press the tab to lift up the battery compartment cover.
2. Insert four AA batteries (not supplied) into the compartment as
indicated by the polarity symbols (+ and –) marked inside.
3. Pull down the cover then press the cover down to snap it in
place.
When the display dims or the batteries weaken,
!
appears on the
display. Replace the batteries.
Or
Using an AC Adapter
You can also power the blood pressure monitor using a 6V DC, 1A
AC adapter. To connect an AC adapter to the blood pressure moni-
tor, attach a size M Adaptaplug
TM
to the adapter with its tip set to
positive. Insert the adapter’s barrel plug into the monitor’s DC 6V
jack. Then plug the adapter into a standard AC outlet.